Wondershare Filmora has made a name for itself in the video editing market. It’s a very popular tool that is used by newbies to advanced users alike. Filmora stands unique in the sense that it is very easy to understand yet very powerful in every way.
Want to make YouTube videos, casual home videos, trailers, informative documentaries or even full-fledged films? Then Filmora is the right tool for you.
When the community is full of people using professional software like Adobe Premiere Pro and Sony Vegas, Wondershare Filmora shines like a beacon of hope for the more casual user. It’s easy to use and friendly interface attracts every type of user.
But that doesn’t mean that Filmora cannot have advanced features. It’s an overall wonderful editing tool that is go-to software for many YouTubers, students, and even professional studios and you should definitely give a try.

The latest version Filmora9 is a massive update to the already successful Filmora video editing tool line up. It features some new functions as well as changes to some of the user interface aspects that the community wanted. Filmora9 is faster and better optimized than the previous versions and provides a more streamlined experience.
It is available for free but adds a watermark on exported video. However, you can buy the full version to unlock every features, tech support and to remove the watermark on video.
Review of Wondershare Filmora9
We have worked with a lot of video editing tools, professional and casual alike but we always come back to Filmora due to its familiar and easy to use design and a large number of features that are easy to learn and doesn’t overwhelm the user, especially people who are new to editing.
Now that you understand what Filmora can be used for and its user base, let’s start the review with the downloading and installation of the software.
1. Download and Installation
You can download the free version of Filmora9 from here. The software supports both Windows and macOS so there are no issues with compatibility. After downloading their setup, Run it and you’ll be greeted with one of the most simple installation screens we’ve witnessed in softwares.
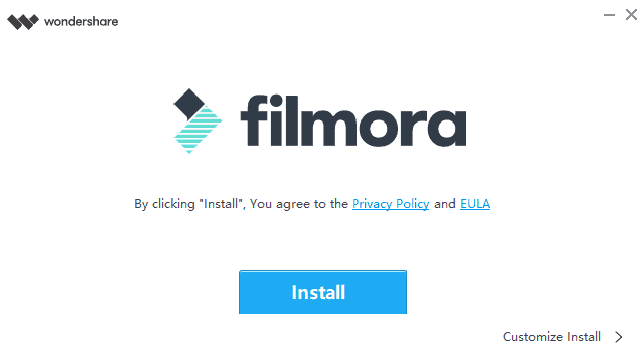
Just click on the Install button and Filmora9 will be installed on your personal computer. Clicking on the Customize Install button gives you two additional settings and lets you set the path where you want the software to be installed. The installation process is very very easy and there are no problems faced while installing the tool.
2. Creating a New Project
Open Filmora9 from the desktop shortcut that is created after you install the software. You’ll be greeted with a simple screen where you open an existing project or you can create a new project.
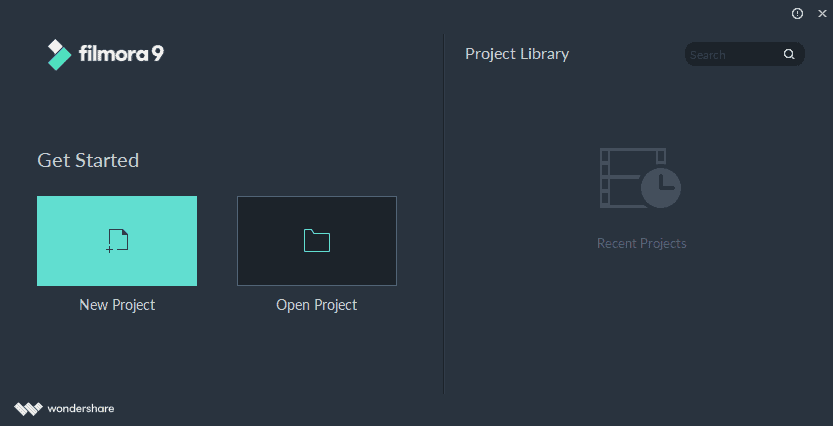
There is an additional project library where you can look at your previous projects and browse through them. Click on New Project to start editing your raw video.
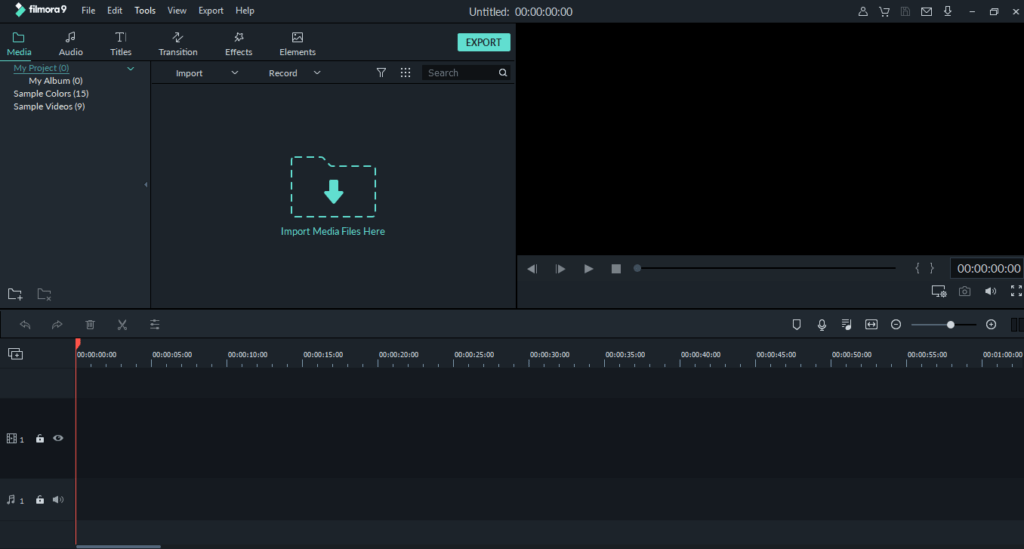
This is the project editor window. You can now import your media file to start editing your videos. For demonstration, I’ve imported Geek Dashboard’s channel intro from our YouTube channel and another track with a person working on their laptop.
You can choose any of your videos from your library that you want to edit. To add a media file click on the “Import Media Files Here” area and select the video that you want to edit. After importing your video, click on the plus icon above the thumbnail to add it to the timeline. You can also import several videos by selecting and dragging-n-dropping to the timeline directly.
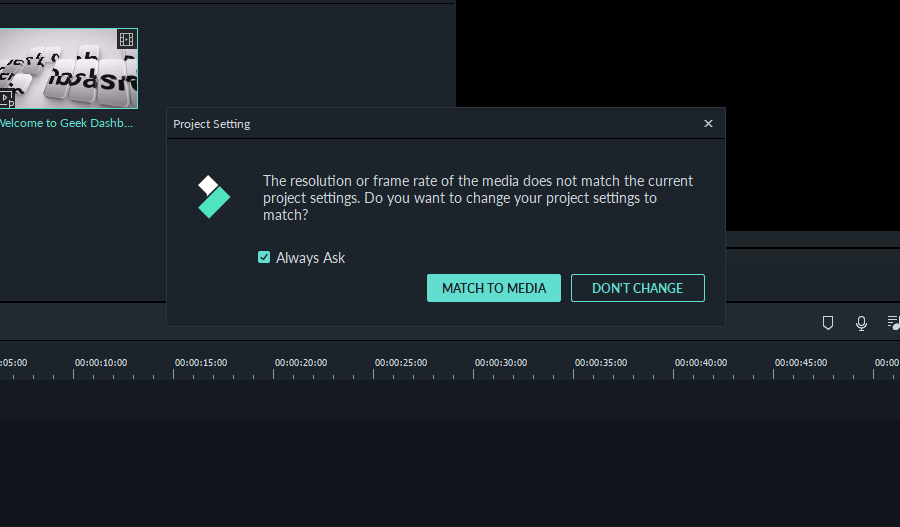
You will be greeted with a pop up that will tell you if you want to match the media settings to your projects. This feature will change the resolution and other aspects of the video according to the media file that you are importing. Select Match to Media or Don’t Change depending on your personal preference.
What’s new in Filmora9
Wondershare Filmora video editor is quite popular in the market. We have already covered the review of the previous versions of Filmora editor here. We have an extensive guide on how to make your videos more cinematic and add a professional touch to your amateur creations.
Filmora video editor already has all of the tools necessary to give your video an amazing appeal. It can crop, trim and slice your videos. It features a large number of overlays and transition effects that are just a click away. Filmora even has the famous 3D Lut feature which can add a cinematic overlay to your video and has preset settings with the most popular movie franchise.
All this aside, the new Filmora9 comes with a new set of features that makes it truly the best and most powerful video editing choice for everyone.
1. Titles and Text
Filmora9 adds to the already huge library of different effects and title cards. The ever growing effect library of Filmora got a push with the new Filmora9. Now you can choose from a large number of preset Titles, effects, and different Overlays and make your video more engaging and interactive.
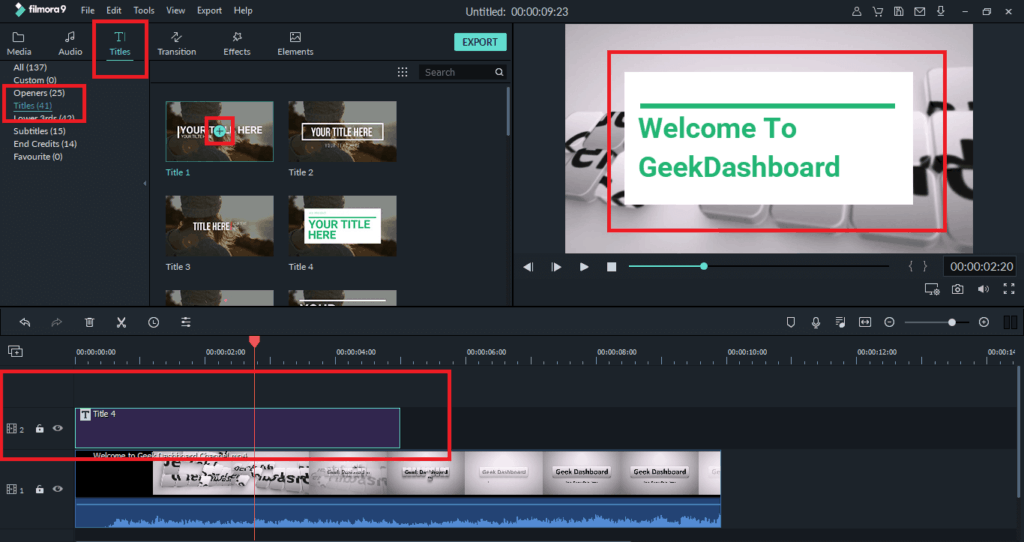
To add these Title effect to your video, click on Titles on the top left toolbar and select Titles from the menu. You’ll be greeted with a lot of Title effects to choose from. Just click on the plus icon and add your favorite effect. The effect will be added in another layer.
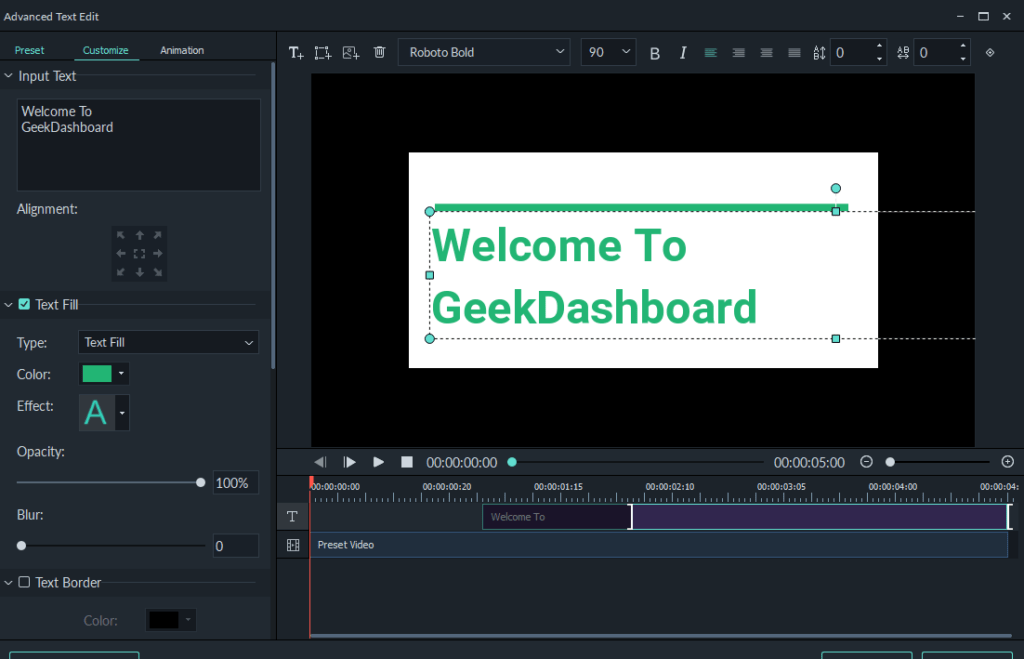
Double click on the Title track in your tracklist and you can now edit the text of the title as well as other settings. Click on Advanced to change all the properties of the text and preview how it will look in your video. You can adjust the time, speed, font size, font type, color, and other settings to make your Title more appealing.
2. Filters and Overlays
Just click on Effects on the top menu to add different effects to your videos. You’ll be greeted with a window that neatly lists all the Filters and Overlay effects that are available for you. Open any of the effects and add it to your video by click on the plus icon or dragging and dropping it into the timeline.
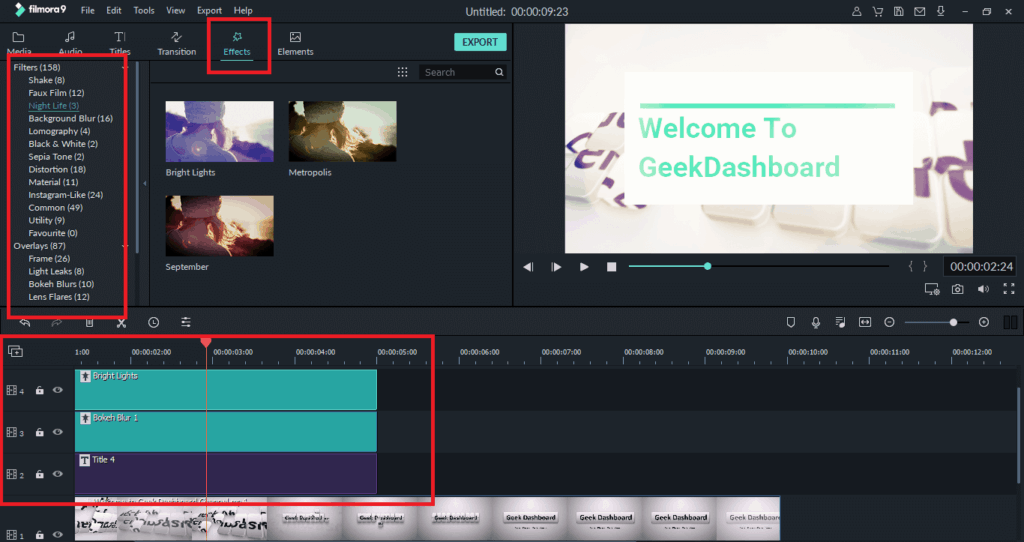
Depending on your settings, Filmora9 will first download the filter or overlay and then apply it. The effect will be added in another layer in the track window. You can double click on the track and change the transparency of the effect.
Filmora9 comes with a vast library of different filters. These filters look quite professional and will help your video to stand apart from the rest.
To add a filter just click on the Filter button and choose from the vast library of different ready-made filters available. Experiment with all the different filters to get the right feel to your video.
3. Add Multiple Video and Audio Tracks
Filmora9 boasts of supporting up to 100 different tracks in the same project. This feature is only seen in premium softwares which makes Filmora9 an editing tool for every user base. Non-linear editing is very useful as you can add tracks on tracks and edit them simultaneously in the same project. It can result in many interesting results and effects.
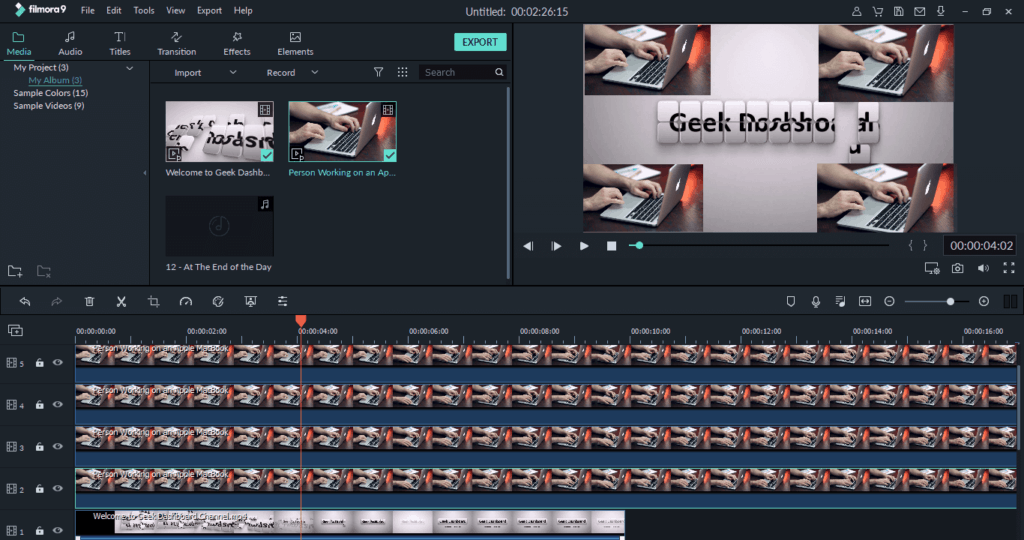
To add multiple video tracks to your project, just drag and drop the video file from the import menu to the timeline tracks. A new track will be added above your original track. You can adjust the size of the new track on the screen and make it work like an overlapping layer as I have done with my project. Just click on the track and you can transform the size of the video in the preview window easily.
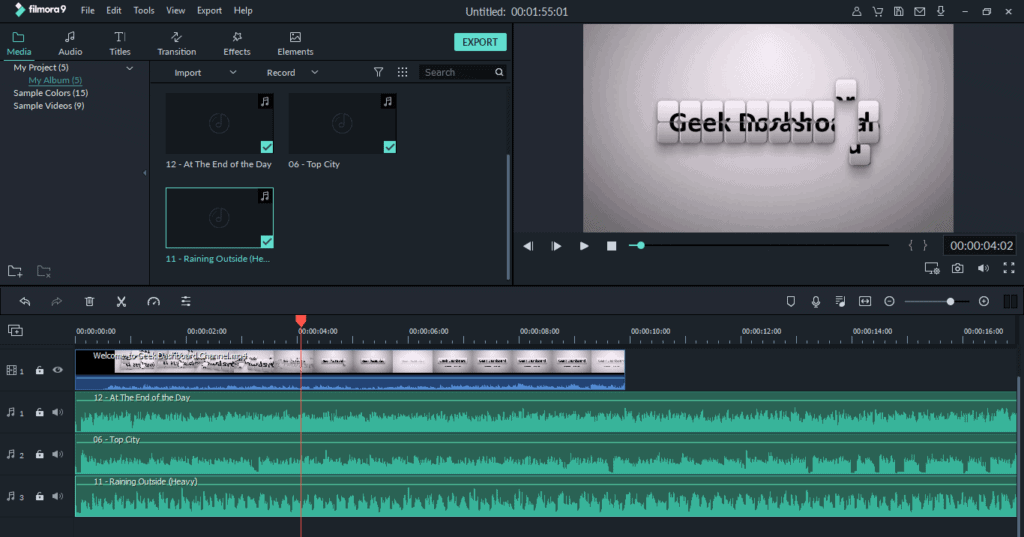
You can even add up to 100 audio tracks to your project to add different sounds at specific intervals or overlap different music effects. To add a music/audio track, first import the audio that you want to use. Then just drag and drop it from the import window down to the track window. A new track with the audio will be added to your timeline.
4. Enhanced Video Stabilization
Filmora9 now comes with an advanced video stabilization tool that can help stabilize your shaky homemade amateur videos. The new stabilization tool is very easy to use. Just double click on any video track in your track window. A new window will open where you can now edit many different settings regarding video, audio, color, and motion.
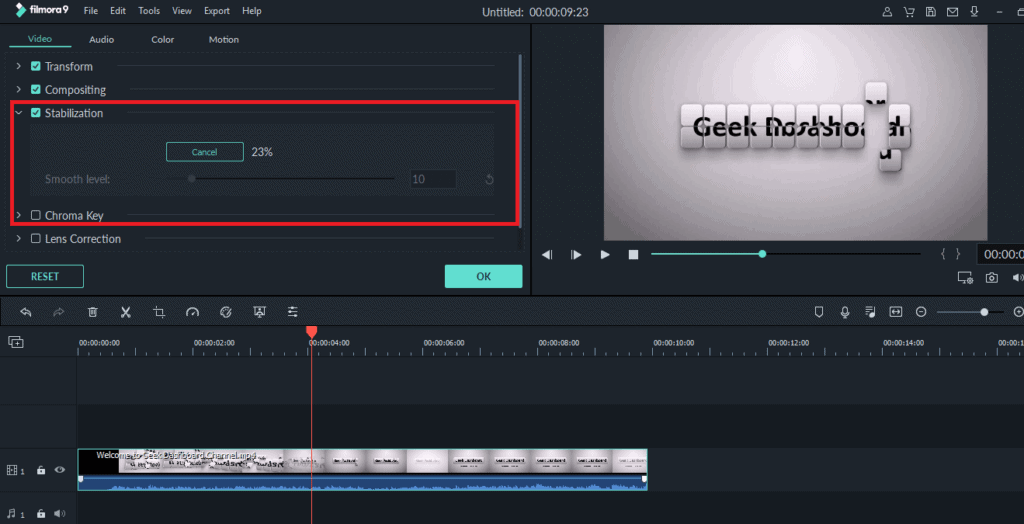
Under the video option, you will see a Stabilization option. Click on the Stabilization option and Filmora9 will automatically stabilize the video. You can adjust the smoothness level according to your needs. This new video stabilization is very handy and the stabilization can now be applied to specific tracks.
5. Playback Quality
You can now adjust the preview quality of your video. This adjusts the resolution of the video playback that plays on the preview window. You can set the resolution to full where the preview resolution is the same as the video resolution. But you might experience some lag.
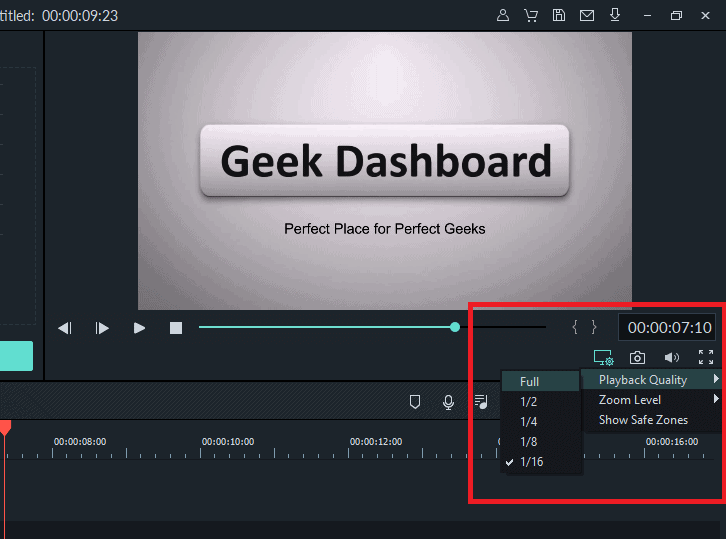
In order to remove this lag, you can adjust the resolution of the playback. To adjust preview quality click on the playback quality icon under the playback window. Select Playback Quality and adjust the settings according to your needs. Lower the setting, the more blurry your preview video will be.
Note that this doesn’t affect in any way the final output. This setting is just for users who might experience lag while working on big 4K video files.
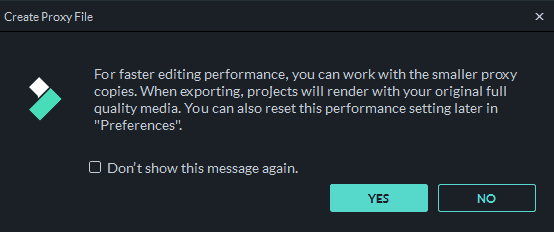
By the way, Filmora9 also features creating proxy file ability which allows you to work with the small proxy copies for faster editing performance, you will see the pop-up screen as shown below when importing large 4K videos as well.
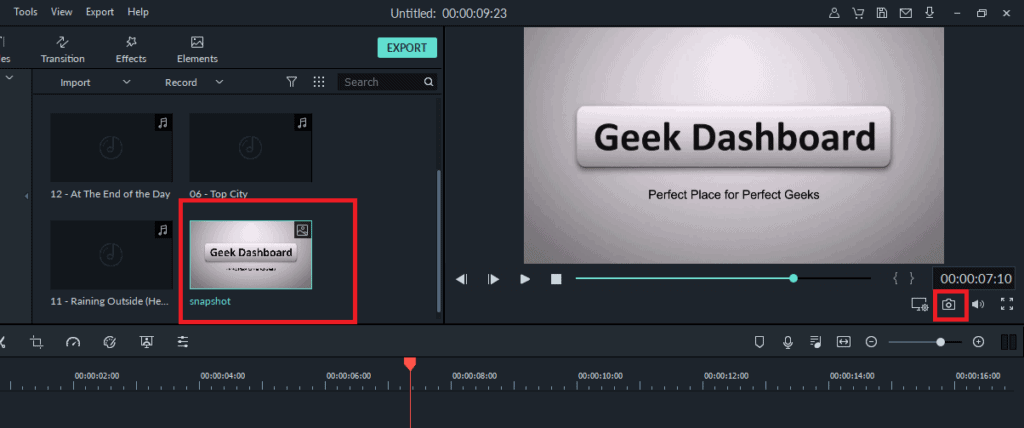
Filmora9 now lets you take screenshots from the video directly without any hassle. Just point your track cursor to the specific point in the video where you want to take the snapshot. Click on the snapshot icon under the preview window and a snapshot of the specific frame will be taken and saved in your import folder. This process is very easy and can save a lot of time for users who want to analyze different parts of their videos.
6. Mac and Windows Cross-Compatibility
This is a very important feature of the new Filmora9 and very helpful if used in the right situation. You can start your project in any operating system, whether it be macOS or a windows device and then you can edit that same project in a different operating system afterward.

Saving your project in any particular OS won’t restrict the editing of that project in the same OS. This is especially useful for teams and companies that have different people working on the same project with different devices. A person working on a macOS can now synchronize his work with someone working on a Windows OS easily.
7. Enhanced Chroma Key
Filmora already had the Chroma key feature where you can add green screen videos above your original videos. The new Filmora9 has upgraded their Chroma Key feature to add in more settings and give the user more command on how they want to use the green screen video.
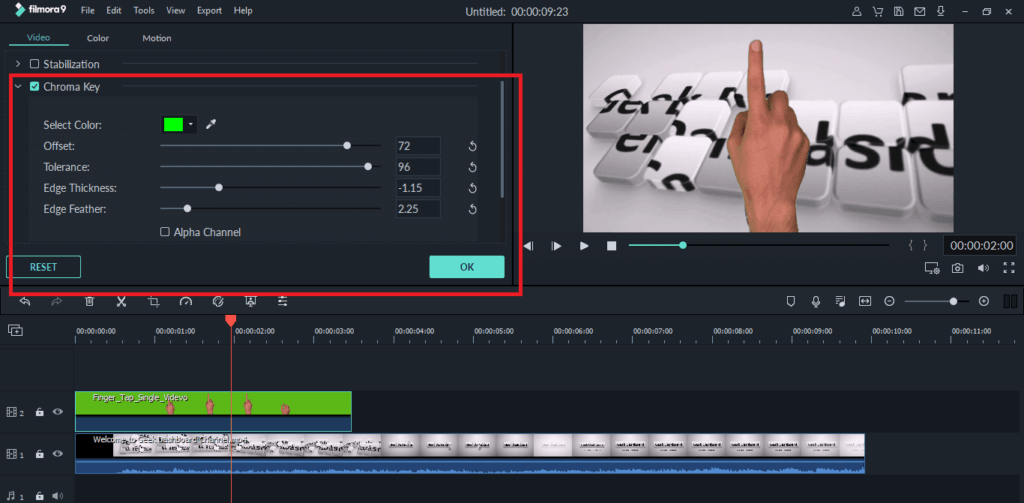
To access the enhanced Chroma Key feature, you first need to import a green screen video file. After importing a green screen video file, drag and drop it in the track window. Double click on the track and select the Chroma Key option from the new settings window under the video tab.
Here you will be greeted with different settings. You can set the color, change the offset, increase or decrease the edge thickness, reduce or increase the tolerance and edge feather. Experiment around with the different settings and preview them live in the playback window to get the best results.
8. Adjustable Track Size
Filmora9 lets you adjust the track size in the track window. This feature is really helpful as you can now change some intricate settings directly from the track window without squinting your eyes. You can make the track size, small, normal and big according to your preference.
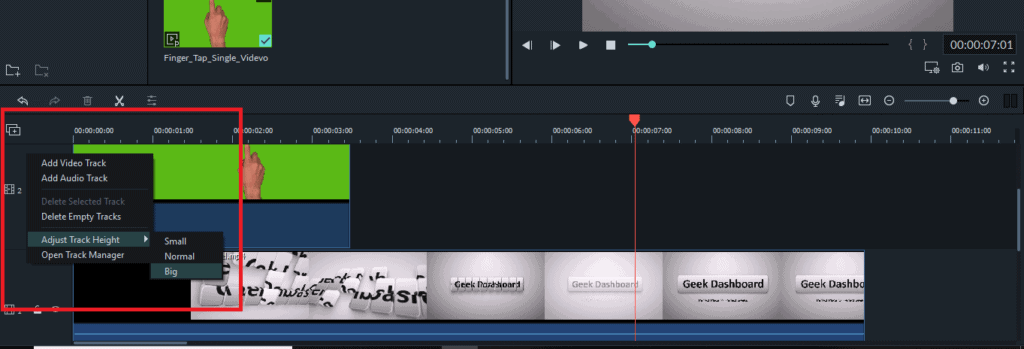
To change the track size, right-click anywhere on the left side of the track window. Select Adjust Track Height and set the height to your choice.

The feature is especially handy for analyzing the waveforms of audio files. By changing the track height to Big you can easily figure out the different waveforms of your audio file. You can drag the volume line up and down over your audio track to change the audio volume in decibels.
9. Exporting your Video
Exporting your videos is now very easy especially for users who want to upload their content directly to popular video streaming websites like YouTube and Vimeo. Filmora9 comes with preset settings that help you upload your content directly to the internet.
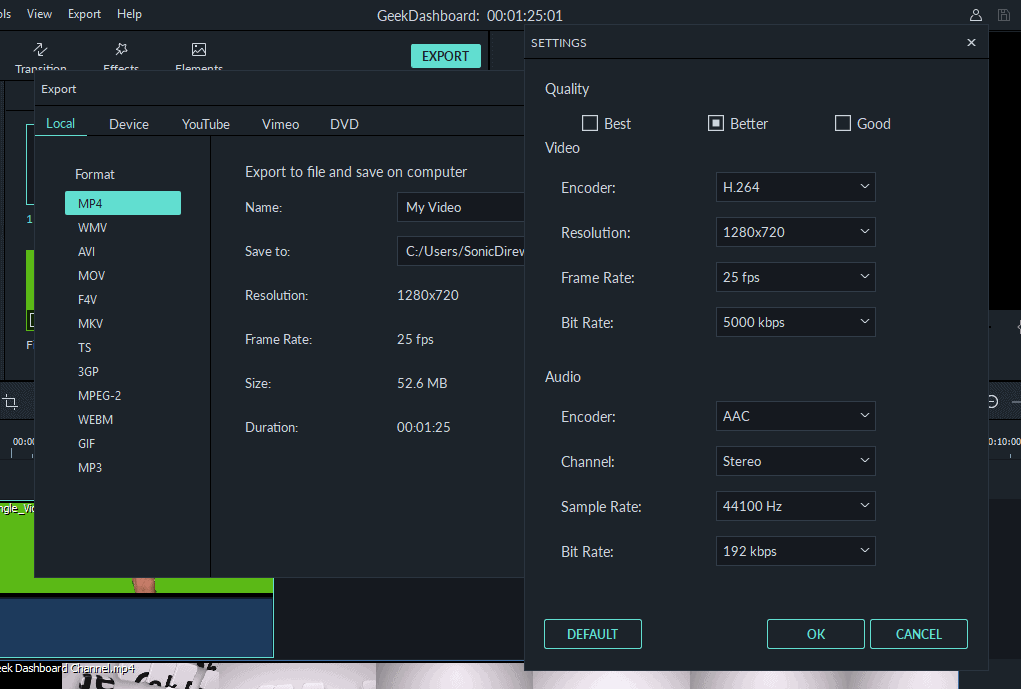
You can either opt for direct uploading which can save time and effort or you can save your video to your storage drive for other purposes. Filmora9 supports a large number of video output formats and resolution with the highest being 4K. You can click on Settings to alter some advanced video properties like framerate, codecs, sample rate etc. before exporting your files.
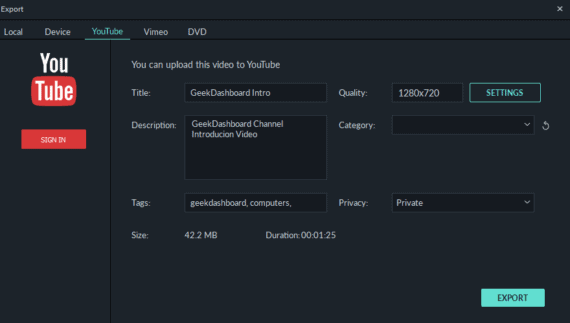
Select the YouTube/Vimeo tab to directly upload your video to either of these websites. You can directly fill in the Title and description and also select tags for your videos right from the export settings without even going to the website. Filmora9 boasts of faster export and import speeds than the previous version and as a user the difference was noticeable.
10. Pricing
Filmora9 can be used for free, but the free version will export your videos with a huge watermark. The good thing is that the free version comes with all the features and doesn’t compromise with the usability. You will get future updates in the free version.
$39.99/Year will remove the watermark from your videos and will provide you with tech support if you are stuck in any problem. There is one-time pricing of $59.99 that will make Filmora9 available to you for a lifetime with all the features and tech support.
If you want to access the 1000+ and monthly increasing effect library of Filmora than you’ll have to pay $99.87/Year. This will allow you free access to their effect store from where you can use any effect in your video. Their effect store library is constantly updated so you’ll never run out of content.
Our Verdict
Filmora9 is a very powerful editing tool that can be used by new and advanced users alike. The interface is very easy to get familiar too and the vast library of effects and filters will help your video to get that professional and trendy feel. With a large number of effects and features, Filmora9 comes with a very affordable price tag.
The software essentially provides all the features of a premium video editor at a much lower price. Wondershare Filmora has their own YouTube channel with over 26 million views and 300k subscribers and a big community which has curated a large number of video tutorials and guides that can help you become a master in using the software. You can try the free version of Filmora9 and check out all its features and then purchase the software.

