Are you looking for quick and easy ways to update all your drivers in Windows 11 or 10 in one go? You have landed at the perfect place as we will show you a couple of the best and easy methods to update all Windows 11 drives. You can either do it automatically or go the extra mile and do it manually by yourself.
However, if you don’t want to indulge in updating all the drivers without sweating, we have an alternative option for the same. We introduce you to the Driver Booster 9 which not only helps you in updating all drivers in Windows 11 quickly, but it also improves the performance of your Windows PC by scanning and updating at every interval possible.
Let’s check two different ways to update all drivers in Windows 11 quickly using manual and automatic methods.
How to Update All Windows 11 and Windows 10 Drivers Easily
In Windows operating system, Microsoft allows users to have the flexibility to tweak all types of preferences and settings for optimal performance. For updating all drivers on your Windows machine, we’ll take you through two manual methods and an automatic updating method using the Driver Booster 9 tool. Let’s check out those methods to update all Windows 11 and 10 drivers without wasting more time.
Update Drivers using Manual Methods in Windows 11 and Windows 10
Method 1: Updating Drivers using the Device Manager
In this first manual method, we will use the Device Manager on the Windows system for updating the drivers like display and sound. Furthermore, we will use the same procedure for any other drivers on the Windows operating system.
- Open Device Manager using Win + X shortcut or search for Device Manager in the Start menu.

- A new window pops open on the screen showing you all the drivers available on your system.
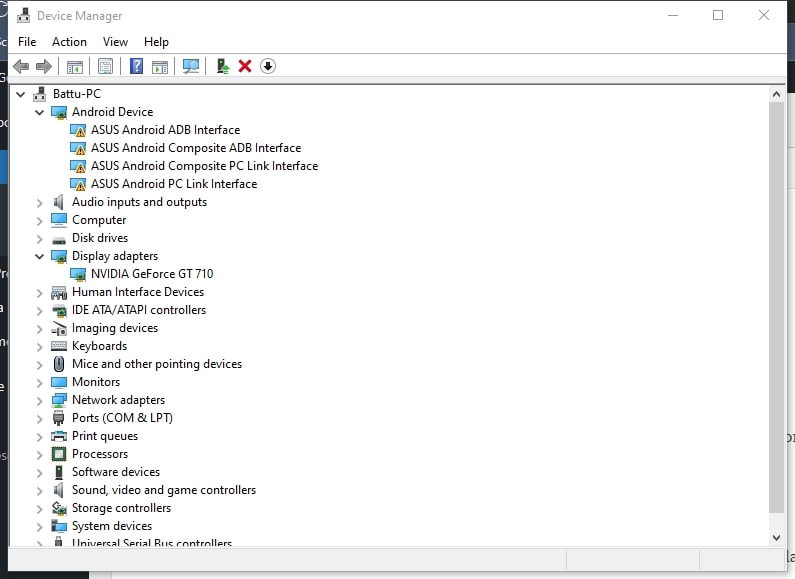
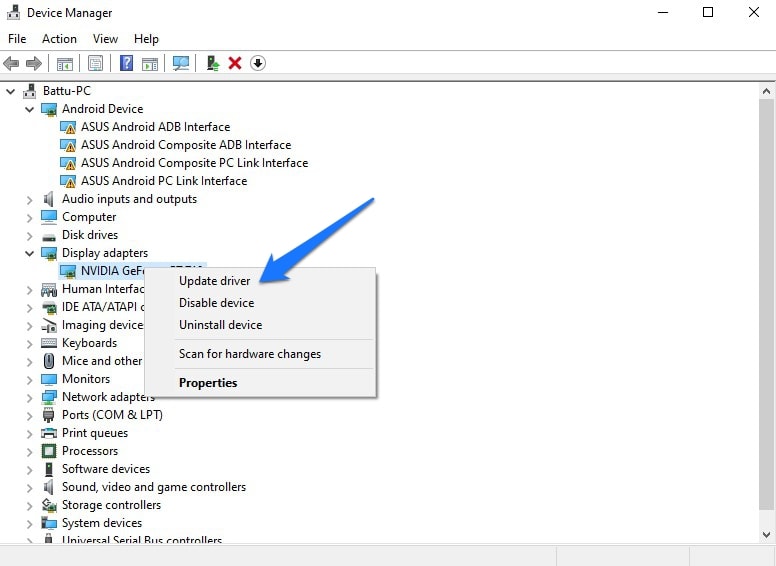
- Now right-click on the required driver and select Update Driver.
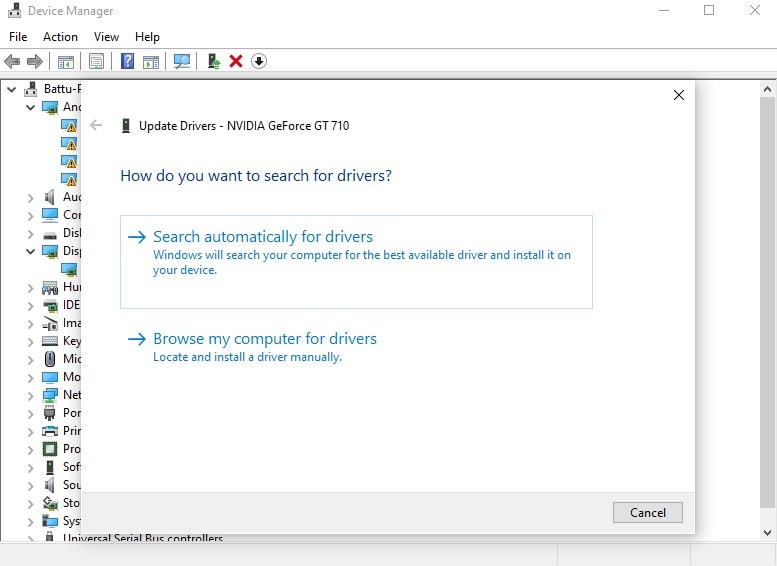
- Select Browse my computer for drivers and choose the drive update file on your computer. If you are sure where the file is located, select Search automatically for drivers, and Windows will try to find the latest compatible driver on your computer.
- Wait for the update process to complete.
This way, you can selectively choose the driver that requires the needed update using the Device Manager feature on Windows.
Method 2: Updating Drivers via Windows Update Settings
This method needs you to browse through the Windows Update Settings where the primary update settings of the operating system reside. Follow the simple steps below for updating the needed drivers using Microsoft’s official Windows Update feature.
- Open the Windows Settings menu from the Start Menu.
- Select Update & Security.
- Go to the Windows Update menu on the Update & Security page.
- Now click on the View optional updates.
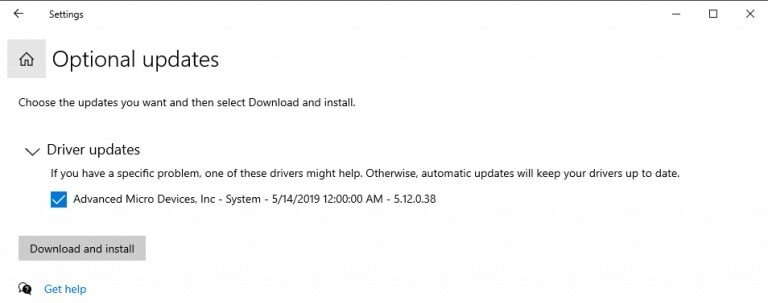
- Navigate to the Driver Updates tab on the page.
- Select the driver you need to update and click on Download and Install bottom.
This way, you can quickly find the drivers that require upgrades and update them quickly and easily.
Driver Booster 9: The Finest Option for Auto-Updating Drivers on Windows 11
Now that we have gone through a couple of manual methods to update all drivers in Windows 11. We’ll show you one of the easiest and quickest ways to update all the drivers on Windows 11 and 10. We bring you the Driver Booster 9 program from IObit, which helps you instantly scan and check updates.
The tool provides a one-stop solution for all your updating needs of your Windows machine’s drivers. Apart from auto-updating, the Driver Booster 9 tool from IObit offers you two additional features.
A Boost menu is found along the vertical tabs on the program’s window. You can turn on the Game Boost option on the Boost page for more high-performance gameplay. Besides, there’s a System Optimize option that lets you optimize the Windows machine for serving optimal performance.
Update Drivers in Windows 11 and Windows 10 using Driver Booster 9
- Download the Driver Booster 9 tool from IObit’s official page for your Windows or macOS system.
- Install the software with your preferred options and installation location.
- Wait for the Installation process to complete, and the Driver Booster 9 successfully opens up on your screen.
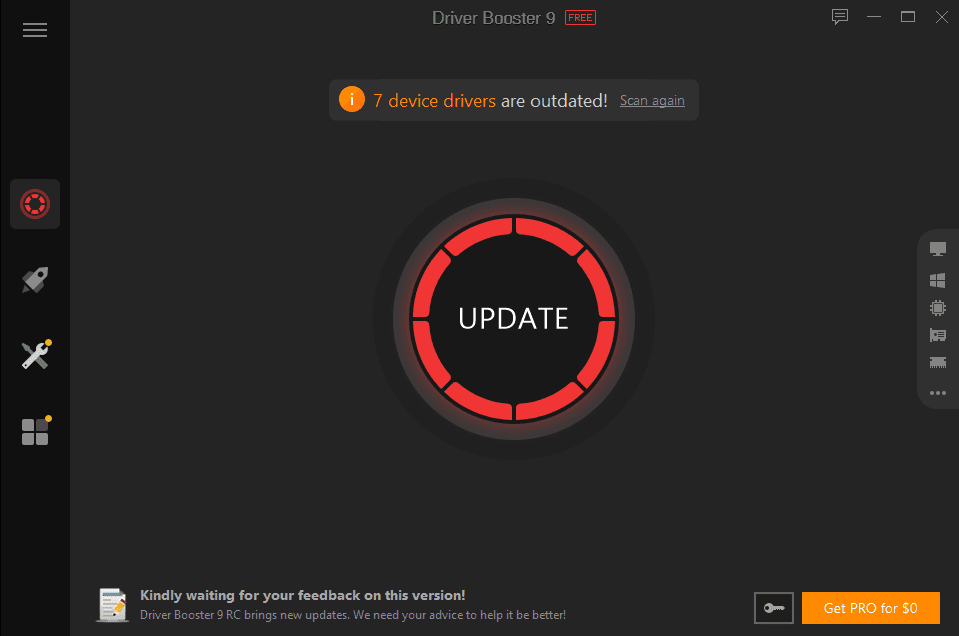
- Now, click on the big round Update button to start the auto-update of drivers.
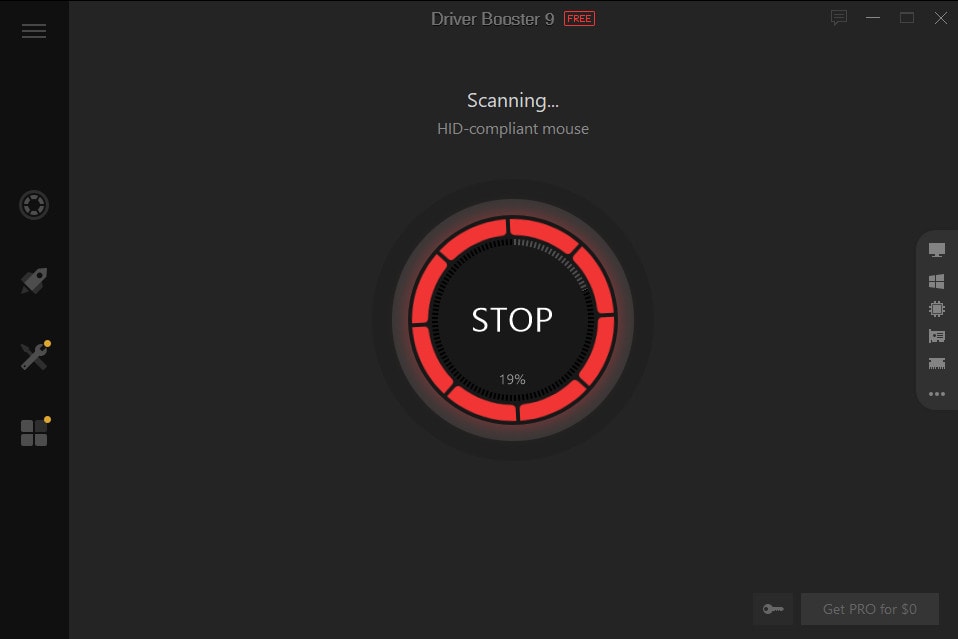
- The program will show you all the drivers and the available updates after the successful scan.
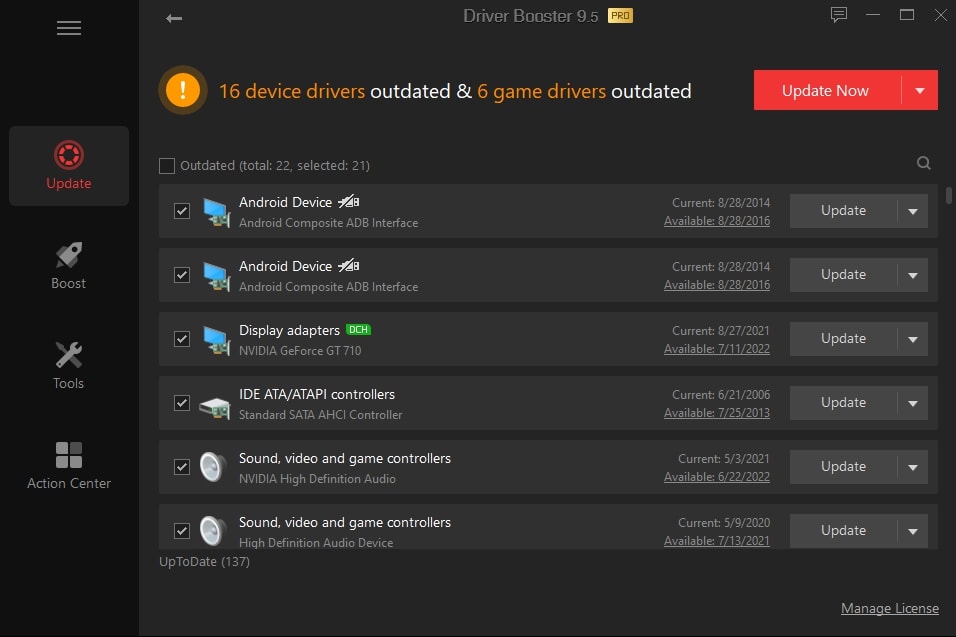
- Click on the Update Now button provided at the top-right corner for auto-updating all the drivers in your Windows 11 or Windows 10 machine.
The Driver Booster 9 program, with its user-friendly and safe interface, helps you to keep a check on all the drivers and their updates on your system. Furthermore, the program has additional tools, including Backup & Restore, Fix no sound, and Fix Device error. Driver Booster 9 makes way for a complete package that updates your drivers and even fixes a few errors found on your Windows device.
Updating Drivers in Windows 11 is Now Made Easy
Updating all the drivers in Windows 11 has never been a more manageable task, and with the methods mentioned above, you can make it possible without fuss. With you being in charge of things, the manual processes keep you in a well-known state of the drivers that requires an update. Moreover, you can individually select the drivers and install the updates depending on your requirement.
However, if you don’t want to take much stress in updating drivers and want to complete it in just a click, the IObit’s tool comes to the rescue. You can blindly rely on the Driver Booster 9 program, which auto-updates all the drivers on your system. Also, the additional features available on the program help you improve performance and fix hardware issues in a jiff.
