Taking screenshots is a basic task in any operating system. However, it becomes annoying when you want to take a screenshot on Android but the app doesn’t allow it. Especially when you want to share details with your friend or relatives. This is a precautionary move from Android to enhance the security of Android so that confidential details are protected.
While this is a good move from Android, it gets frustrating in the long run. For instance, If you want to share a webpage screenshot that is opened in Chrome’s Incognito mode, you’ll see an error stating “Couldn’t Save Screenshot — Taking screenshots isn’t allowed by the app or your organization.” The same happens with banking, payments, and social media apps too.
Well, Android is a customizable OS, and hence there are various ways to take screenshots on an Android device even if the app disabled it.
In this guide, we’ll show you multiple ways to take a screenshot of a restricted app on Android.
How to Take Screenshots in Restricted Apps without Rooting in Android
Believe it or not, you’ll need the help of Google Assistant to take screenshots on Android in Restricted apps. Apart from the Google Assistant method, there are two other ways to take screenshots on your Android phone in restricted apps.
Method 1: Using Google Assistant to Take Screenshots
Follow the instructions below to capture screenshots on Android with Google Assistant if the app doesn’t allow taking screenshots:
- Open the restricted app that you want to take screenshot of on Android.
- Now launch Google Assistant by long-pressing on the home button. If your device doesn’t have a home button, then swipe from the corners of your screen.
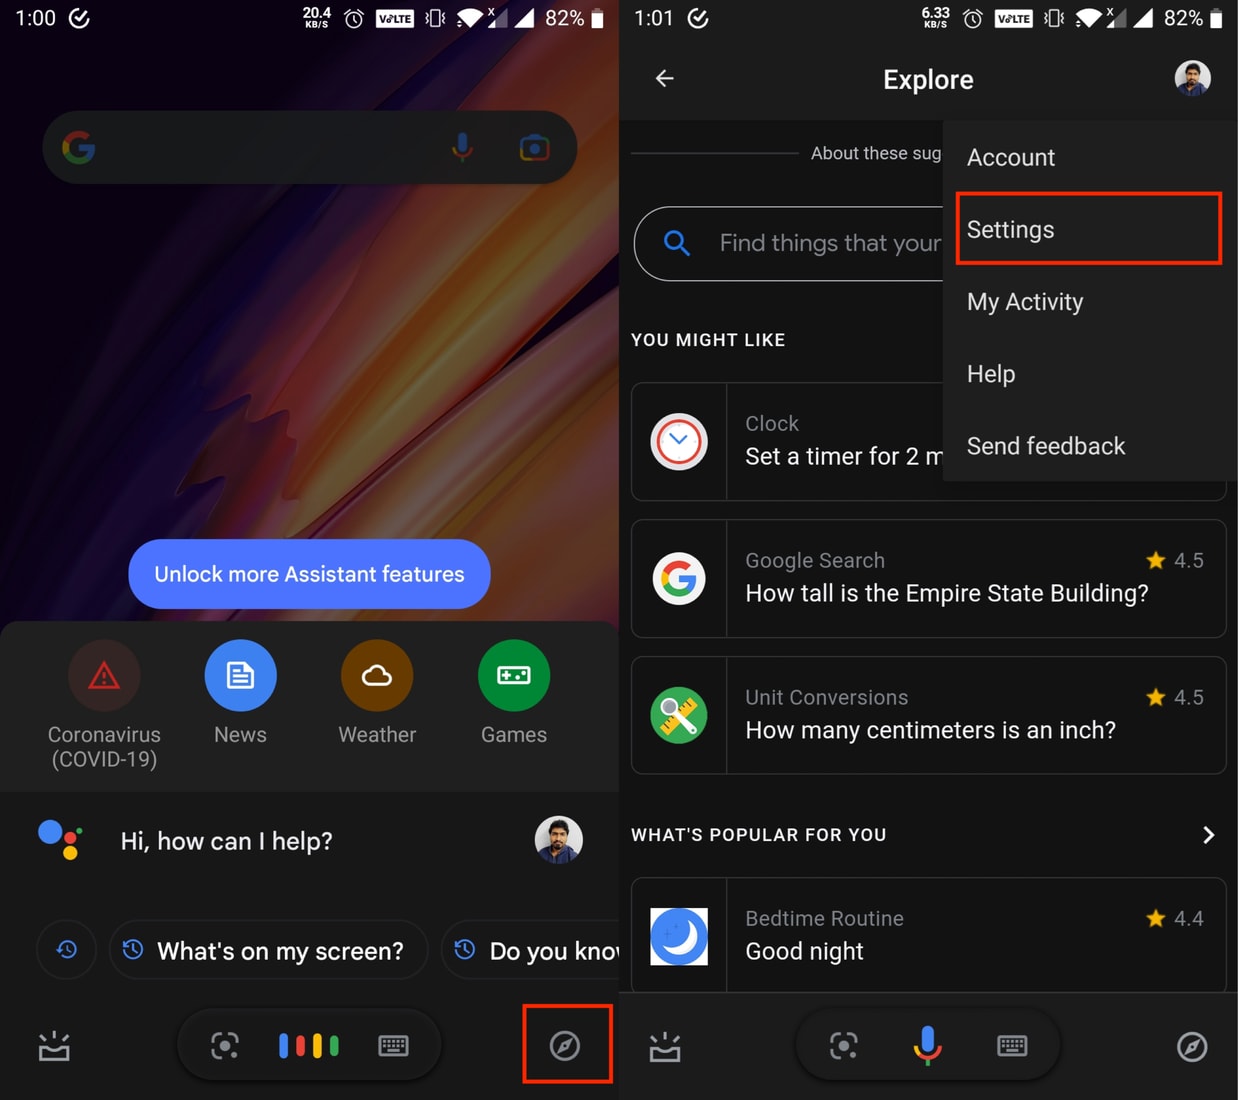
- Click on the Compass icon on the Google Assistant page.
- Now tap on your Profile icon.
- Select Settings from the submenu.
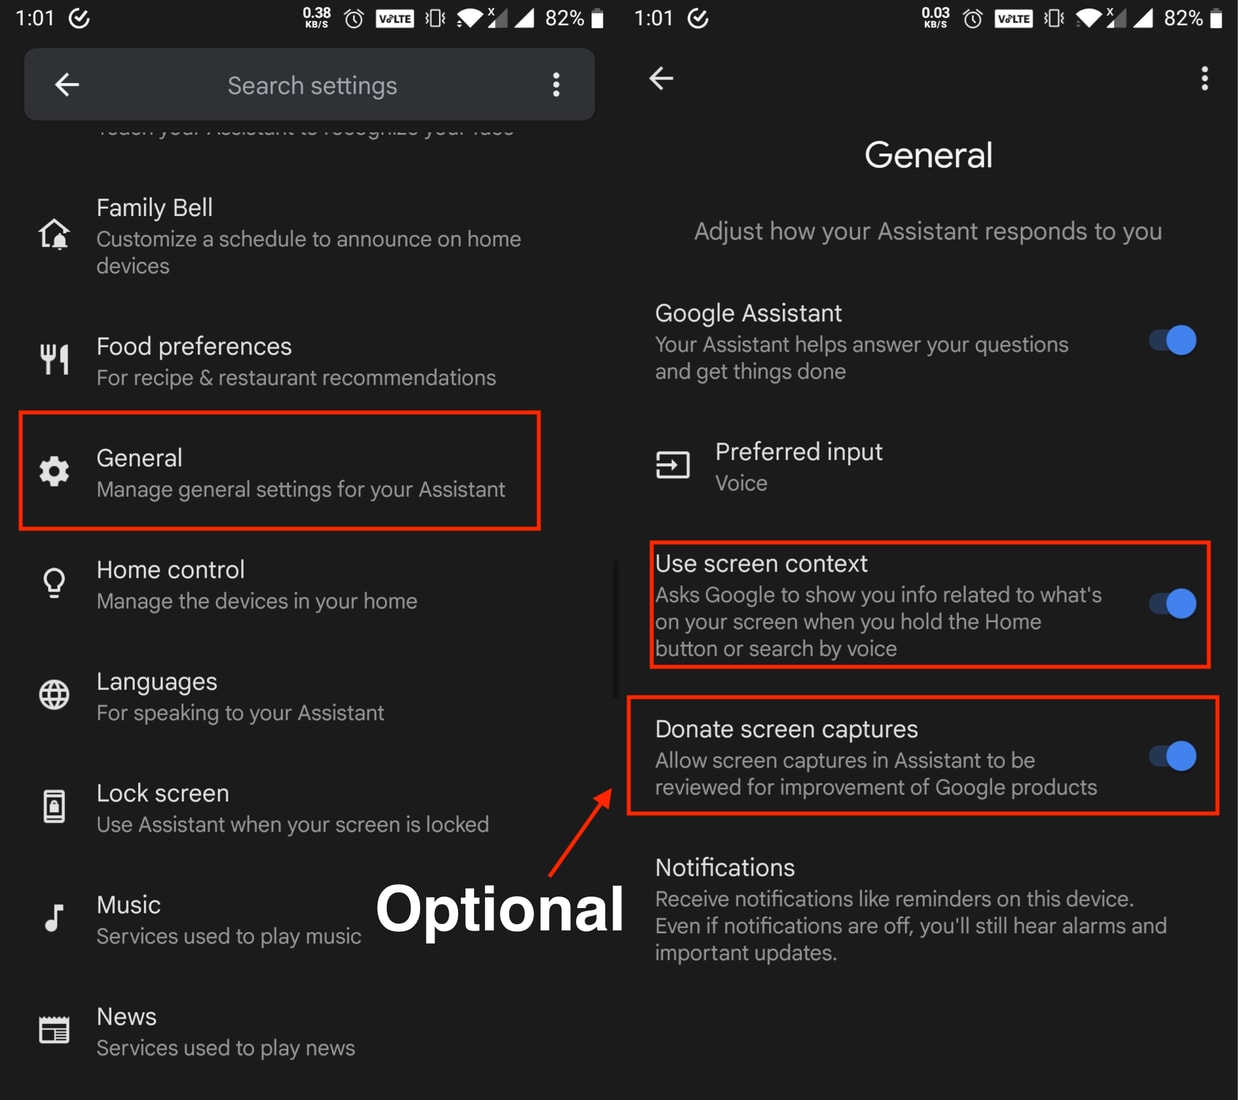
- Click on General, and enable these two options — Use screen context, and Donate screen captures (optional).
- Now go back to the restricted app and open Google Assistant again by swiping from the corner of the screen or long press the home button.
- Once launched, select the Share Screenshot option.
- Now select the app where you want to share the screenshot.
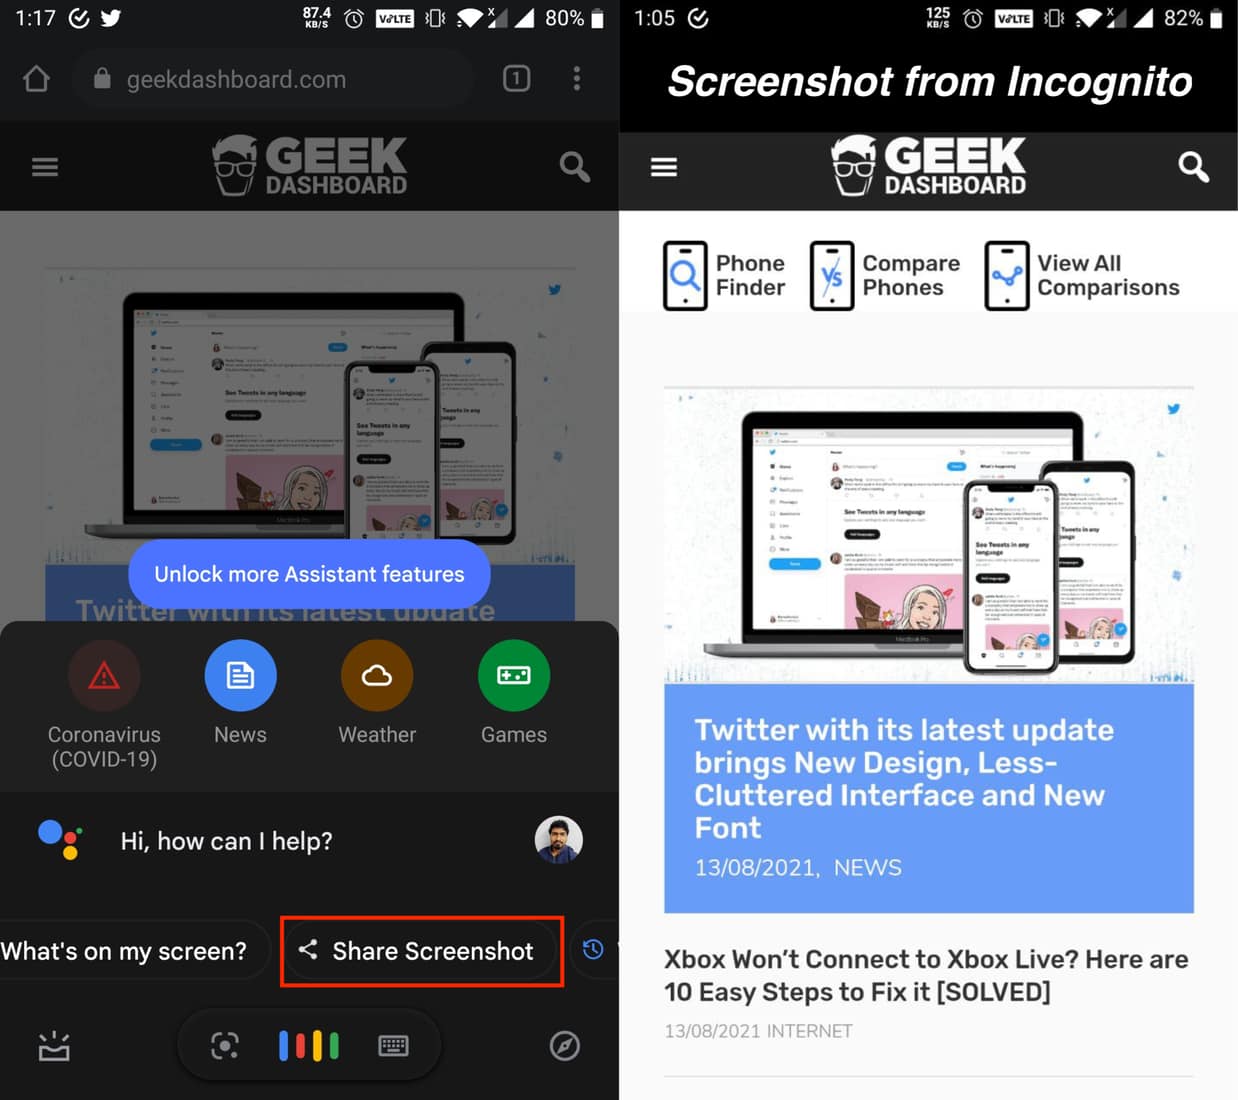
However, the screenshots that you share won’t be saved in the Gallery of your Android device. If you want to take the screenshot again, you’ll need to repeat the process from Step 6.
However, if you are using good File Manager apps like Solid Explorer, you will find the “Save to Device” option in the Share Chooser. Selecting it allows you to save the device locally without sharing it with everyone.
Method 2: Using AZ Screen Recorder
AZ Recorder is a great screen recording app, but it doubles as a screenshot-taking app as well. The best thing about this app is that it is free, has fewer intrusive ads, and has no time limits.
UPDATE: The method might doesn’t work these days. Despite that, you can give it a try; depending on your Android version, it might work for some of you.
This screen recorder app can be used to take screenshots in restricted apps as well. To do so, follow these steps below:
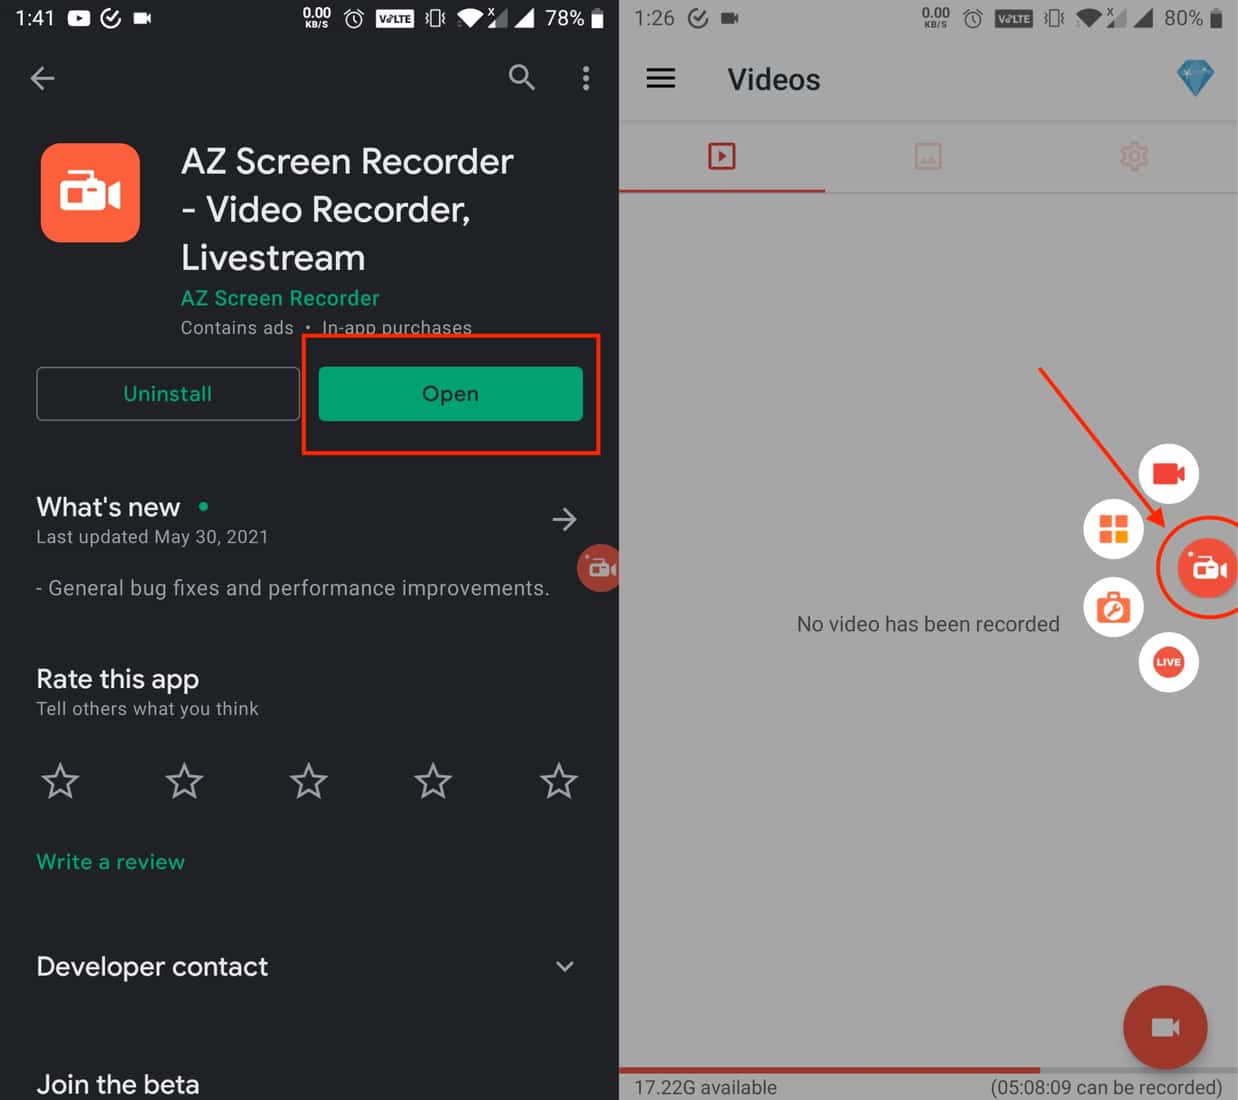
- Download and install the AZ Screen Recorder from the Play Store.
- Open AZ Screen Recorder and give it the necessary permissions.
- You’ll now see a floating button with multiple options on your screen.
- Open the Restricted app where you want to take the screenshot.
- Click on the floating button on your screen, and select the Settings icon that looks like a toolbox.
- Enable the Screenshot option from the list and close the list.
- A second floating button will open on your screen — a camera icon of the left.
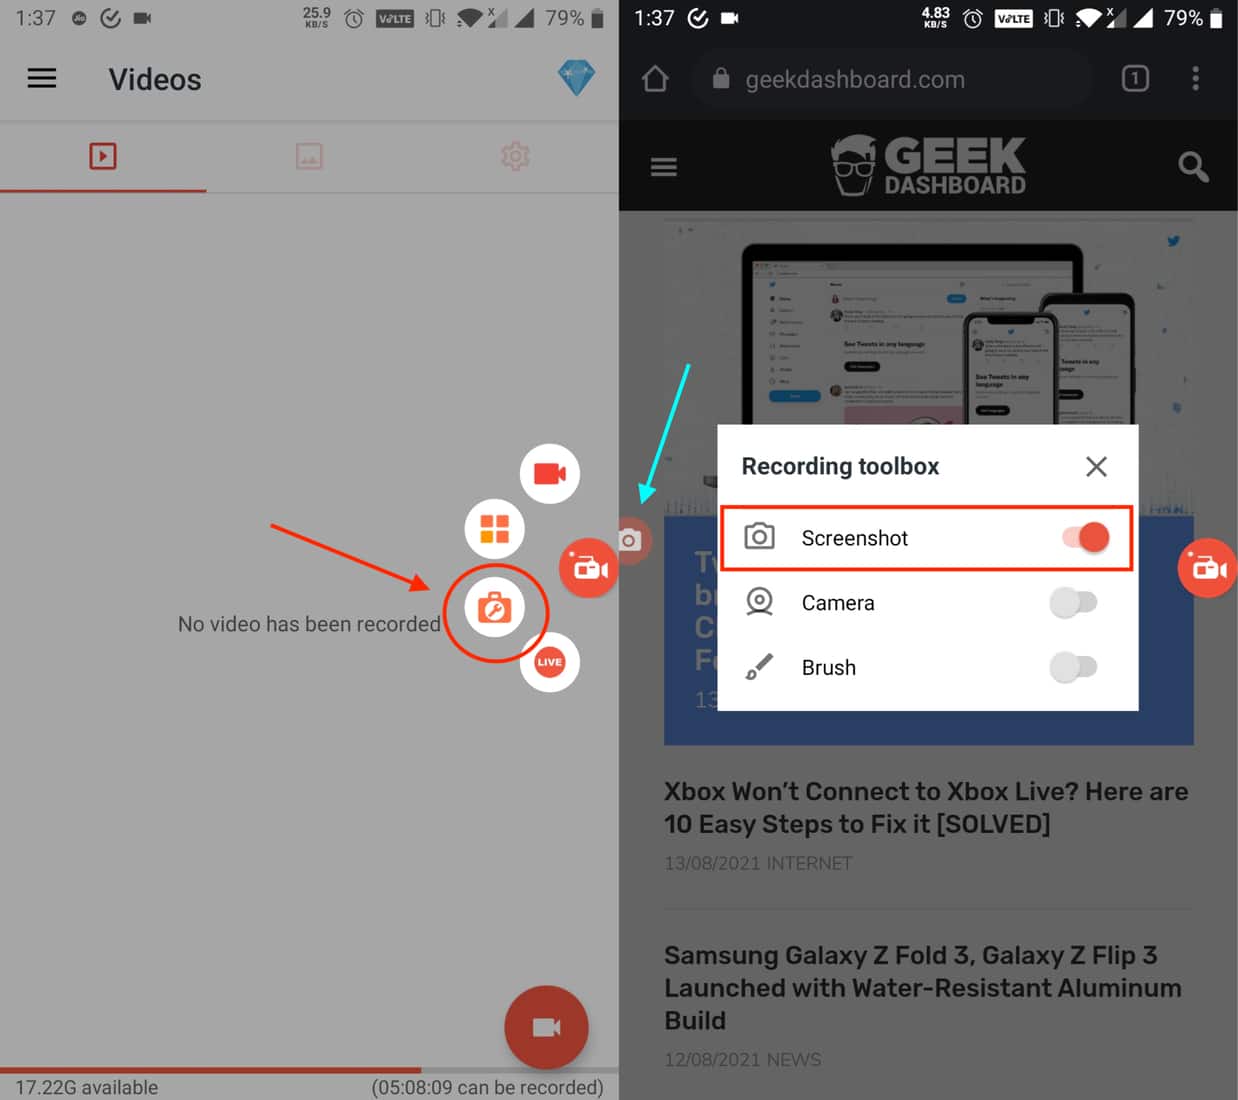
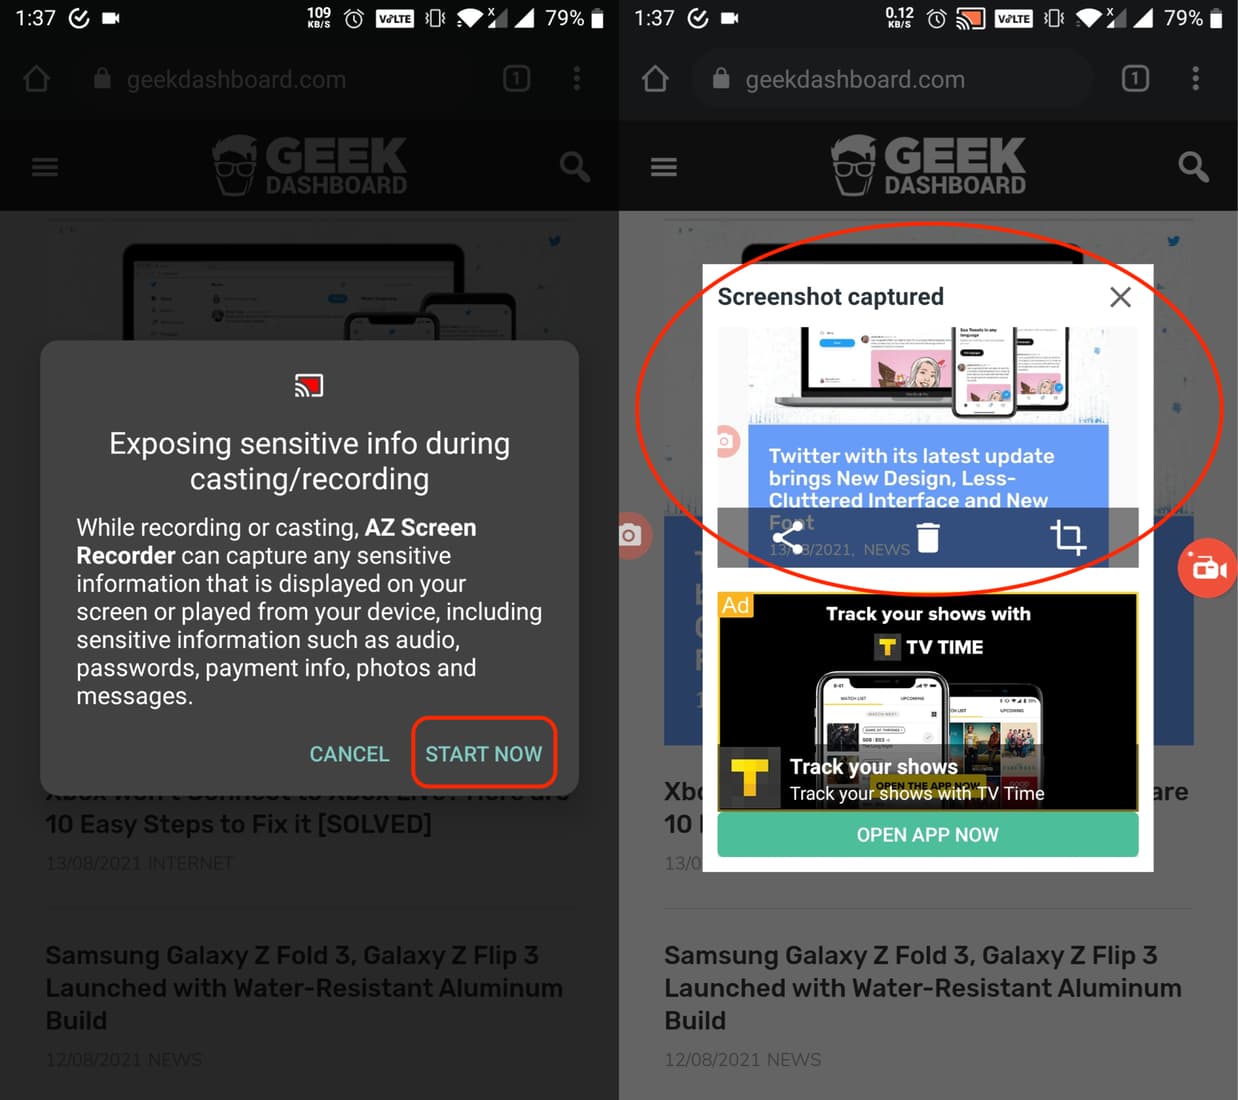
- Click on the Camera icon, and tap the Allow button.
- A screenshot will be captured and saved to your gallery. You can also preview/edit the screenshot after tapping on the floating window that opens up.
Method 3: Screen Record and then Screenshot with XRecorder
XRecorder is another screen recorder that comes from the house of InShot Inc. Similar to AZ Screen Recorder, it also doubles as a screenshot-taking tool. XRecorder is also free and comes with fewer ads with no time limits.
UPDATE: The method might not work for everyone. Despite that, you can give it a try. Depending on your Android version and device manufacturer, it may work for you.
Here we are using the XRecorder app to first record the screen and then capture a screenshot from the recorded clip. This may sound like a crazy hack but in the end, it works. Here is how you can do it.
- Install and open XRecorder from Google Play Store.
- Give it the necessary permissions, and look for the floating button on your screen.
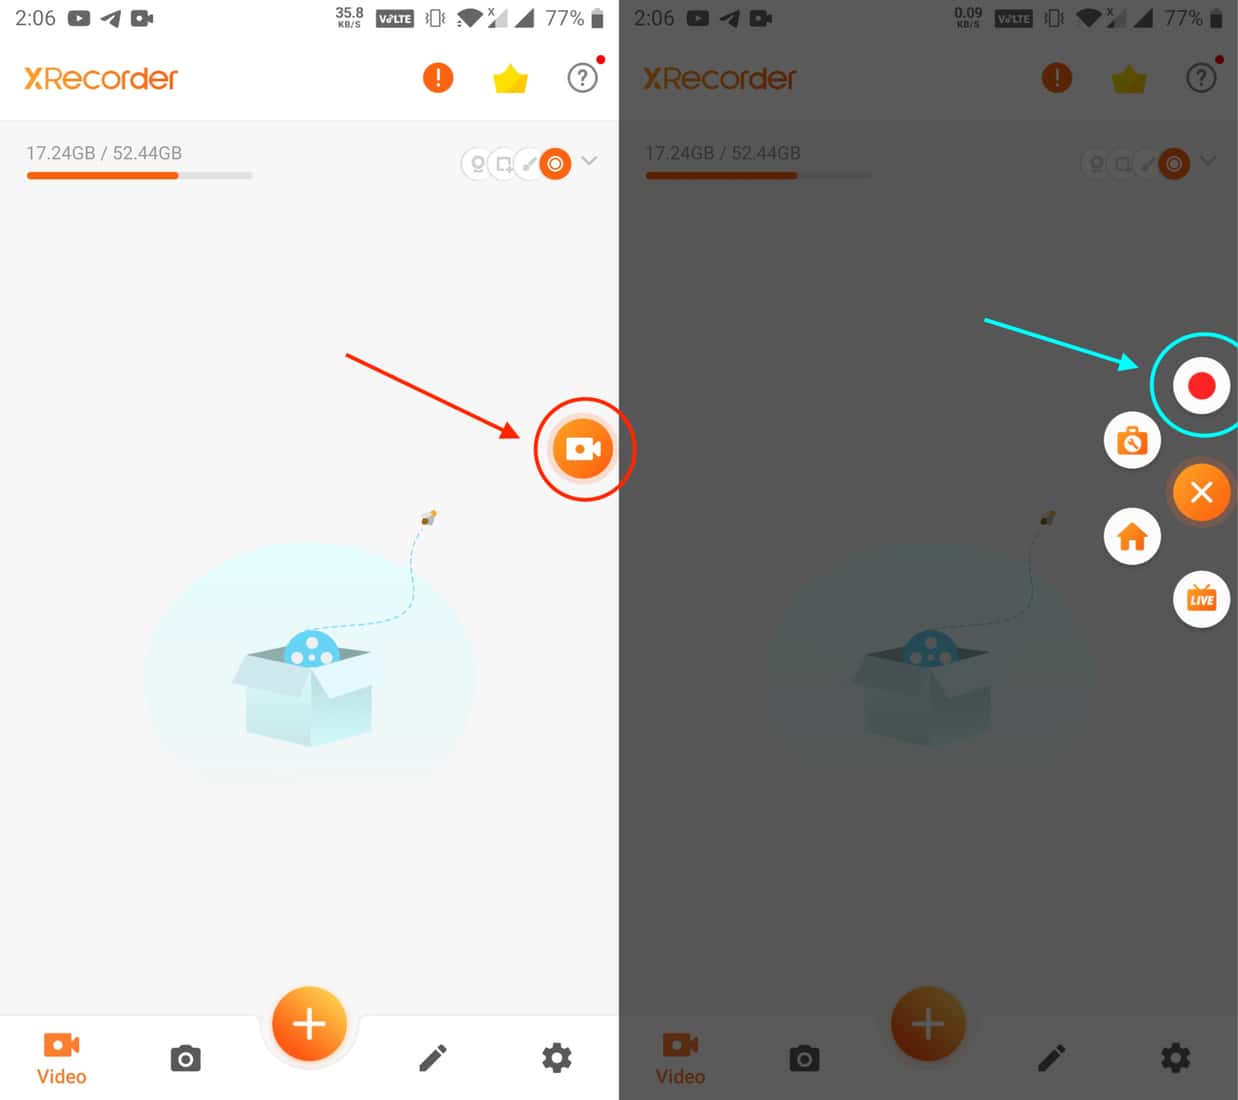
- Tap on the floating button and then select Red Dot icon. This will start the recording on your phone.
- Go to the restricted app that you want to take screenshot and keep recording the screen for 5 seconds.
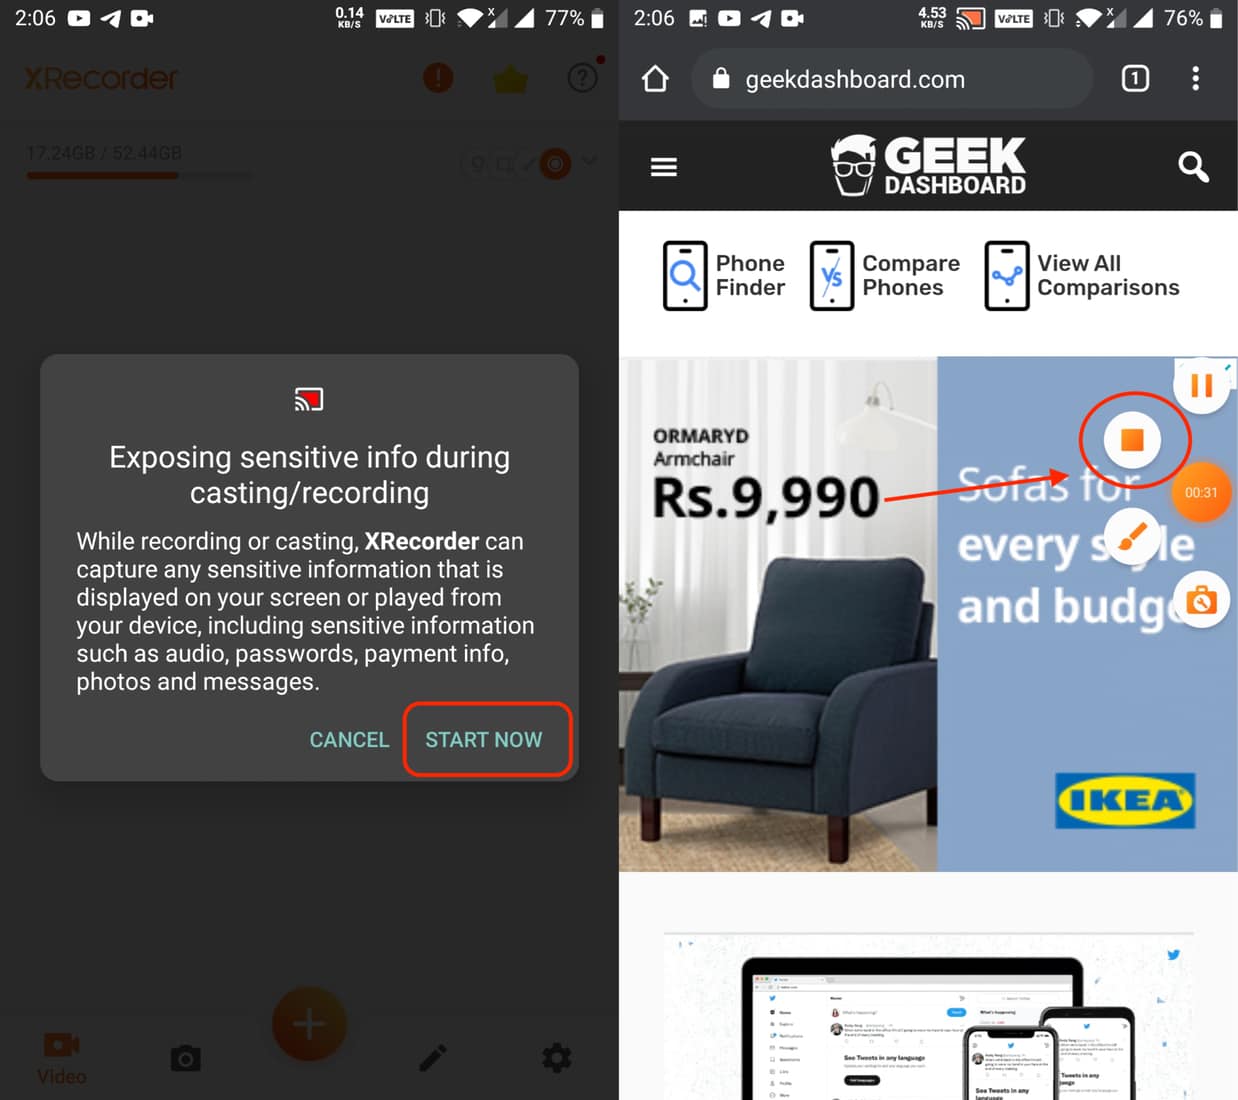
- One done, click on the floating button, and tap on the Stop option that looks like a square.
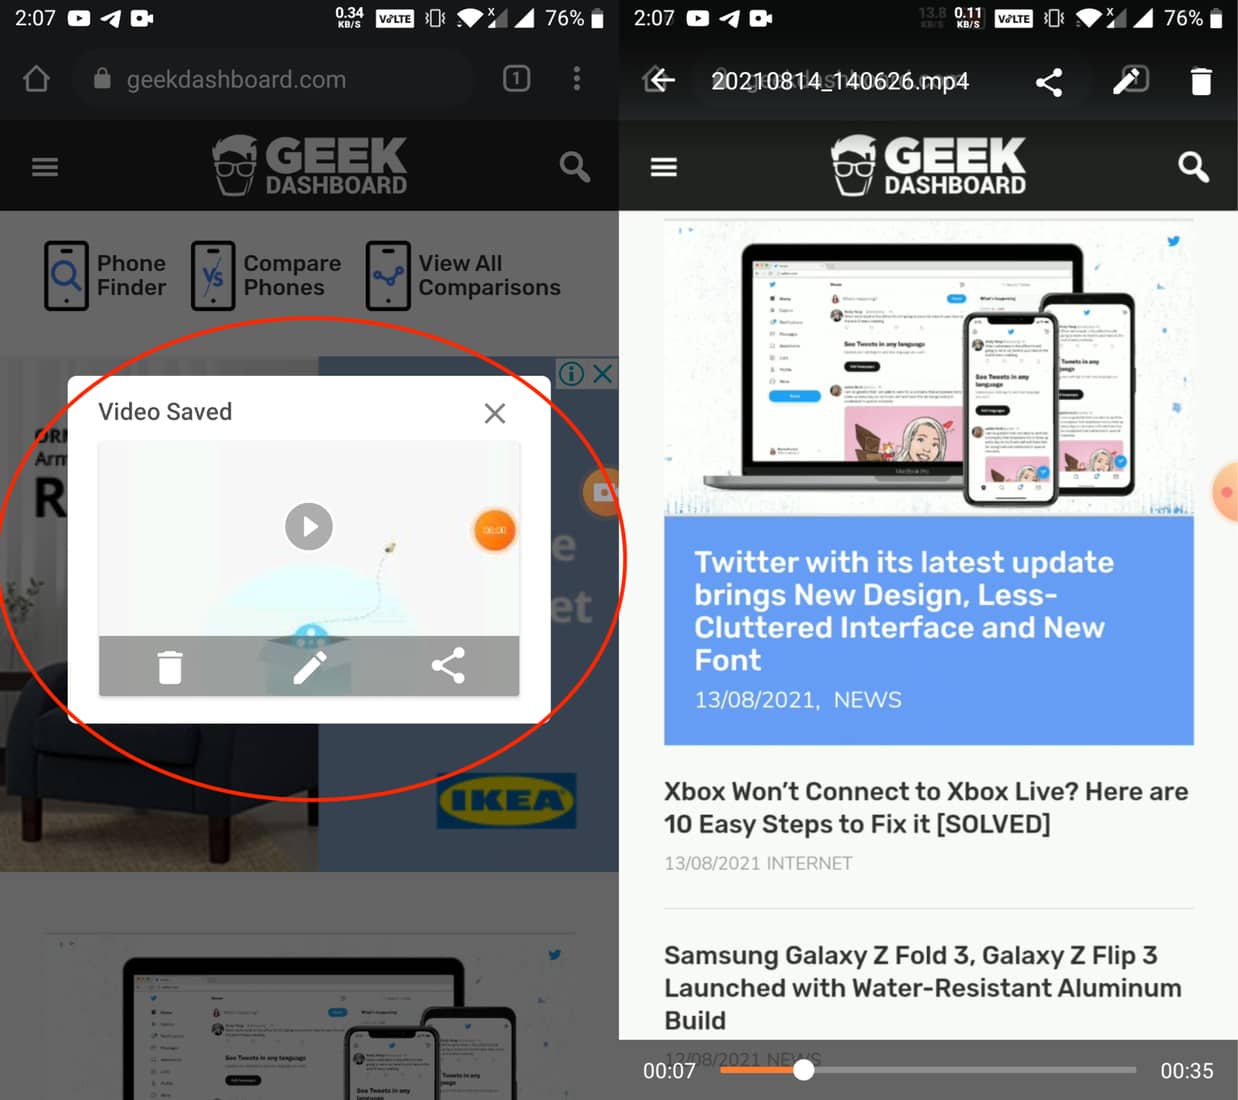
- Open the screen recording clip, and let it play to the part where you want to take the screenshot.
- Once there, capture the screenshot as usual and the screenshot will be saved in phone’s Gallery.
Also Read: 11 Stunning VLC Skins To Make Your VLC Media Player Look Amazing!
Conclusion
We hope you were able to take screenshots using the above methods. While Method 2 and Method 3 come with the doubt of whether they work or not, Method 1 works for sure on all Android devices. Blocking from taking screenshots on some restricted apps allows Google to improve security on Android.
In addition to the information-sensitive apps, few movie apps like Netflix, Disney+ Hotstar, and other streaming apps don’t allow you to share screenshots as well. This in turn reduces piracy to some extent on Android. If you’ve any questions, you can leave them in the comments.

All of the methods didn’t work😔
Method 1 did not work for my Android (version 9)