Windows 11 with its new interface and total revamp has even brought attractive animations. You can speed up animations on Windows 11 if you feel a slight delay in opening menus. The number of user interface animations is far higher on Windows 11 than the Windows 10. Microsoft has added these animations to make users feel better and more pleased while browsing through the system.
If you are a laptop user with Windows 11 installed, then these animations might drain out the battery life in extended usage. The animations can even slow down your productivity as you have to wait until the menu opens after the transition. These animations on the system can affect the PC performance leading to slow operations while working.
In this article, we’ll cover all of the ways to change the animation settings on Windows 11 and speed up the transitions. These methods include editing the registry of Windows, disabling visual effects, and turning off animation effects on Windows 11.
4 Ways to Improve Animation Speed on Windows 11
We have four different methods to speed up the animations on Windows 11. These methods will give you an idea of whether to turn off all the animations or leave a few of them to keep the appealing factor. You can find the solutions below with a step-by-step guide to changing the animation settings on Windows 11.
Method 1: Change Animation Speed on Windows 11 using Registry Editor
The Registry Editor is a vital part of the Windows operating system that defines the core function settings. It is a double-edged sword and make sure you know what you are doing. Follow the steps below carefully to modify the animation speed in Windows 11.
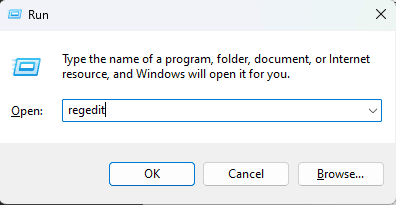
- Use the ⊞ Win + R on your keyboard and open the Run dialog window.
- Type regedit in the Open search field and click OK.
- As the Registry editor opens up, enter the following location in the address bar:
HKEY_CURRENT_USER\Control Panel\Desktop - In the right panel of the window, double-click on the MenuShowDelay key.
- Now, enter a new delay value in milliseconds to change the menu speed on Windows 11.
- The default value set is 400, you can change it to 200 or 100 as per your preference to decrease the menu animation speed.
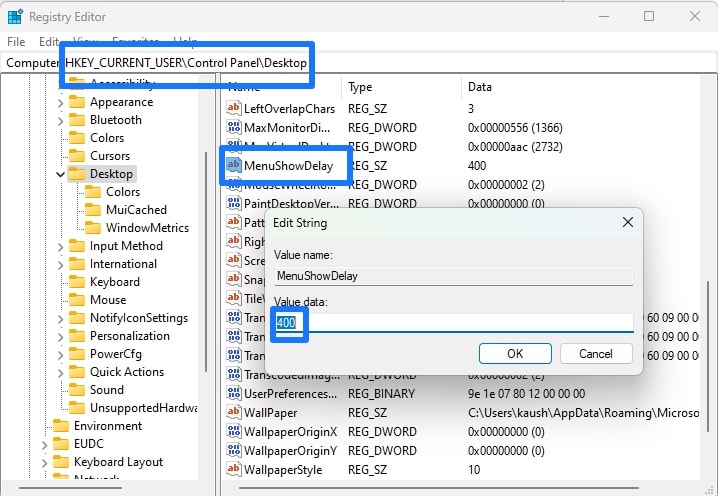
- Click on OK and restart your Windows 11 system to let changes take effect.
Method 2: Using the Settings App to Turn Off Animations on Windows 11
It’s the most preferred and convenient method for turning off animations on Windows 11. You can simply toggle off the animations from the Settings menu.
- Open the ⊞ Windows Start menu and click on the Gear icon or Settings option.
- In the left pane of the Settings menu, click on the Accessibility option.
- In the Accessibility menu, click on the Visual Effects menu for Animation effects.
- Now, Turn off the Animation effects by toggling off the switch on the right side.
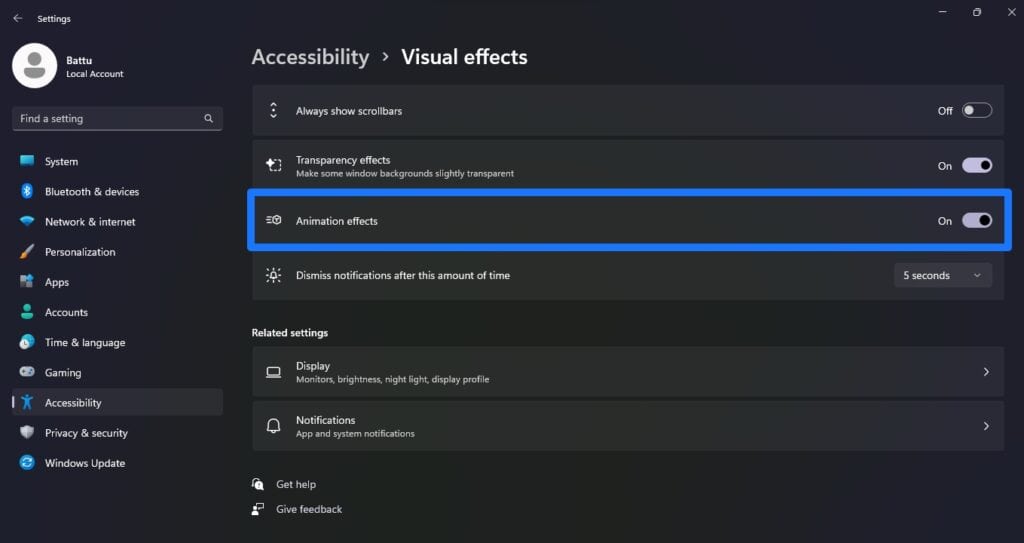
- You can even turn off the Transparency effects to improve performance to an extent.
Method 3: Turn off Unnecessary Animations from Control Panel
In the Control Panel of the Windows operating system, Microsoft has provided a dedicated option to manage Windows 11 animations. You can disable all the unnecessary animations from the “Ease of Access” to improve the performance further.
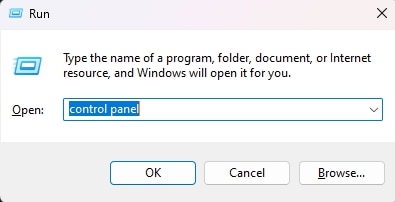
- Open Control Panel from the Start menu or Use ⊞ Win + R and type control.exe in the dialog box.
- In the Control Panel, open the Ease of Access page.

- Now, click on the Optimize visual display option.

- Scroll down and untick “Turn off of all unnecessary animations (when possible)“.
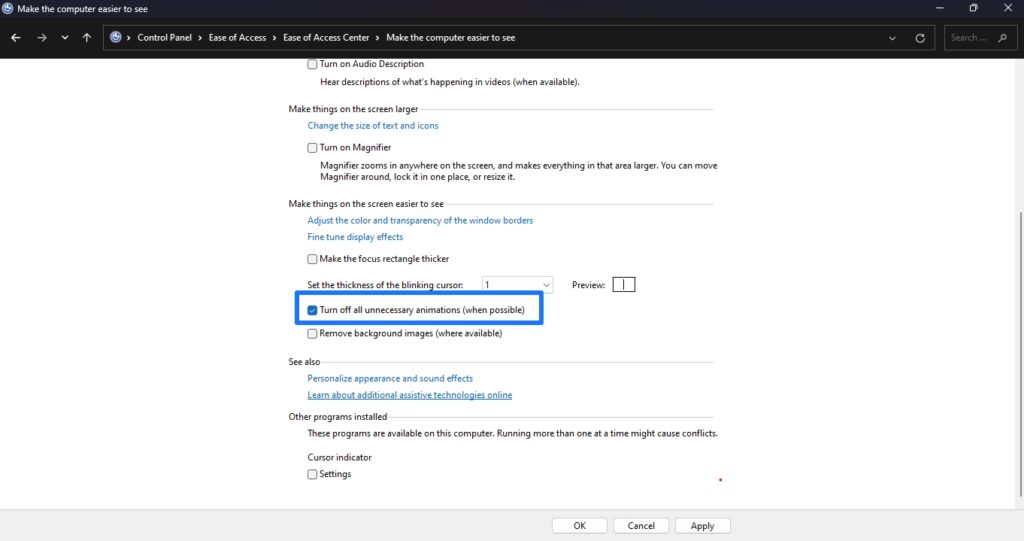
- Lastly, click on Apply for the changes to take effect and restart the computer.
Method 4: Adjust Performance Options for Best Performance
As we first made edits to the registry, turned off animations from the Ease of Access center, and toggled off the animation effects in Settings. There’s another way to speed up Windows animations by tweaking the performance options for the best and fast experience possible.
- Open the Start menu and search for View Advanced System Settings
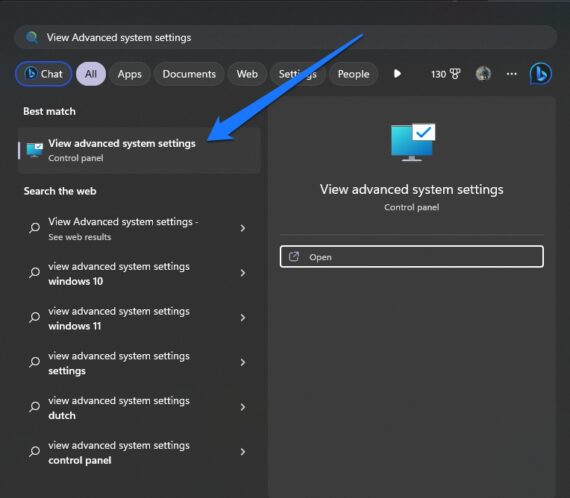
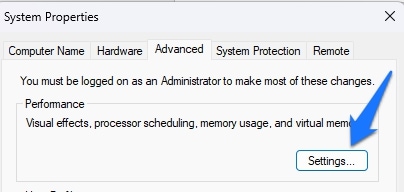
- The System Properties window will open up and here go to the Advanced tab.
- In the Advanced tab menu, Click on Settings under the Performance section.
- Now, in the Performance Options, you will see two options for best appearance and best performance.
- Select the Adjust for best performance option or customize as per your requirements.
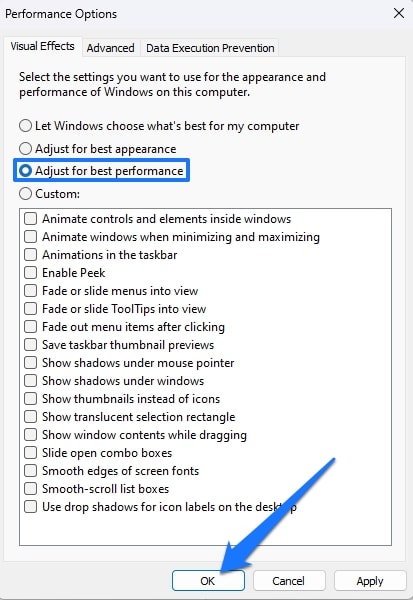
- Click on OK and then Apply for the changes to get into effect.
Frequently Asked Questions
Why Windows 11 is laggy?
Low system storage or running too many programs simultaneously may be to blame for Windows 11 becoming sluggish or freezing. Heavy animations that were previously absent in Windows 10 might be another factor.
Do Animations slow down PC?
The animation effects in Windows 11 give the UI a more fluid appearance. Enabling animations on a slower computer, however, may result in a sluggish experience where programs take a while to launch and exit.
How do I make Windows 11 smoother?
You can turn off the unnecessary animations on the operating system which can help you have a more smoother experience while browsing through the system.
How do I increase animation speed in Windows 11?
By pressing Win + R and typing SystemPropertiesPerformance in Run, the Visual Effects tab will be shown. After that, click OK to open that tab. Select the option that says “Adjust for best performance.” Select the Apply button in the Performance Options box.
Do Windows 11 animations affect performance?
The shadows, animations, and visual effects in Windows 11 are likely to be favorites of those who enjoy eye-candy visuals. On quick, more recent PCs, they often don’t impact performance. However, they can cause older, slower PCs to function worse.
Speed up the Animations on Windows 11 for Better Performance
These were the simple and quick solutions to speed up Windows 11 animations to improve performance. This way you can change the style and speed of the animations to have a better and faster experience while working on the PC.
The Registry editor has the ability to increase the speed of the animations and the rest of the methods will help you disable the animations completely.
