Windows 11 update came in with many major changes. While Microsoft is making big visual changes to the Operating System; there was an alternation in many basic operations. In addition to these changes, Windows 11 introduced a new File Explorer in place of the legacy File Explorer. The new File Explorer is minimalistic and introduces a new ribbon bar. As a result of this, basic tasks like viewing hidden files, are not easy to change.
Given that things have changed, you can still view those hidden files. You just need to take a different route to see hidden files in Windows 11 now.
In this guide, we’ll show you two ways to show hidden files in Windows 11.
2 Ways to View Hidden Files in Windows 11 File Explorer
Windows 11 provides two ways to show hidden files in the Windows 11 Explorer. One of those methods uses the new File explorer while the other uses the legacy method. You can follow any of these methods to see hidden files on Windows.
1. Using Layout and View Options to See Hidden Files
Layout options are the new way for viewing the hidden files or folders on your Windows 11 File Explorer. Follow these instructions to show the files hidden in Windows 11:
- Open File Explorer on Windows 11 by clicking on the File icon on the taskbar. Alternatively, you can press Win + E on your keyboard to open the File Explorer.
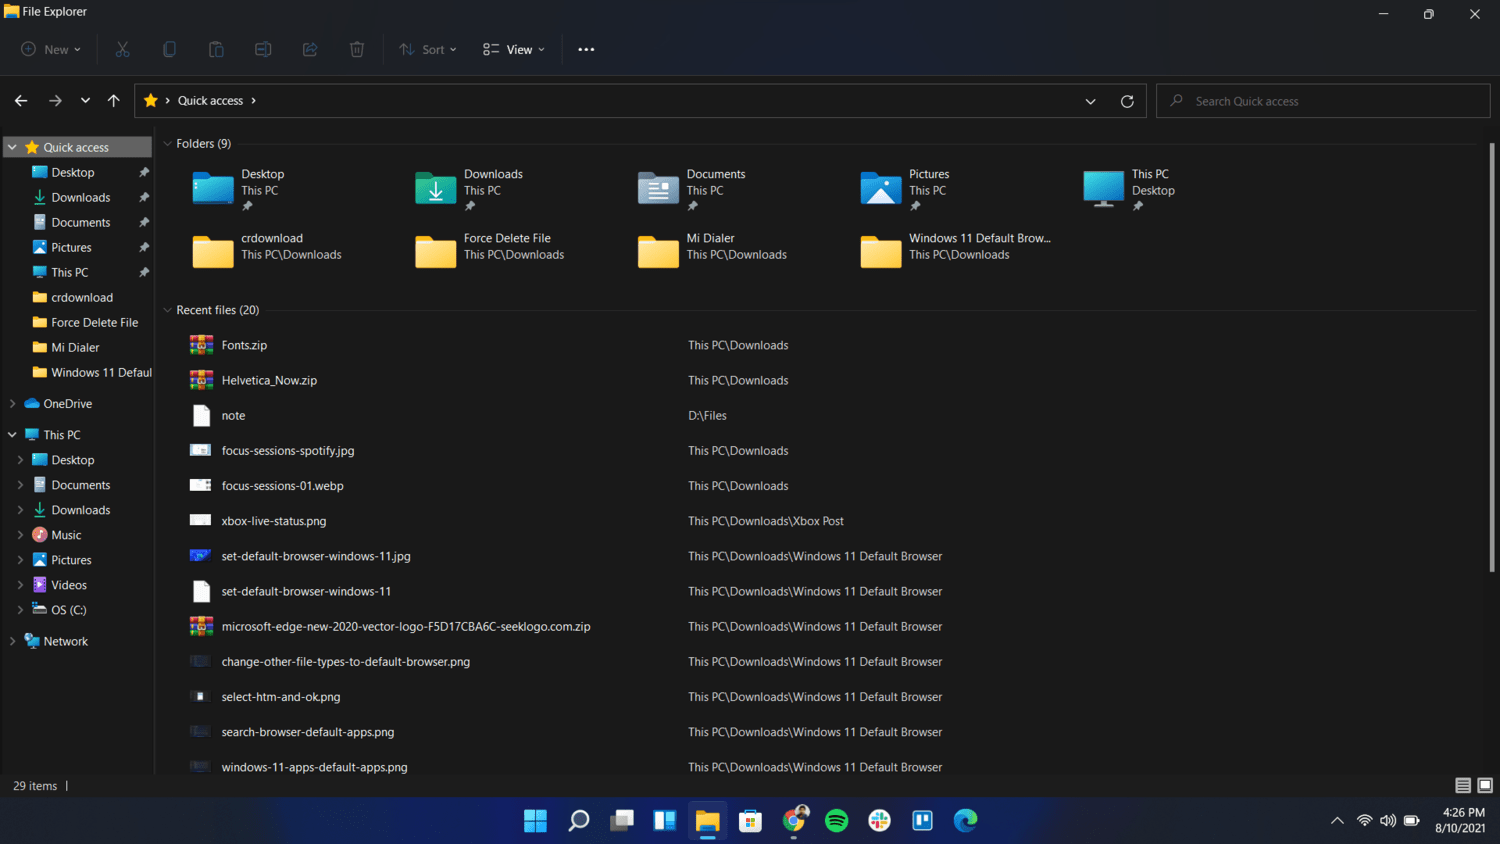
- Click on the Layout and View options button. This will be the second button from the top-right side of your screen.
- From the sub-menu, hover the cursor on Show option
- Click on Hidden items option to enable it.
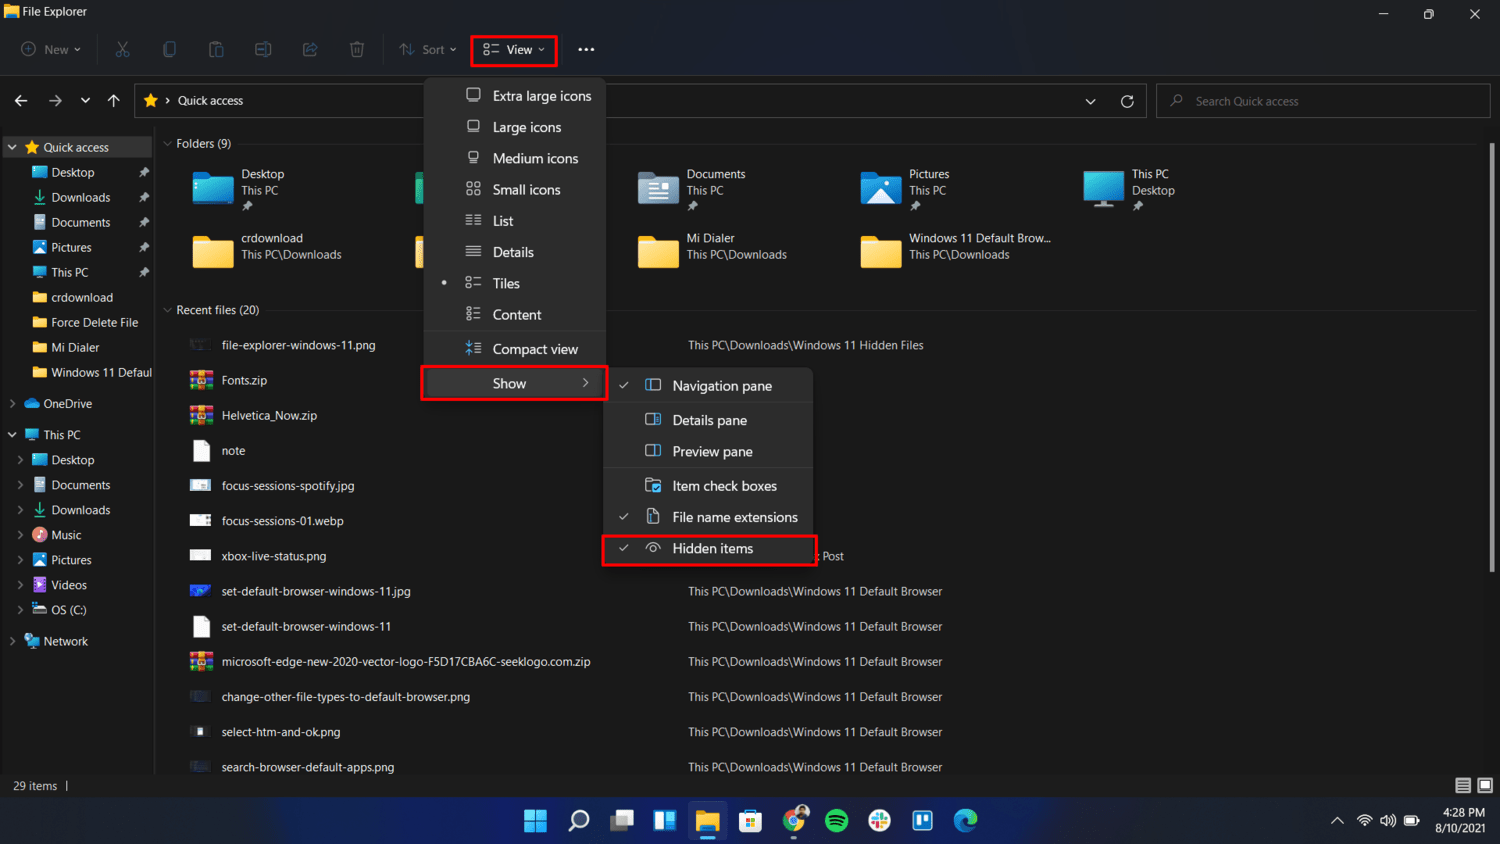
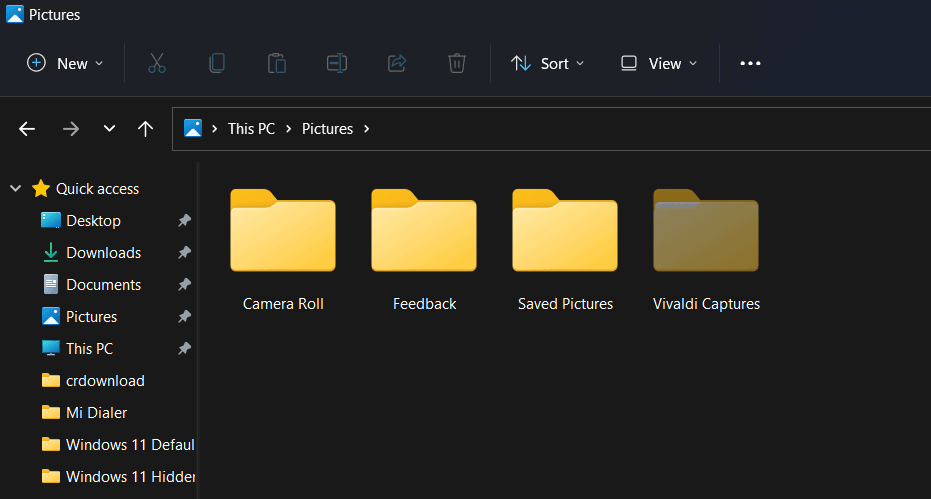
After clicking on the Hidden item option, you’ll be able to see hidden files on your File Explorer in Windows 11. All your files including hidden files will be visible and you also get access to edit them.
2. Using Folder Options to View Hidden Files
The Folder options method, on the other hand, is the legacy method to enable hidden files/folders in Windows 11. Follow these instructions to see your files that are hidden in File Explorer.
- Open File Explorer by pressing Win + E shortcut on your keyboard.

- Click the See more option (three-dotted menu). You’ll see this is as the first option from the right.
- Select Options from the submenu.
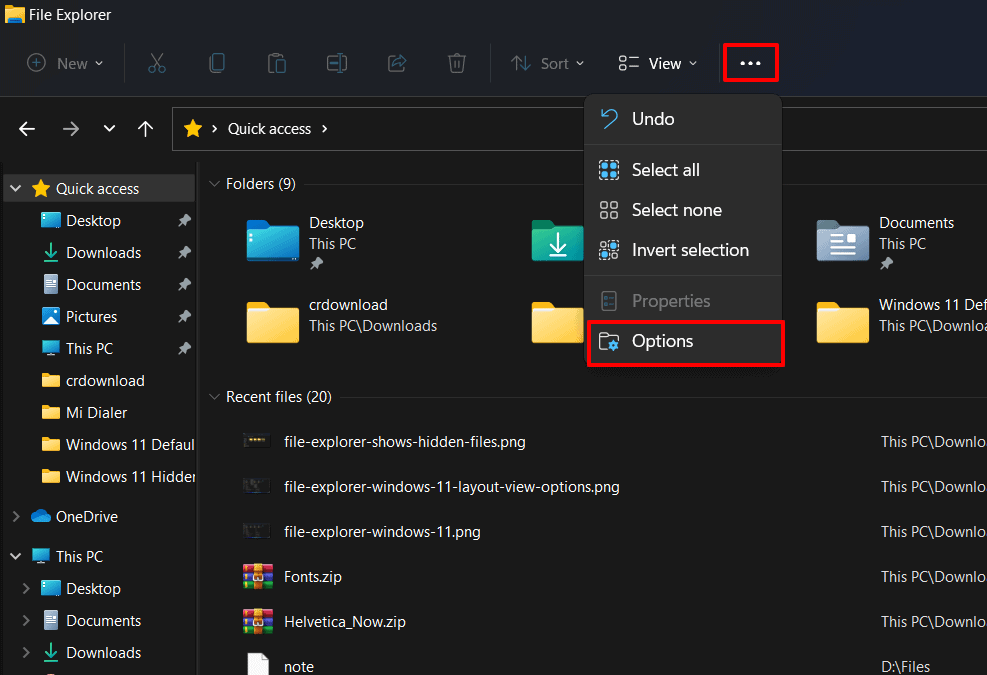
- Go to View tab.
- Under Advanced settings, look for Hidden files and folder group.
- Now select the Show hidden files, folders, and drives radio button.
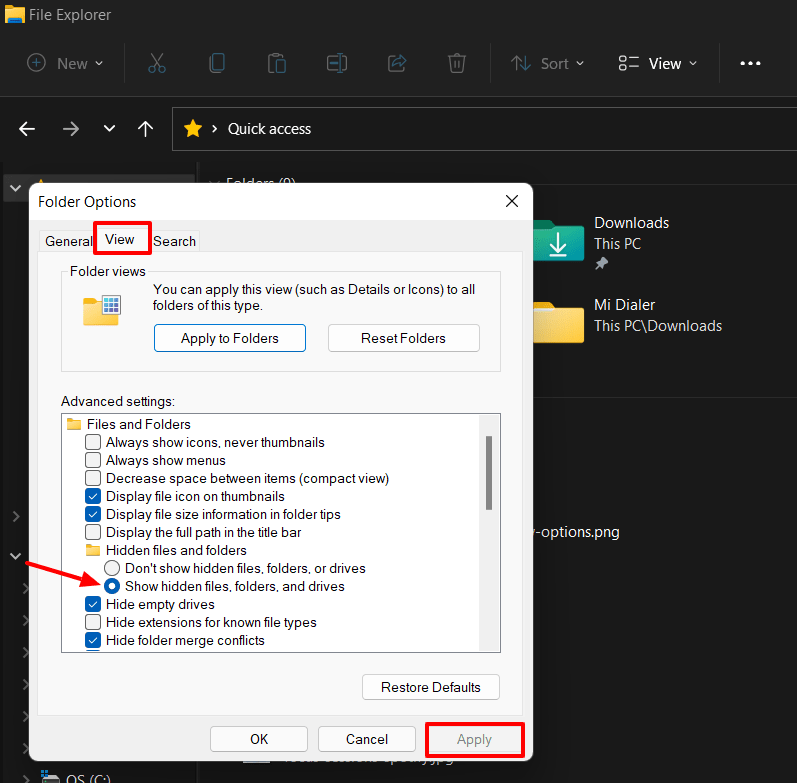
- Click the Apply button
- Select OK to close the dialog.
Now you’ll be able to view the hidden files and folders in your File Explorer. Any file or folder that uses the Hidden attribution, instead of Read-Only, it’ll be visible now. You can also edit the files and folders if you wish to make changes.
Also Read: How to Force Delete a File or Folder That Can’t be Deleted on Windows
Conclusion
If you are intentionally hiding your sensitive or personal information, don’t forget to revert the above changes to hide the files again. You can repeat the same steps anytime to see hidden files once again.
Showing hidden files on Windows has been the same over years. But with Windows 11, things are changing. Even basic tasks like changing your default browser on Windows 11 are becoming a tough task. After getting used to Windows 10 for such a long time, Windows 11 is bringing big changes and it may take time to adjust to the changes.
Hope you learned how to see hidden files on Windows 11 easily with this guide. If you’ve any suggestions or queries, you can leave them in the comments, and we’ll answer them.
