Accidentally deleting your Microsoft Word or Excel file that you had been editing for the last few days can be the most heartbreaking thing ever. Seeing all your hard work going down the drain can bring tears to anyone’s eyes. The good news is, there are recovery methods available to bring back your lost Word and Excel file easily. It saves you hours or even days of repeatedly editing your already finished documents.
Even though the new version of Microsoft Office comes with features like auto backup and cloud sync, such mishaps can still happen when you delete the file permanently from your storage. But there are few methods available that can recover deleted Word and Excel documents easily and hassle-free.
You don’t need heavy computer knowledge for Word document recovery or Excel document recovery. It will just take a few minutes and you will get back the files that you deleted accidentally.
How to Recover Deleted Word and Excel Files on Windows
When you delete a file from your computer, your computer just makes its flag as deleted. The deleted file will be still in your storage but is waiting to get an override. If you copy new files on your computer then the new file may override the storage location whose flag is marked as deleted previously.
This means that your file is safe even after deletion and you just need a recovery tool to get it back from its ‘hidden’ stage. To recover deleted Word documents or Excel documents from your Windows machine, we will be using Pandora Recovery.

Disk Drill can recover files that are kept under this layer of deleted files that haven’t been overwritten yet. Normally deleted files are first moved to the Recycle Bin which is easy to recover. But Disk Drill can help you recover the files that are no longer present even in Recycle Bin.
It is the latest recovery software from Panda Recovery with improved algorithms for deeper searching and better recovery methods. The tool can help you recover deleted files on Windows that are not only Microsoft Office documents, but it can also recover more than 300 different file types which include PDFs, TXT, XLS, ZIP, RAR, etc.
Disk Drill is made up of the latest algorithms and comes with an impressive filter tool which can help you narrow down the file that you want to recover. It’s a free data recovery software with a user-friendly interface.
Download and Installation
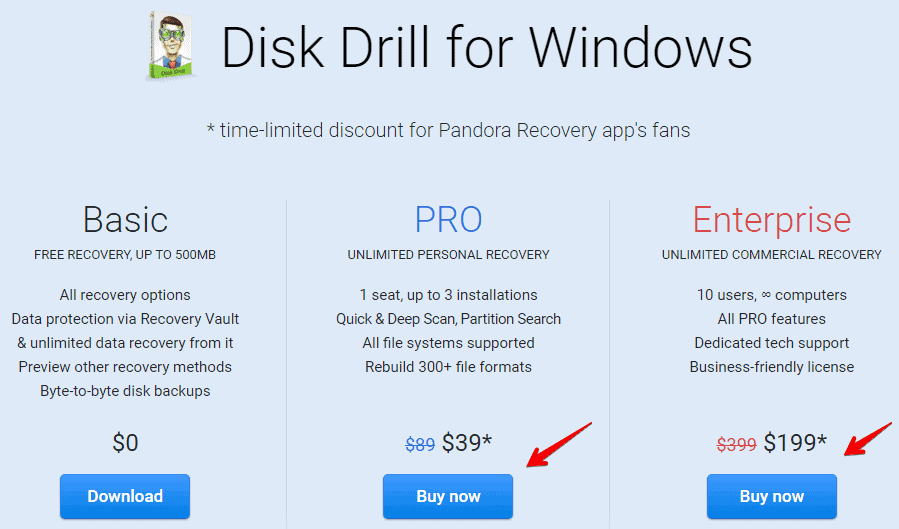
You can download Disk Drill by visiting their official website here. Disk Drill comes free with a recovery storage cap of 500 MB for the free version. This means you can only recover 500 MB of data in the free version.
There is a PRO version and Enterprise versions available which costs you 39$ and 199$ respectively. The PRO version is featured with unlimited file recovery along with added features like Quick & Deep Scan, Partition Search, etc.
After downloading Disk Drill, open the setup and follow the on-screen instructions to install the recovery software on your Windows computer. As soon as you finish the installation, double click on the shortcut icon on the desktop to open the software.
If you have downloaded the free version then you will be prompted with a message to upgrade to the PRO versions. You can skip this and click on Get Started to recover deleted files on Windows easily and securely.
Recovering Word and Excel Documents in Windows
So you accidentally deleted your important Word or Excel document right?
It can be the worst feeling in the world to have all your work to literally go down the drain. All the hours of editing, typing, researching just gone in an instant. But don’t worry, we have the solution.
Continue reading to know how you can recover deleted files on Windows without any hassle.
1. Open Disk Drill
Open Disk Drill and you will be greeted with a simple looking UI where you can see all the storage devices currently present on your computer including external storage drives. If you don’t know, Disk Drill can help you recover lost files from external sources too. This is an essential feature as most of the time you might save your Word and Excel file on portable devices like pen drive and SD cards to transfer and they might get formatted.
2. Select drive to scan
Select the storage device where you saved your documents. After carefully selecting the drive from where the Word or Excel file was deleted, click on the Recover button. Disk Drill will start recovering all deleted files present on the chosen storage.
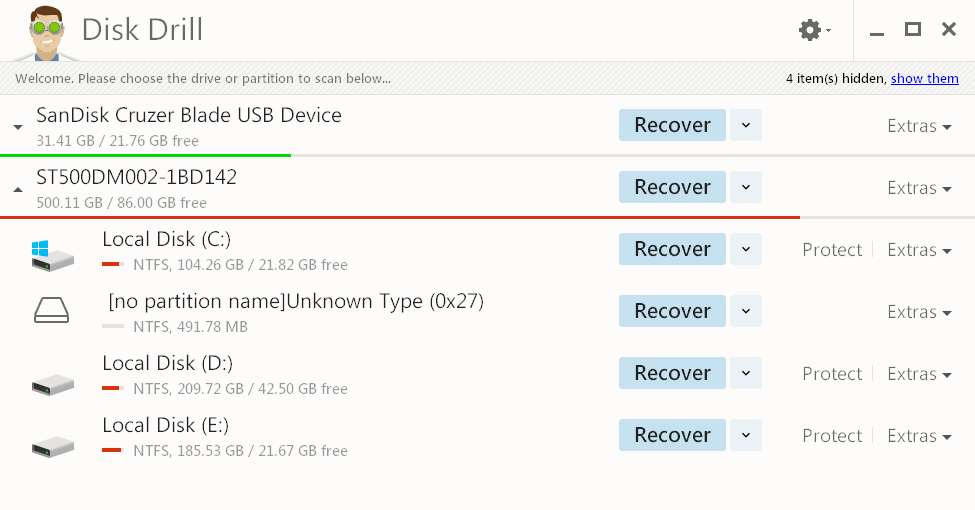
I had my documents deleted from the E drive, so I have selected it for the recovery process.
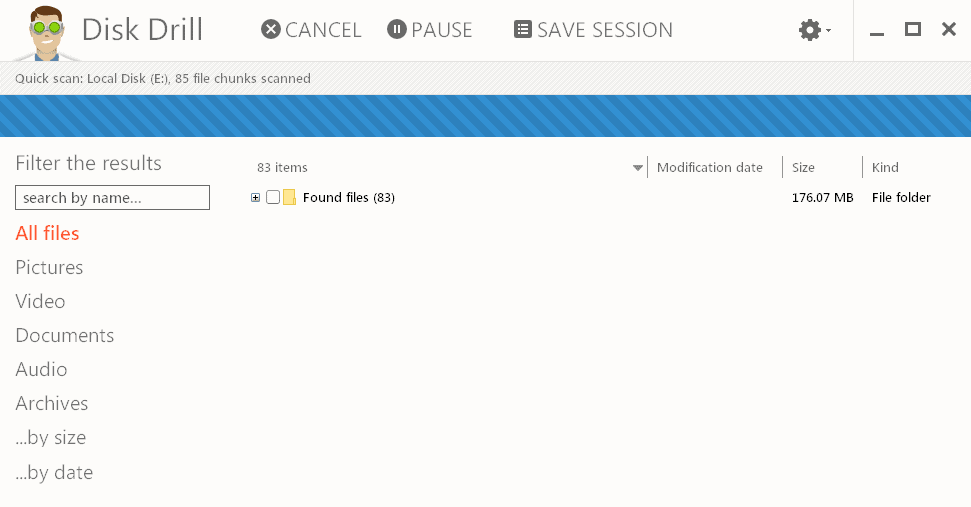
If the Microsoft office file was deleted recently, then Disk Drill will quickly show it under the Document section present on the left side of the screen. If the file was deleted a while ago, maybe 2-3 days before, then let Disk Drill take its time to finish the Scanning process.
3. Check Scan Results
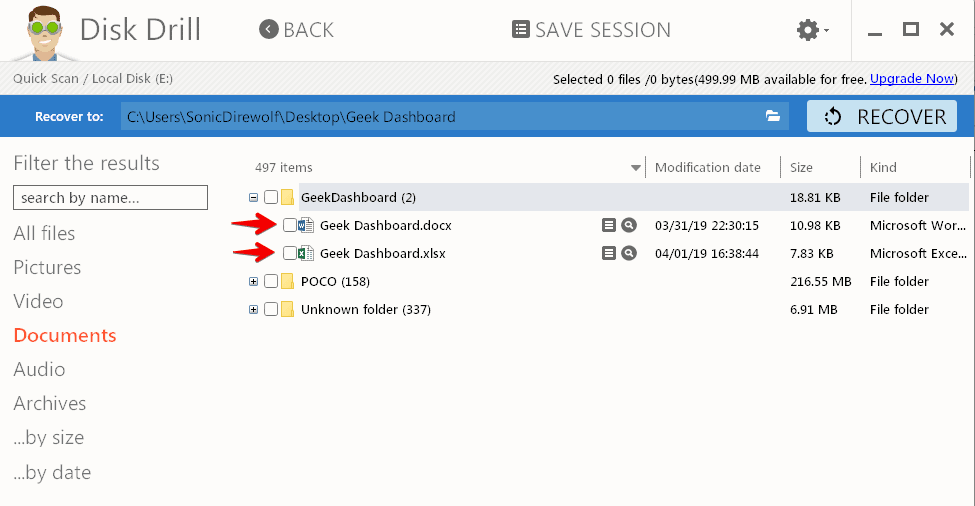
You will get a list of all the files and folders that were recovered after the scan is completed. Now on the left side of the screen, click on Documents to look for the document files that were found on the storage location that you selected in the previous step. Here you can find the specific file that you need. If you cannot find your file, use the search option to search for the lost file with its name.
4. Recovering Word and Excel Documents
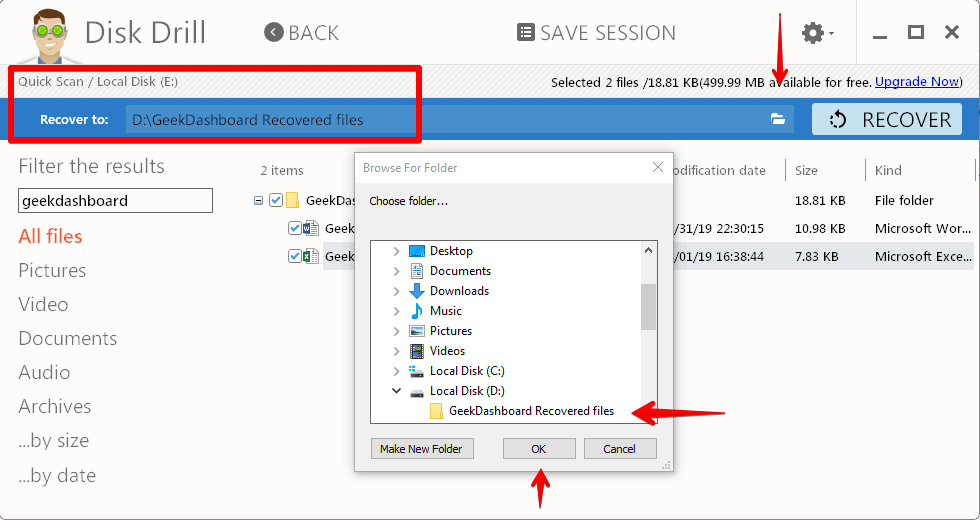
Once you find the deleted file(s), select it and verify the path in “Recover to:” field located at the top. This is the location where your file will be saved after recovering.
Always remember to recover your files to an entirely different drive or location to prevent overwriting of the original file.
To change the recovery path, click on the browse icon, and choose a different location to recover the deleted files. After selecting the path, click on Recover on the top left corner.
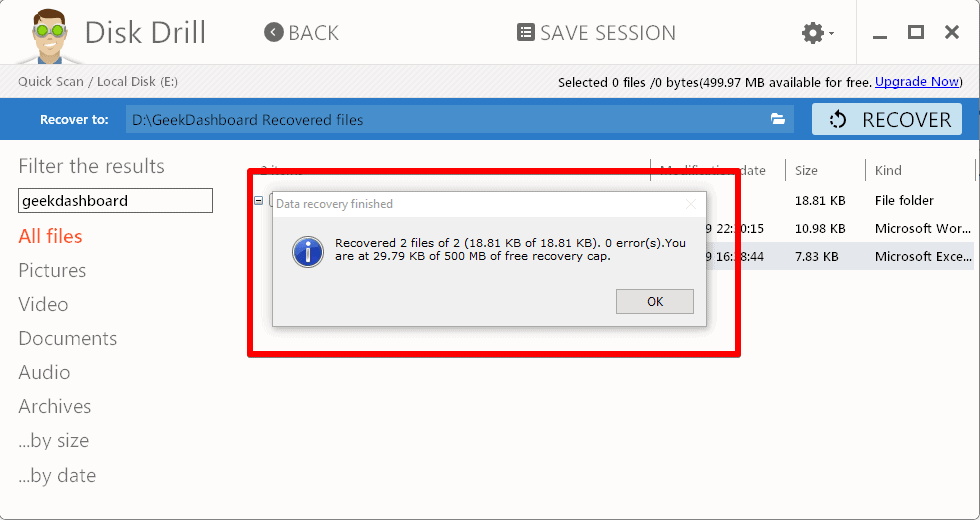
All selected file(s) will be recovered to the location you have chosen and wait until you see the Recovery successful dialog on the screen.
Some times after clicking on the Recover button, you might get a warning to change the recovery location to something different than the original location of the file. This warning might pop-up even though you have selected a totally different path. In such case, Just click on the Yes button to recover your files.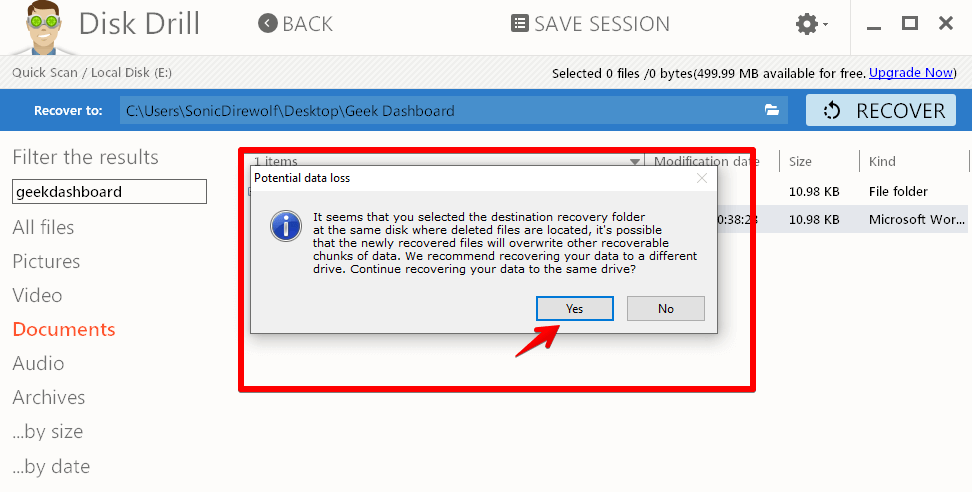
5. Open recovered Word or Excel File
Open the recovery location you have chosen to find the Word and Excel documents which are recovered successfully. Double click on them to open and check whether all your content still exists or not.

Congratulations! You have successfully recovered Word and Excel files in just a matter of minutes. Now you can sit back and relax knowing that all your work is safe.
Conclusion for Word and Excel Files Recovery in Windows
Always remember that you should not copy or move any files after you accidentally delete something that you wish to recover later. The best advice is to recover your file as soon as you delete it to prevent any overwrites.
Disk Drill comes with a workable 500 MB recoverable file size, which means you can get back up to 500 MB of files with the free version. If you are a casual user who wants to recover a few deleted files, then the free version will work absolutely perfect for you.
If you are a heavy user who works constantly with Word and Excel sheets, then I would recommend you to buy the premium version for unlimited recovery. All the countless hours spent on editing is worth every penny and you should definitely invest in the PRO version.
Were you able to successfully get back your lost file? Tell us in the comment section your experience with file recovery using Disk Drill.

Fantastic information, thanks.