The Xperia M4 Aqua is a popular mid-range Android Smartphone from Sony. The Sony Xperia M4 Aqua provides performance that is equivalent to most of the entry high-end Android Smartphones that too at a very competitive price point.
The hardware specs of the Sony Xperia M4 Aqua includes a 5 inch 720×1280 pixel display with a PPI of 294, a 1.5 GHz Snapdragon 615 processor, 2 GB of RAM, 13 MP primary camera, 5 MP secondary camera. The device is powered by a 2400 mAh battery and comes in either 8 or 16 GB of internal storage space. The device is also IP 68 certified for dust and waterproofing up to a depth of 1.5 meters for up to 30 minutes.
However, if you are not satisfied with the software performance on the Sony Xperia M4 Aqua, you always have the option to root your Sony Xperia M4 Aqua, flash a custom recovery and then finally install a custom ROM.
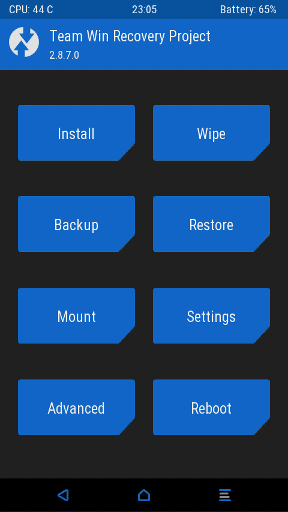
If you are in search of the perfect guide on how to install the TWRP custom recovery on your Sony Xperia M4 Aqua Android Smartphone, then below we bring you a well detailed yet simple to follow guide on how to install TWRP recovery on your Sony Xperia M4 Aqua Android Smartphone.

How to Install TWRP recovery on Sony Xperia M4 Aqua
Before you begin with the procedures to install TWRP recovery on your Sony Xperia M4, please do make sure that the device has been rooted, the battery is above 80% and all the necessary USB Drivers for Sony Xperia M4 Aqua has been installed on your Sony Xperia M4 Aqua.
Useful Links:
- Begin by downloading the TWRP recovery kit from here to your computer.
- Next, download the SuperSU pack from here to your PC.
And here is the detailed guide on how to install TWRP recovery on your Sony Xperia M4 Aqua.
- Power OFF your Sony Xperia M4 Aqua.
- Press and hold the Volume Down+Power keys of your Sony Xperia M4, once the Smartphone vibrates, press the Volume Down key multiple times. This will enter your Sony Xperia M4 Aqua to the bootloader mode.
- Connect your Smartphone to the PC using USB cable.
- From your PC, navigate to the folder where the TWRP recovery file has been stored. Rename the recovery file to “recovery.img“. On an empty space, click on the right mouse button and then choose the “Open Command Prompt Here“.
- In the Cmd window that appears, type in the command
Fastboot devicesand press Enter. Next type the commandfastboot flash recovery recovery.imgand press Enter. - Next, enter the command
adb rebootand hit Enter. - Disconnect your Sony Xperia M4 Aqua from the PC.
Finally, you have now successfully installed TWRP custom recovery on your Sony Xperia M4 Aqua successfully. Hope you found this article easy and helpful. Let us know if you face any problems while installing the custom recovery on Sony Xperia M4 Aqua.
