The Xperia E3 is a recently announced budget Android Smartphone by Sony and retails for around Rs. 9,000 in India.
The Sony Xperia E3 features a 4.5-inch shatterproof glass display with a screen resolution of 480×854 pixels that shows up to a PPI of 218. The device is powered by a 1.2 GHz Snapdragon 400 processor and 1 GB of RAM. The Xperia E3 runs on Android 4.4.2 KitKat operating system and features 4 GB of internal storage space. There is an option to increase the storage externally via a MicroSD card up to 32 GB. The primary camera unit provided in the device is of 5 MP resolution whereas there is also a secondary 0.3 MP camera unit for selfies and video calls. The Smartphone is powered by a 2330 mAh battery that is nonremovable.
If you own a Sony Xperia E3 already, and if you feel that the hardware specifications of the Xperia E3 are a bit outdated according to current standards, then you are not alone. However, you can try rooting your Xperia E3 and then flash a custom ROM of your choice. However, after rooting your Sony Xperia E3 and before flashing a custom ROM you will require to flash in a custom recovery.
And if you are in search for a guide on how to easily flash a custom recovery on your Sony Xperia E3 Android Smartphone, then you are at the right place as below we bring you a detailed how-to on the same.
How to flash the TWRP custom recovery on Sony Xperia E3 Android Smartphone

Below is the detailed guide that will take you through the processes required to install the TWRP custom recovery on your Sony Xperia E3 Android device:
- Download the TWRP file for Sony Xperia E3 from here.
- Navigate to the TWRP file you downloaded, click the right mouse button and then from the drop-down menu that appears, click the “Open cmd window here” option.
- Power OFF your Sony Xperia E3 and then boot it into the fastboot mode by pressing Volume Up+Power keys.
- Once the device has entered the Fastboot mode, connect it to your PC.
- And in the cmd window, type in the command “fastboot devices” and then type in the command “fastboot flash boot boot RECOVERY.img”. Replace RECOVERY with the name of the recovery image file that you downloaded and press Enter.
- Wait for the TWRP recovery to be installed on your Xperia E3.
- Once completed, your device will then reboot. Wait for the reboot to complete.
- Once the reboot completes, you can then disconnect your Sony Xperia E3 from the PC.
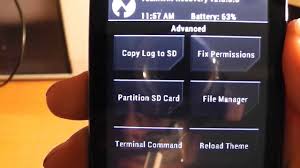
And viola! you have now successfully installed the TWRP recovery on your Sony Xperia E3 Android Smartphone.

#ASK Why i cant acces to my recovery, its frustrating and i dont know whyyyy!? can someone help me?
I am not getting the option to open CMD window,
Can I open it from run menu rather than by right clicking
Or can you send me the screenshot of CMD window with input in it
You just need to press and hold the Shift Key and then do the Right click. You will find the option “Open cmd window here”
#ASK
Can use to xperia e3 dual?
Thanks
No, you should not
Yes you can as you are downloading the twrp for D2212 which is Xperia we dual
Nice post very useful article thank you very much to provide me that information
You are absolutely on the spot, some very important topic you explained for the Xperia E users including me 🙂 i also have Xperia E.
Once again its a very useful write . Thanks.