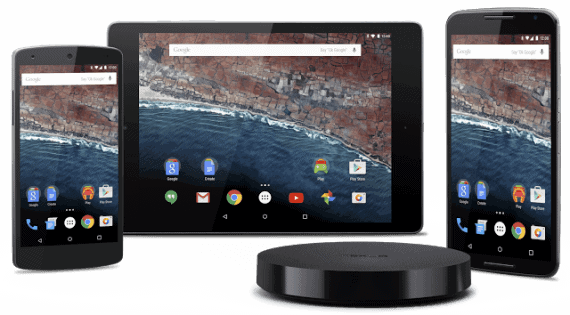
This is a sure shot guide to Install Android M Developer Preview on Nexus 5, Nexus 6 and Nexus 9. Google already announced Android M during it’s I/O 2015 and as promised, they made the Android M developer preview available for all Nexus devices. One best thing being a Nexus owner is, we’re the one who get the updates first. If you own a Nexus device and can’t wait to have your hands on Android M developer preview, then move on to know how to install Android M on any Nexus Devices.

What’s New in Android M on Google Nexus?
Well, It is always a best practice to know what you will get on Installing Android M on Nexus 5 or Nexus 6 or Nexus 9. Name of M is not yet disclosed and Android M follows the same material design introduced in Android Lollipop. Have a look at the new things that are being added to Android M 6.o
Volume Control
Now you can adjust volumes separately for Ringtones, Music Players, Alarms etc. This new update will really helpful to get control on various applications.
App Permissions
Till now we can’t manage the permissions of installed applications. But those days are gone, Google introduced the most awaited feature called App Permissions which enables you to block the access of certain things to applications. For example you can block Facebook app to access your gallery.
Improved Battery Life
Google worked hard to improve the battery life in Android M. They are working to make the battery life double. If they end with success, you can see awesome battery performance in Android M.
Today’s Special: How to improve Battery Life on Android Devices [10 Tips]
Check List to Install Android M developer preview on Nexus 5, Nexus 6 and Nexus 9
Before installing Android M developer preview on your Nexus device, make sure you are done with the following things.
- Your device bootloader must be already unlocked.
- It is not mandatory to root your device. But we suggest you to check our rooting guides if you have time.
- ADB and Fastboot must be installed on your computer and double check you have a basic knowledge on them.
- USB debugging must be enabled on your smartphone.
How to Update or Install Android M Developer Preview on Nexus Devices
If you are done with the above check list, you can now proceed to Install Android M on Nexus 5, Nexus 6 and Nexus 9. Please check the following warnings
Warnings
- Take complete backup of you Android device. This process will wipe all your data.
- Charge your batter at the least up to 50%.
- Follow this guide at your own risk.
Follow the below steps carefully else you will end bricking the device.
- First you should download Android M Developer preview for your Nexus Device from below links. Select your device carefully.
- Unzip the file contents to your desktop using WinZip or any other tool of your choice.
- Connect your Nexus Smartphone either to Windows or MAC OS with USB data cable.
- Navigate to your Android SDK directory and then to platform-tools. Open command window here. (Hold Shift and Right click)
- Run the following command and wait till your smartphone access bootloader.
- Windows Users:
adb reboot bootloader - MAC Users:
./adb reboot bootloader
- Windows Users:
- Go to extracted folder (in step 2) and open command window (hold sift -> Right click -> open command window here)
- This is the final step, run the follow command and keep your patience. Your Nexus Smartphone will boot normally with Android M developer preview installed in few minutes.
- Windows Users:
flash-all - MAC Users:
./flash-all
- Windows Users:
Conclusion
That’s all folks, Set up device as a new one and keep enjoying Android M Developer preview on Nexus Smartphone. Let us know how it went and your experience with Android M on Nexus device.
