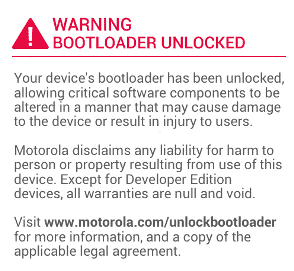
Hello Moto users, if you’re using your all new Moto G3 : The latest edition of Moto G, and want to take over full control on your phone, then this is for you. A guide for those who want to gear up their Moto experience by unlocking the bootloader, Rooting and by Installing a custom ROM or Recovery. But I have to warn you in the beginning itself, that this will VOID your WARRANTY! Do this only if you’re okay with it. However, for whatever might happen to your device, we do not take any responsibility for it. In this guide you get clear steps on how to unlock the bootloader in Moto G 2105 (3rd gen), Rooting and installing custom recovery.

Coming back to the topic, why do you want to root? Well, there might be many reasons. To get the best out of a smartphone, you’ll obvioulsly have to root the device first. And yeah, you might also be a nerd 😉
Device: So far the device is working like a charm and probably the best phone at $200 price range. The benchmarks are good and speed is upto the par I can say. When it comes to the hardware and software integrity, there is a good synchronization because this device managed to play Asphalt game flawlessly without heating like a hot fudge cake.
Check the complete features and specifications of Moto G 3rd Gen
Why Do I Need To Unlock Bootloader In Moto G3?
Though you get a good device out of the box with a decent hardware inside, you’re restricted to use it to the fullest. This is done in most of the Android devices just to restrict the users to modify or alter their operating system. If you’re are heavy user of your device and are finding a way to tinker it a bit, Motorola will never stop you. Here is the official link to unlock the Bootloader of your Moto G 3rd gen.

If you have a Motorola account then simply sign-in else you can sign-in through Google by the option below. Now this will lead to the device unlocking page with a step-wise guide. Carefully follow the steps displayed on your screen. To know if your device is unlocked successfully or not, dail *#*#4636#*#* and check in Service info> Configuration.
To know more in detail about unlocking Bootloader of Moto G3, follow this link or watch the video.
Why Root Moto G3 (2015)? How It Makes Sense?
In linux, Root is a core folder in the file system. Similarly in Android: which is based on Linux, some applications demands the need to access this root folder. There are many applications available in the play store that requires some additional privileges to run them. By rooting you’ll get superuser privileges to run any applications of this kind. Few of those applications are used to overclock or underclock the speed of the CPU, changing the firmware and removing the bloatware software’s that are built-in with your device.
Before rooting Moto G3
- Charge your phone at the least to 50% (Batter saving tips)
- Backup all important data like apps, messages, Images etc.
- I repeat, it void warranty unless you unroot it again.
Follow these steps to get Root access in Moto G 2015 (3rd Gen)
Step 1: Download UPDATE-SuperSU-v2.46.zip and copy it to your mobile.
Step 2: Switch off the device and turn it ON by holding Volume Down and Power buttons and then Press Volume down again to highlight Recovery Mode and press Volume Up to select it.
Step 3: You will see an open stomach Android. Now press Volume down and Volume top buttons together and Press Power button.
Step 4: From the available options, move to “Install Zip from SDcard” and press power button to select it.
Step 5: Select UPDATE-SuperSU-v2.46.zip from the list and rooting process will begun.
Step 6: This might take few seconds and when it is done, choose “Reboot Now”.
Step 7: Now you should see “SuperSU” installed on your device which means you got the root access.
Installing A Custom Recovery in Moto G3
Recovery in Android is just like a BIOS or Command Mode in Computer. There are many custom recoveries developed by the developers but the device comes with a factory based Stock Recovery. Again in the Stock recovery, the options are limited. So, inorder to get extra options like erasing “Dalvik Cache” etc. and for better user interface you can install TWRP(Team Win Recovery Project) recovery by replacing the Stock Recovery. This can be done as a temporary change or a permanent change. Firstly download the files required form here. But make sure that you have rooted your device and unlocked it successfully before trying out this, else this won’t work out.
Steps to install Custom Recovery(TWRP)
Step 1: Switch off the device and turn on by pressing Volume Down and Power buttons for 3 secs.
Step 2: Now connect the device to the computer.
Step 3: Open Command prompt at the location where downloaded file is present. (Just Right click while holding shift and select open command window here)
Step 4: Now, for applying the TWRP permanently type this command:
fastboot flash recovery twrp-osprey-2.8.7-test1.img
For applying temporarily for single boot:
fastboot boot twrp-osprey-2.8.7-test1.img
Step 5: When you reboot to Custom recovery same like how you entered into Stock recovery before, you should see your device running TWRP recovery.
In case you have any doubt while unlocking bootloader or rooting Moto G3, comment below. We’ll try our best to help you out immediately.

