Remix OS created a lot of buzz during the last few days and many Android lovers like me tried to install it on their computers. Most of the articles on the internet show installing Remix OS using a USB stick and dual boot along with your existing OS. Following this method, you need to boot the OS from a USB drive every time and you can’t work with your default OS simultaneously. So, we came up with an article that shows how to install Remix OS on VirtualBox and use it along with the existing OS.
I tried the Remix OS virtually on both Windows 10 and Windows 7 and it worked pretty well. We’re now installing Remix OS virtually using VM VirtualBox. This method of installing Remix OS on VirtualBox will work on Windows, MAC, and Linux and you can use both operating systems at the same time.

Install Remix OS on VirtualBox – Step by Step Guide
We are dividing this tutorial into 3 parts for a better understanding
- Installing VM VirtualBox on your machine.
- Creating the virtual machine for Remix OS.
- Installing Remix OS using ISO file on the virtual machine.
Step 1: Install VM VirtualBox on your Computer/Laptop
In order to install Remix OS virtually, we must have a tool that can create a virtual machine in our device. We recommend you to use VM VirtualBox since it is easy to use and free of cost.
You must start by downloading VM VirtualBox software (Click here to download VirtualBox). It is available for Windows, OS X, Linux, and Solaris.
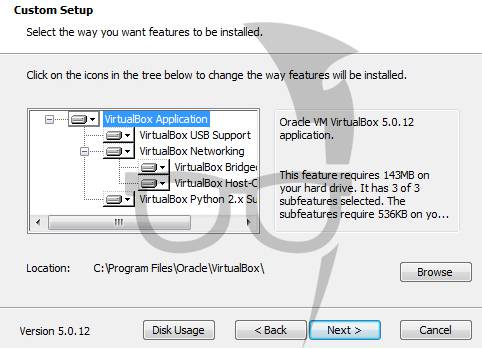
Double-click the downloaded file and follow the on-screen instructions to complete the installation process. If you want to change the default location to install the VirtualBox, click on Browse.
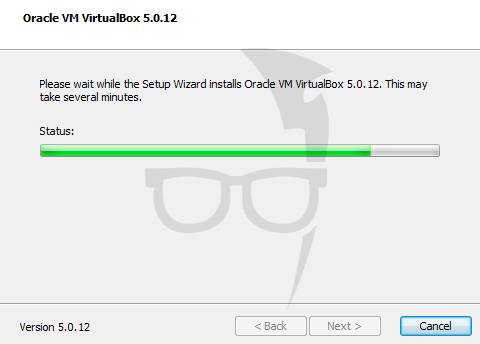
Click Next to begin the VirtualBox installation process and wait till it completes.
Tick “Start Oracle VM VirtualBox” and click Finish.
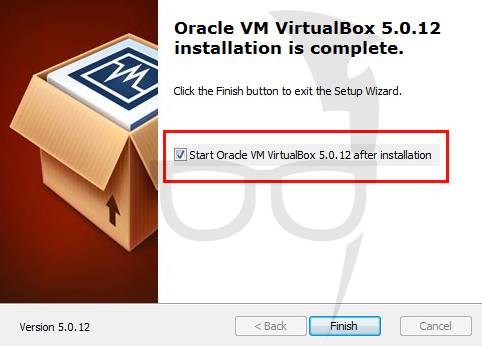
You have successfully completed installing VirtualBox on your device. Using this tool, we’ll create a virtual machine to run different operating systems simultaneously.
Special note:
VirtualBox needs to install few device software’s to complete the installation. Whenever you see such pop-up’s during the installation process, simply click “Install”

Step 2: Create Virtual Machine using VirtualBox
Now it’s time for Step 2. We’ll create a virtual machine in this step which is a very crucial and important step. Follow the instructions carefully.
In Oracle VM VirtualBox, you will see “New” located at the extreme top left corner. Click on it to create a virtual machine.

You should give a name to your virtual machine and for convenience, we named it Remix OS. Select type as Linux and Version as Other Linux (64-bit)
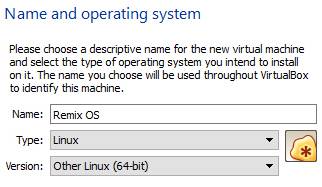
| Name | Remix OS |
| Type | Linux |
| Version | Linux (64-bit) |
| If you’re using a 32-bit operating system, you won’t get Linux (64-Bit) option in the drop-down list. To fix this issue, follow the instructions in this link. | |
|---|---|
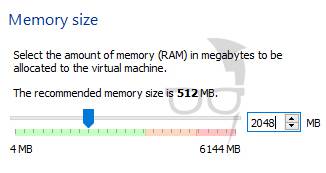
Allocate at least 1 GB of RAM for your virtual machine. The more RAM you allocate, the smoother Remix OS performs. If your device is running on 1 GB of RAM, allocate 512 MB.
The simple rule is to allocate a minimum of 40% of total RAM. I’m using 6 GB of RAM and allocated 2 GB for Remix OS.
Tip: 1 GB = 1024 MB
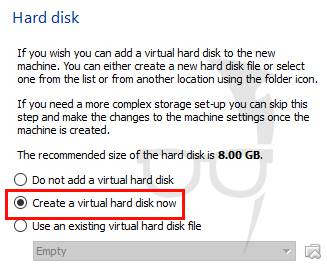
Next select “Create a virtual hard disk now” we’ll add ISO file later.
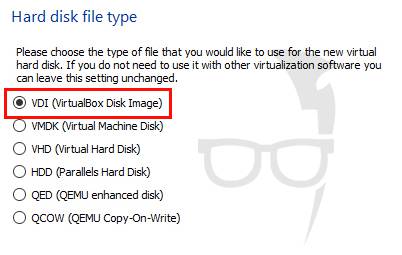
In Hard disk file type, select “VDI (VirtualBox Disk Image)
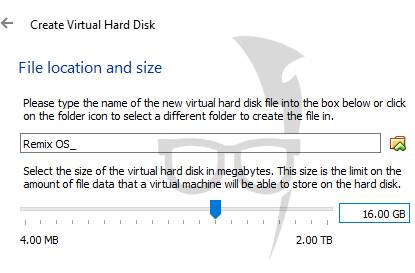
In “Storage on physical hard disk”, select “Dynamically allocated”

This is the last step to create a virtual machine. You should assign 16 GB of hard disk space to this virtual machine and click Create.
Done with one more step. Your virtual machine is ready and the only thing left is running Remix OS in it using an ISO file.
Step 3: Run Remix OS using ISO file [Download link Provided]
You will see the newly created virtual machine with the name “Remix OS”. Before running Remix OS in it, you need to download Remix OS ISO file. Below is the official link to the ISO file of Remix OS.
Unzip the downloaded file and you’ll see these 3 files. We only need the middle file (iso file). You can ignore “How to Launch Remix OS for PC.txt” and “remixos-usb-tool.exe”

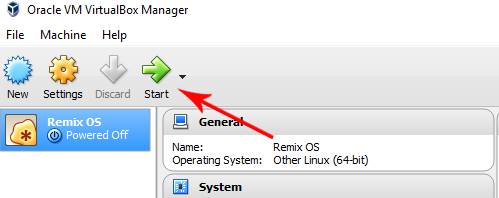
In VM VirtualBox, Left click “Remix OS” in the left side panel and click “Start” at the top.
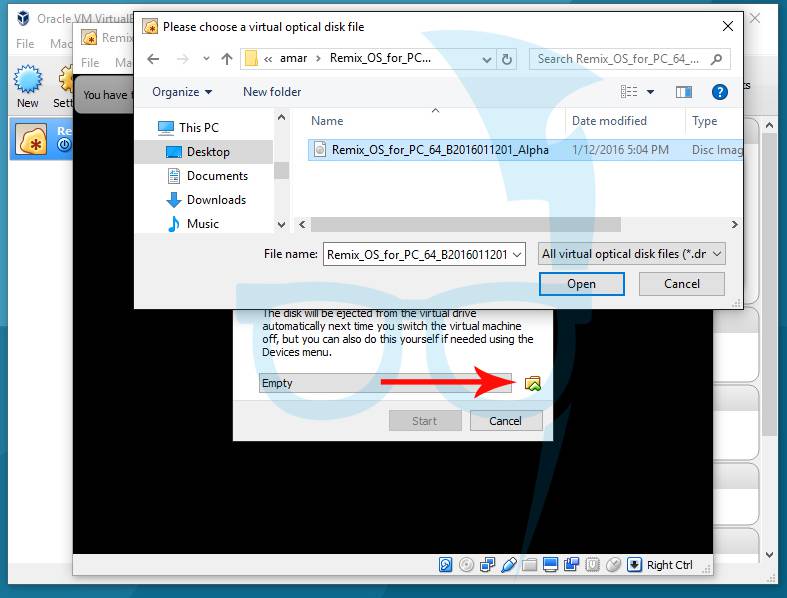
Click the folder icon and browse the extracted .iso file. Click Open.
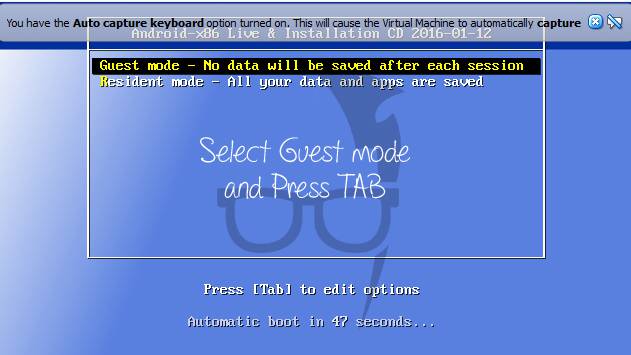
Remix OS will start now. Select “Guest Mode” and click “Tab“. (Resident mode is not working in some devices)
Remix OS will start booting and you need to immediately type the following code using your keyboard and press “Enter”. (Please note the <space> between “DATA_IN_MEM=1” and “vga=791”.)
vga=791
vga=791 says we are booting in 1024×768 resolution with 65000 colors.

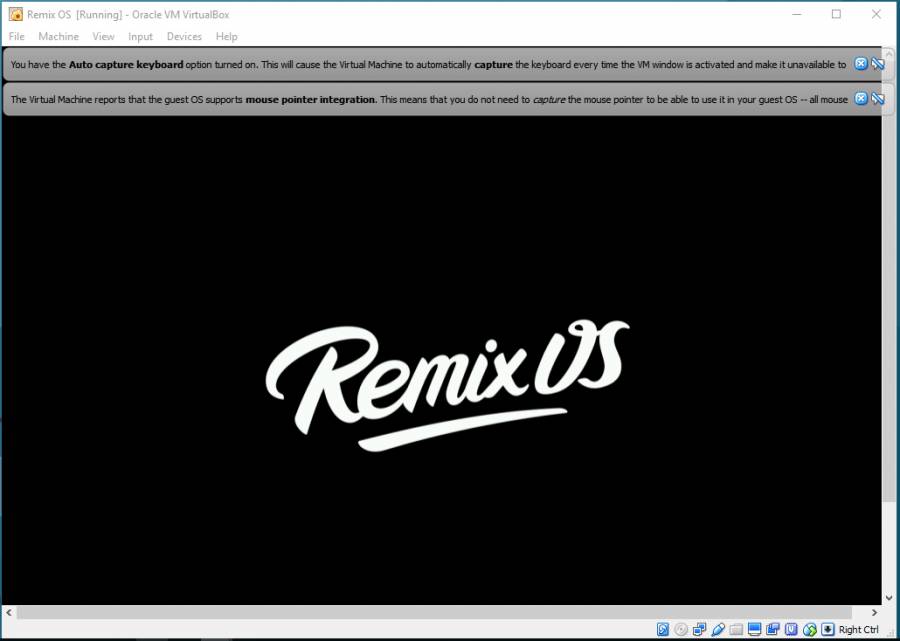
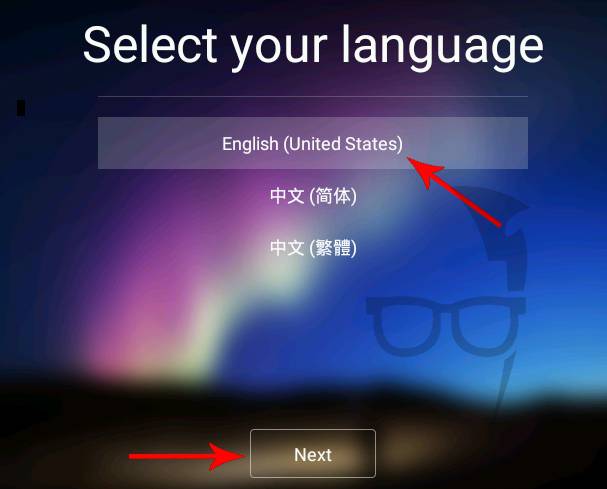
Wait till Remix OS loads. Please be patient, it takes some time depending on your allocated RAM in step 2.
Once it completed loading, select language as “English (United States)” and enjoy Remix OS on the virtual machine along with your existing OS.
Mouse Integration
To integrate the mouse with Remix OS, Click “Input” and select “Mouse Integration“.
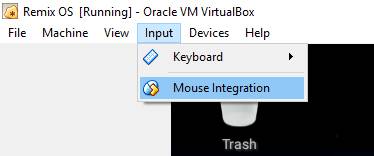
Tip: Use host keys (right ctrl + C) or ctrl+alt to get your mouse pointer out of VM VirtualBox.
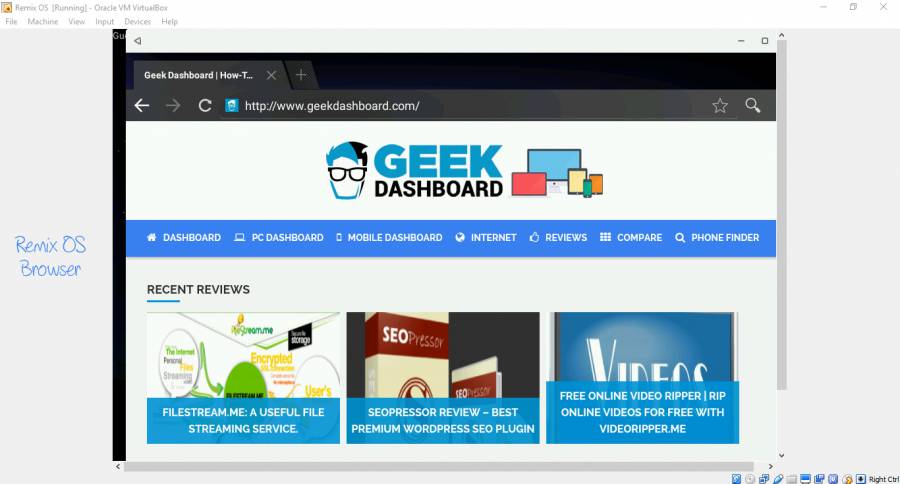
Remix OS on VirtualBox Screenshots
Hope you like this tutorial on installing Remix OS on VirtualBox. Let us know if you have any questions.
Thx
I tried this same process but in VMWare Workstation Player. It prompts me to install VMWare Tools for FreeBSD and I have the ISO to do so, but when I boot into RemixOS there is no option for accessing the CD drive (either physical or virtual). Will I be missing any functionality in RemixOS running it without the VMWare tools installed?
Help i cant write “=” in the step where i need to write vga=791
Once Remix OS is booted from the selected ISO files, you need to select the “Guest Mode” and Click “TAB” key.
After clicking the TAB key, you can type vga=791
In case if you are unable to type “=”, then make sure to turn off the CAPS LOCK.
I usually typing ì on italian keyboard.
Como activo y configuro wifi en remix dentro de Virtual Box??
You can use computer connnection.
This is automatically loaded at startup.
in place of vga=791 for a 1024*768 resolution what can i type for a 1024*600 resolution,the system is crushing? please help.
Nope, doesn’t work. All RemixOS **EVER** does is sit at the logo, and it never goes any further. It has been this way in EVERY version I’ve tried. Does this OS even function at all??? I seriously doubt it.
change the chipset
Install and Configure Gparted first
GPT?
Hello, thanks everyone for information,
But for me it says (Fatal : could not read from the boot medium! system halted.)
Can anyone help me please.
I followed all the steps.
Show YouTube tutorials on VirtualBox.
command not working INSTALL=0, and vgs=791 both
it´s working now. thank you.
Installing Remix OS in Virtual Box (definitive version/resident)
1- Download Remix OS : http://www.jide.com/remixos-for-pc
2- Extract the downloaded files
3- Create a new VM
Memory: 1024mb (minimum)/2048 or more (recommended)
Storage: 8gb or more
4- Start VM with the Remix OS ISO
5- Press TAB key on resident mode > press (space) and add ( INSTALL=0) “Capital Letters” > Enter
6- Create/Modify partitions > Do you want to use GPT (No) GPL (No) > New > Primary > Choose all size you make for virtual > Bootable > Write (yes) > Quit
7- First line (sda1) > OK > ext4 or fat32 > Format (Yes) > GRUB (Yes) > Do you want to install EFI GRUB2 (Skip) > System read-write (Yes) > Run OK ( some differences option may see on different operation system you will choose)
8- To make mouse work go to Input > Mouse Integration ( remove it )
9- After reboot you will not be able to start before you remove the CD from Remix OS setting, Right click on Remix OS virtual disc Settings… > Storage > Remove by right click on Remix_OS > Remove > OK
Original post:
http://forum.xda-developers.com/remix/remix-os/install-remix-os-parallels-vm-t3328973
Wow, one step I was missing to make this install and work perfectly was step 5 !!
5- Press TAB key on resident mode > press (space) and add ( INSTALL=0) “Capital Letters” > Enter
After that everything worked like a champ!!!!!
My audio was a little choppy but changing from PulseAudio to ALSA fixed that problem. After working on getting this to run as an installed application on VirtualBox + Linux Lite 2.8 (Ubuntu 14.04 LTS) it’s finally flying!
Thanks for your post!
Regards, Tenderfoot56
You’re welcome. Keep Visiting.
To Install RemixOS 3.0 on a Virtual Box Machine and run as Permanent install from a Hard Drive, I had to run the following steps above with only one change.
Step 5- Press TAB key on resident mode > press (space) and add ( INSTALL=1) “Capital Letters” > Enter
(Notice That the ZERO was replaced with a ONE to get Version 3.0 Installed just like Version 2.0.
Hope this helps others trying to install !!!
The software runs pretty well, but after enabling the google play store and installing or updating to the latest version of Youtube Player, the audio and video either run super fast with choppy video and audio or run very slow with choppy or no audio. Only a full delete and a fresh install will fix it.
Also, if the Sleep timer in RemixOS 3 is enabled, I cannot find any way to get the machine to wake up again using Virtual Box. I have to shut it down and restart it to get it to work again. It does seem to be a little more stable than 2.0, but still not ready for prime time as I’m sure may folks use the Youtube Player application a lot, so this really must be fixed.
Changing from PulseAudio to ALSA gave me good audio in all application until Google Updated the Youtube Player application via the play store, then youtube went crazy as described above.
After working on getting this to run as an installed application on VirtualBox + Linux Lite 2.8 (Ubuntu 14.04 LTS) it’s finally flying!
Thanks for your post!
Regards, Tenderfoot56
I installed the 32bit version of remix os, beta version (march 1, 2016) successfully as VM under linux. However, I had to boot it in the guest mode, otherwise the 32bit version would not boot!
some open questions:
google playstore not present (and cannot easily installed in the guest mode because restart is required!),
storage available for installation of apps is only 500MB in my installation, and the storage is largely filled by the pre – installed apps.
At present, at least the 32 bit version of remix os, as VM, is not useful for me. I will stick with android-x86, versions 4.4 or 5.1.
i am also tried. but my os not open. it still remix os window
This does not work with the lastest Beta release… Remix_OS_for_PC_64bit_B2016040501.iso as @vinoth said above it gets stuck just displaying the Remix logo on the window forever, it never boots past that.