Page numbers have been an essential part of documents, whether it is formal or informal documents in Word. While being an essential thing, it isn’t easy to use it on Microsoft Word. While numbering the page numbers is one good break, deleting page numbers is another task.
But you need not worry about it.
This guide aims to deliver the solution to the same problem and the ones related to it. The guide will show you how to delete the page number from the first page in a word document.
Before that, we will also show you how to insert page numbers in Word. Also, we will guide you through the process of how to delete the page number from a specific page in Word. Furthermore, we will cover how to iterate page numbers as well.
Without any further ado, let’s jump right in!
How to Insert Page Numbers in Word
Inserting page numbers is a fairly easy task to start with, and you wouldn’t need to take much stress in the first place.
Here’s how to add page numbers in a Word document:
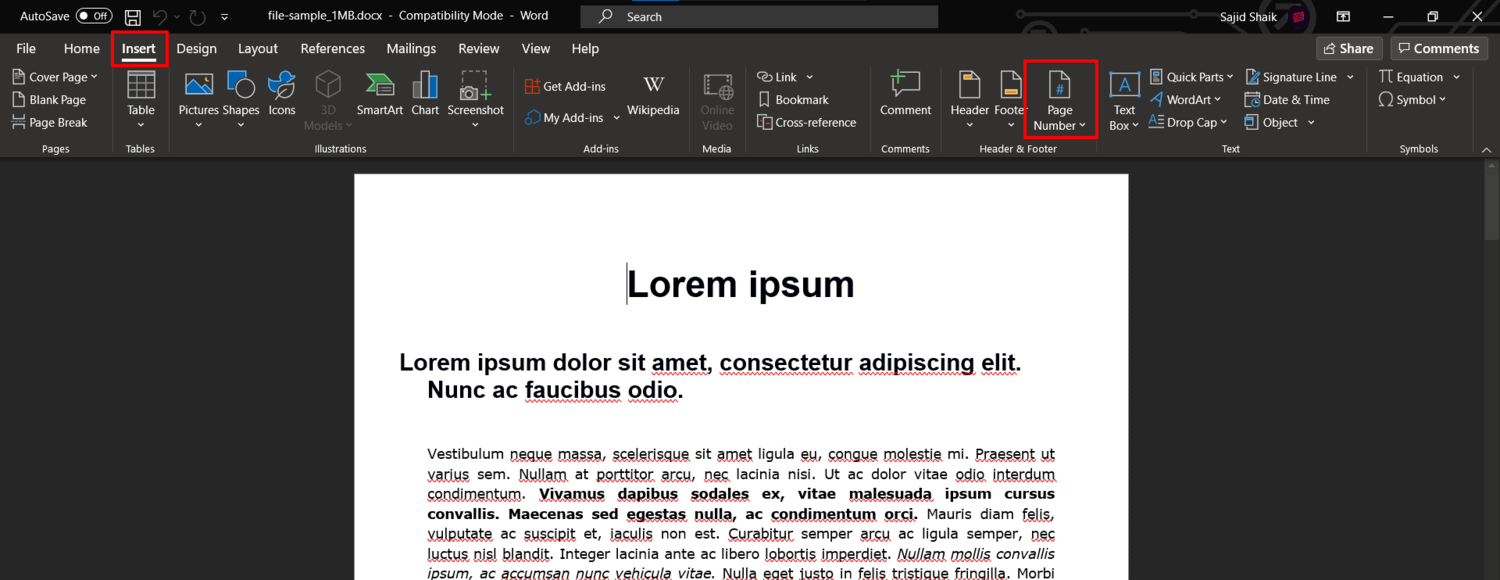
- Click on Insert from the tabs above the ribbon.
- Then select Page numbers from the ribbon menu.
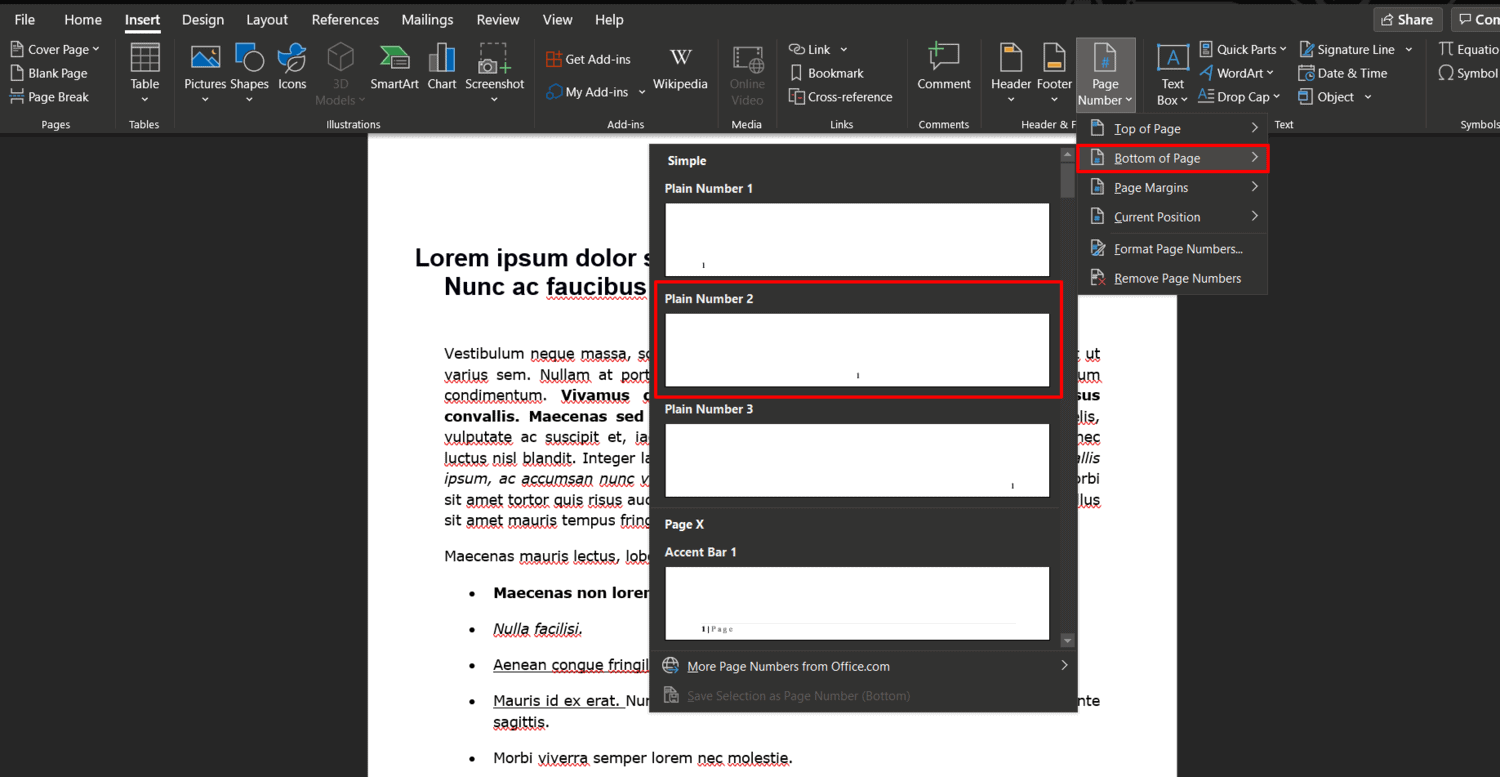
- Choose the format you’d like and click on that. In this example, we’ll go with the bottom layout.
- Click on the “Close Header and Footer” option in the ribbon menu.
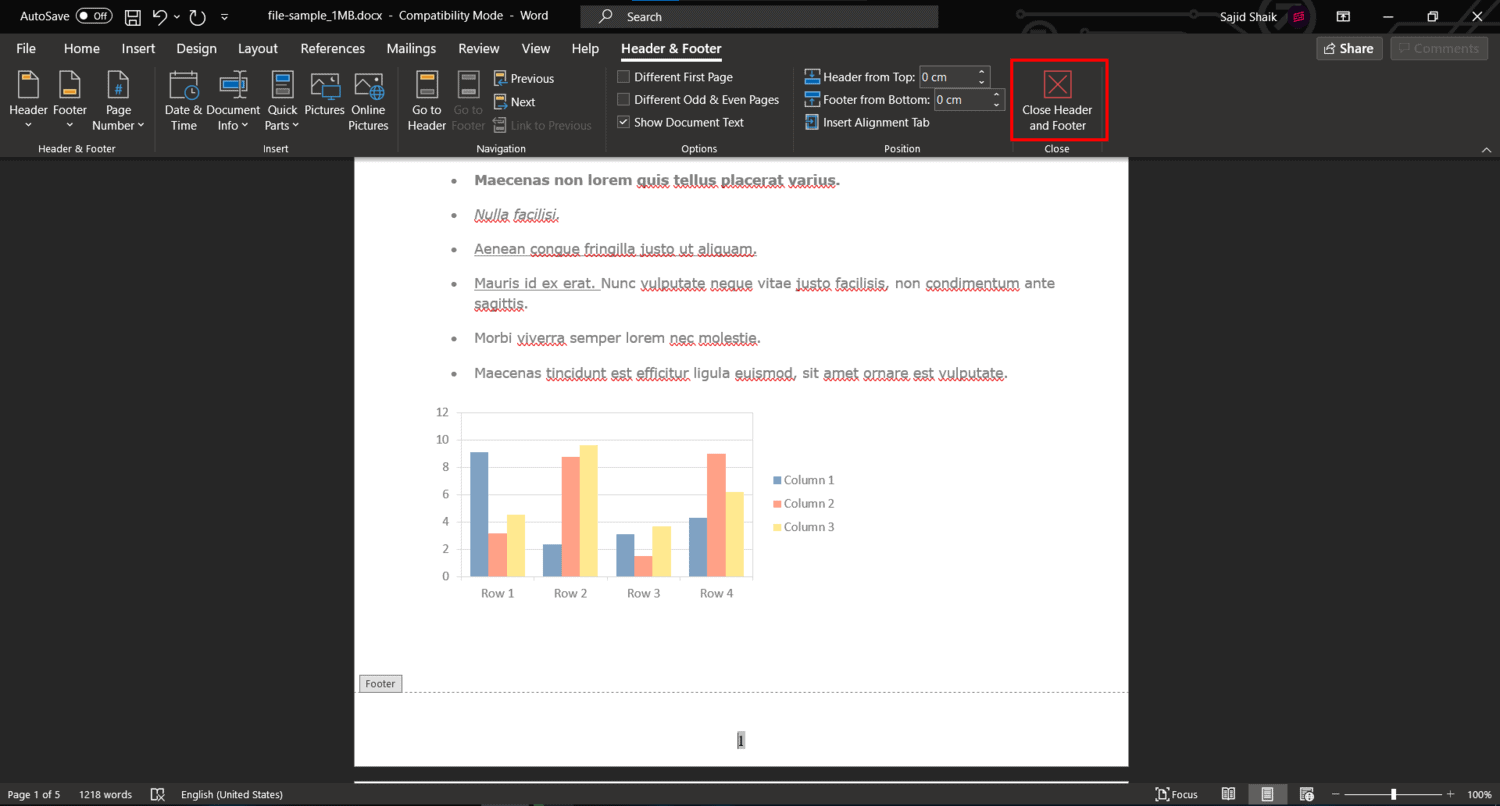
This is how you can insert page numbers in Word with ease. But you’re probably not here for that. Let’s get straight into the other things like deleting the page numbers.
Also Read: 2 Simple Ways for Downloading Windows 7 ISO File Safely, Legally and Officially
How to Delete the Page Number from First Page in Word
While insertion of pages was quite easy, you might want to get rid of the first-page number in Word. It’s a little complicated, but we’ll make it easy for you.
In our example, we have a page starting with page number 1. So we’ll delete it, and continue with 2 on the second page.
Here’s how to delete the page number from the first page in a Word document:
- If you have page numbers on the Footer, right-click on the footer of the first page. If you have the page numbers on the Header, then right-click on the header of the first page.
- Click on Edit Footer/Edit Header depending upon the placement of your page numbers.
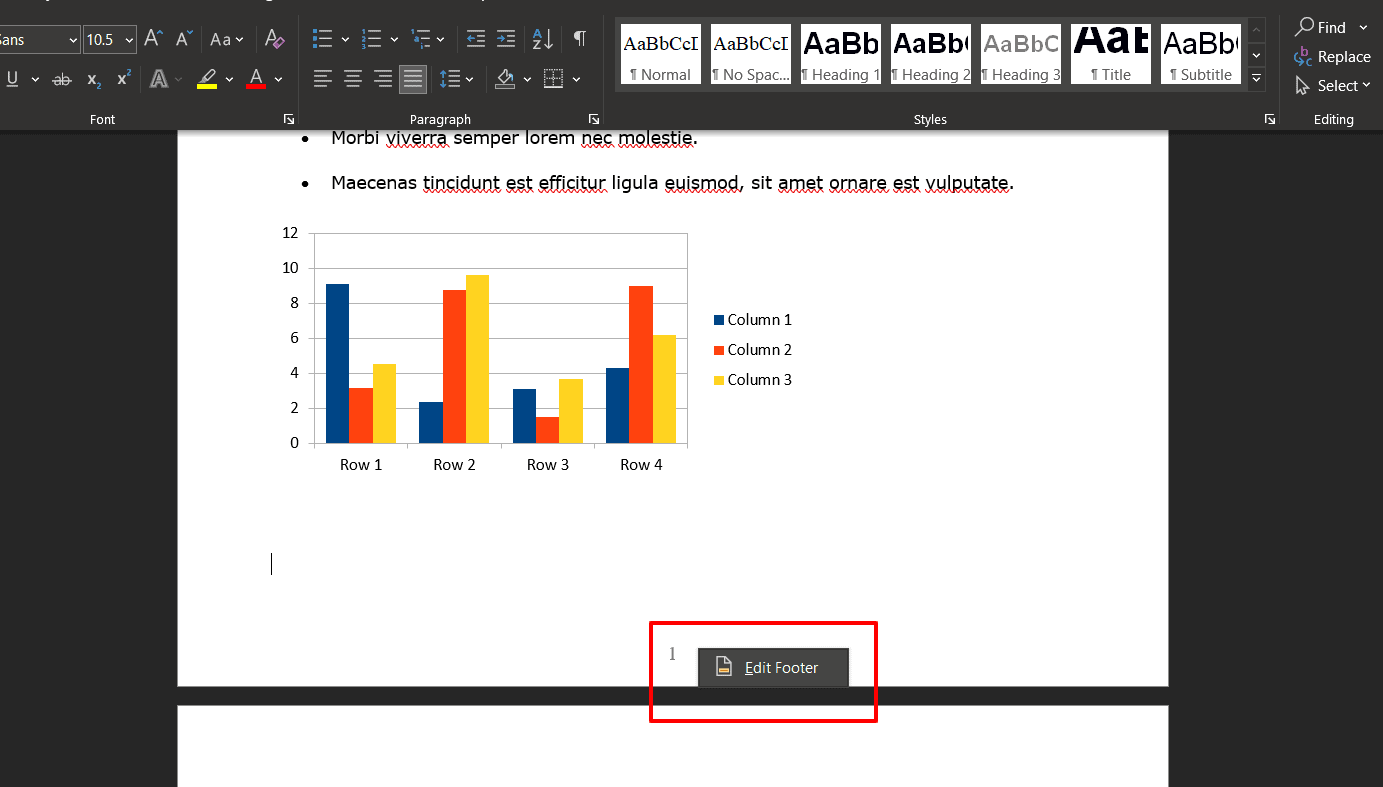
- Select the first page number of your document. In our case, it is “1” on the first page.
- Check the “Different First Page” option present on the Ribbon menu.
- Once done, click on the “Close Header and Footer” option.
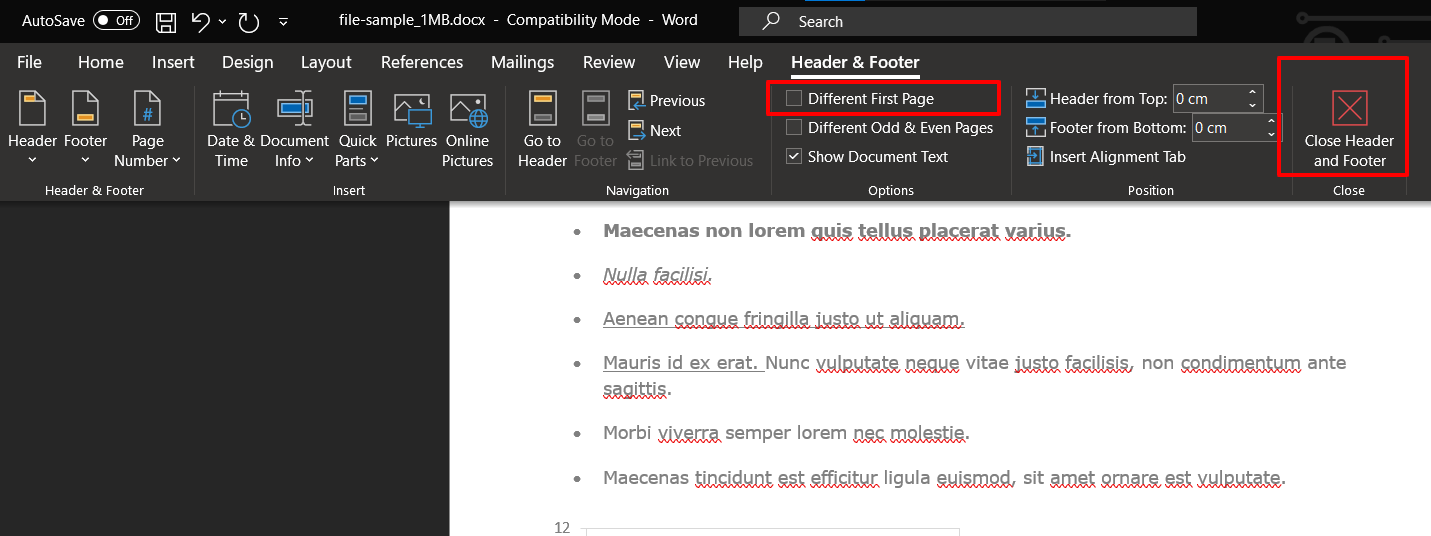
That’s it! The page number from the first page will be gone and you’ll see the numbering starts from the second page with the next number i.e. 2.
Also Read: How to Convert Microsoft Excel Spreadsheet (XLS) to Google Sheets
How to Delete Page Number from Any Page in Word
If removing page numbers from the first page wasn’t your goal, then we’ve got more for you. Let’s say you want to delete the page number from a certain page, then here’s how to do it.
- Open the document and head to the page, whose page number you would like to delete. In this example, it is page number 4.
- Move your cursor to the end of the previous page. In our case, we go to page number 3.
- Now go to the Layout tab in the Ribbon menu.
- Select the Breaks from the options, and choose the Next Page option from the drop-down menu.
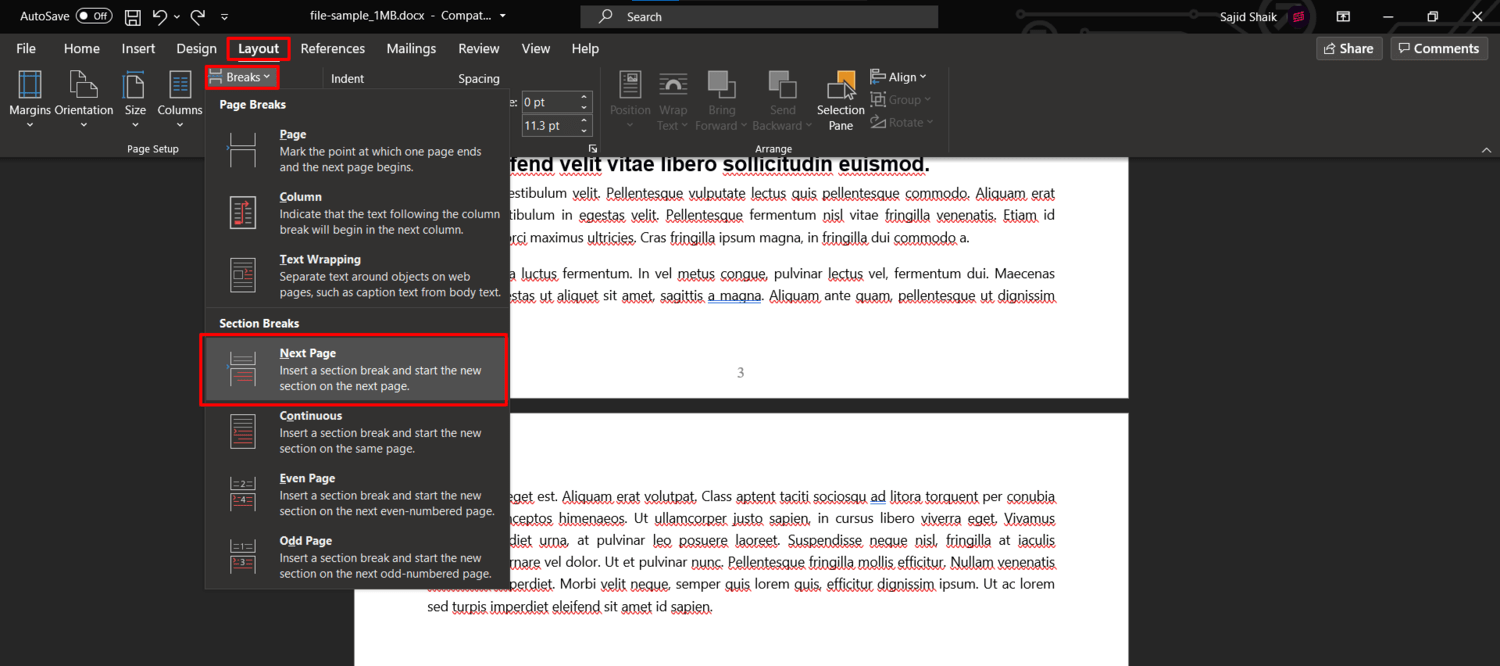
- Now, head over to the page number you want to delete. In our case, it is page number 4. And double-click the Footer/Header based on your page number’s position.
- Then click on the Link to Previous option in the Ribbon menu.
- Select the page number, which is 4 in our case, and press the Backspace key. You might need to press it multiple times until it gets deleted.
- Click the Close Header and Footer option at the end.
- Now click on the top of the next page — the page after the deleted page number one. Then select the Insert tab in the Ribbon menu.
- Click on Page Numbers, and select the same layout as you did with the whole document. We’ll be selecting Bottom of Page > Plain Number 2 in our example.
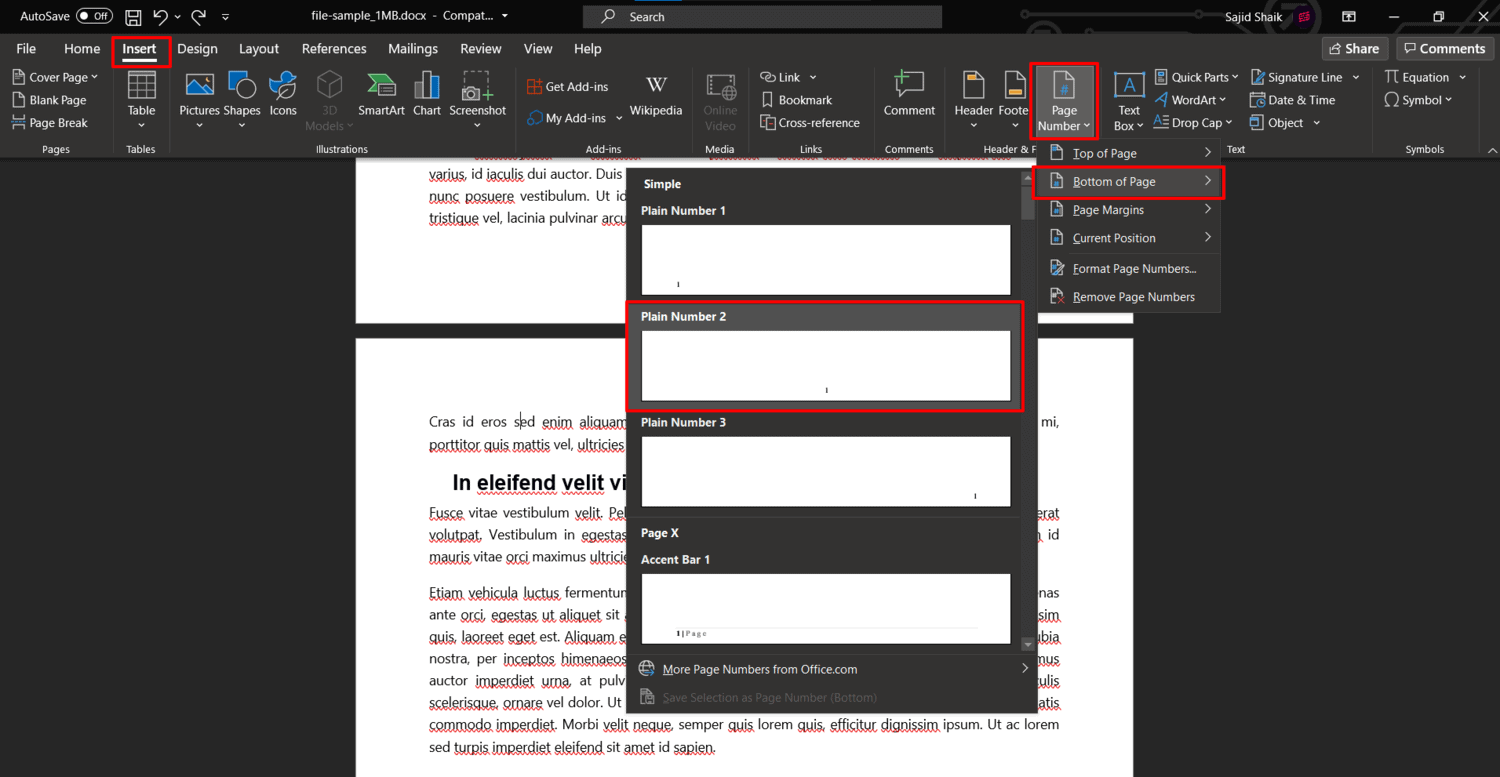
- Click on the next page again, and select the Different First Page option from the menu.
- In the end, click on the Close Header and Footer option.
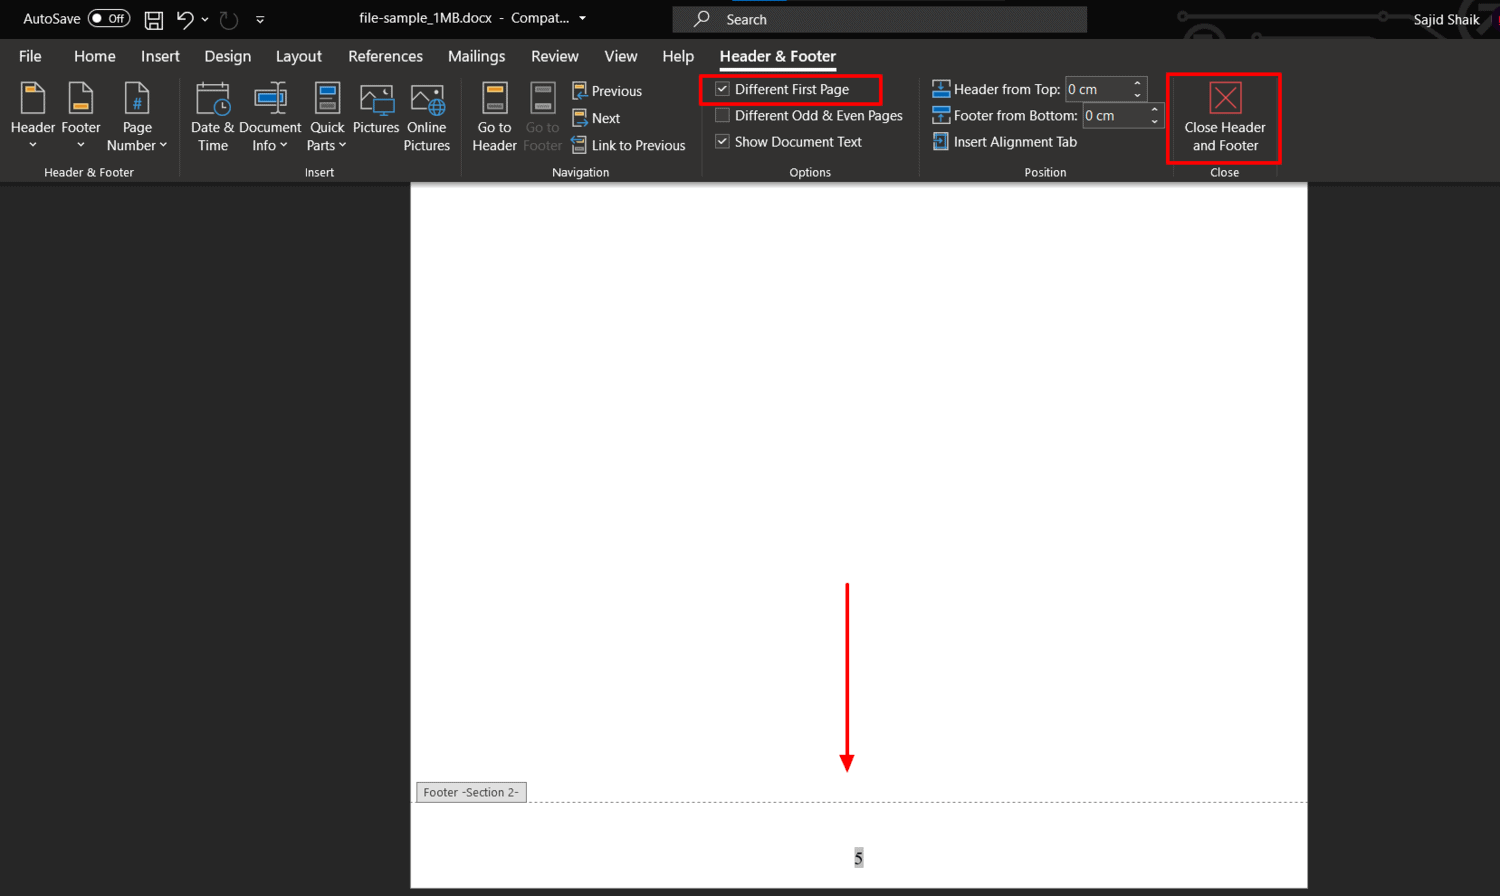
And that’s it, you’ve successfully deleted a page number from your document. Deleting a page specific number is a little more complex than deleting the first page number of any document in Word.
Also Read: How To Merge Columns in Microsoft Excel Without Data Loss
How to Change the Numbering of Page Numbers in Word
Changing or altering the numbering on pages is quite easy and straightforward. To change the numbering on any page in Word, here are the steps you need to follow.
- Open the document with page numbers already inserted.
- Double-click on the page number and select the number. Alternatively, you can right-click on the page number and select the Edit Footer/Header based on the option shown. Also, make sure to enter the number in front of the present number to see the change on other page numbers.
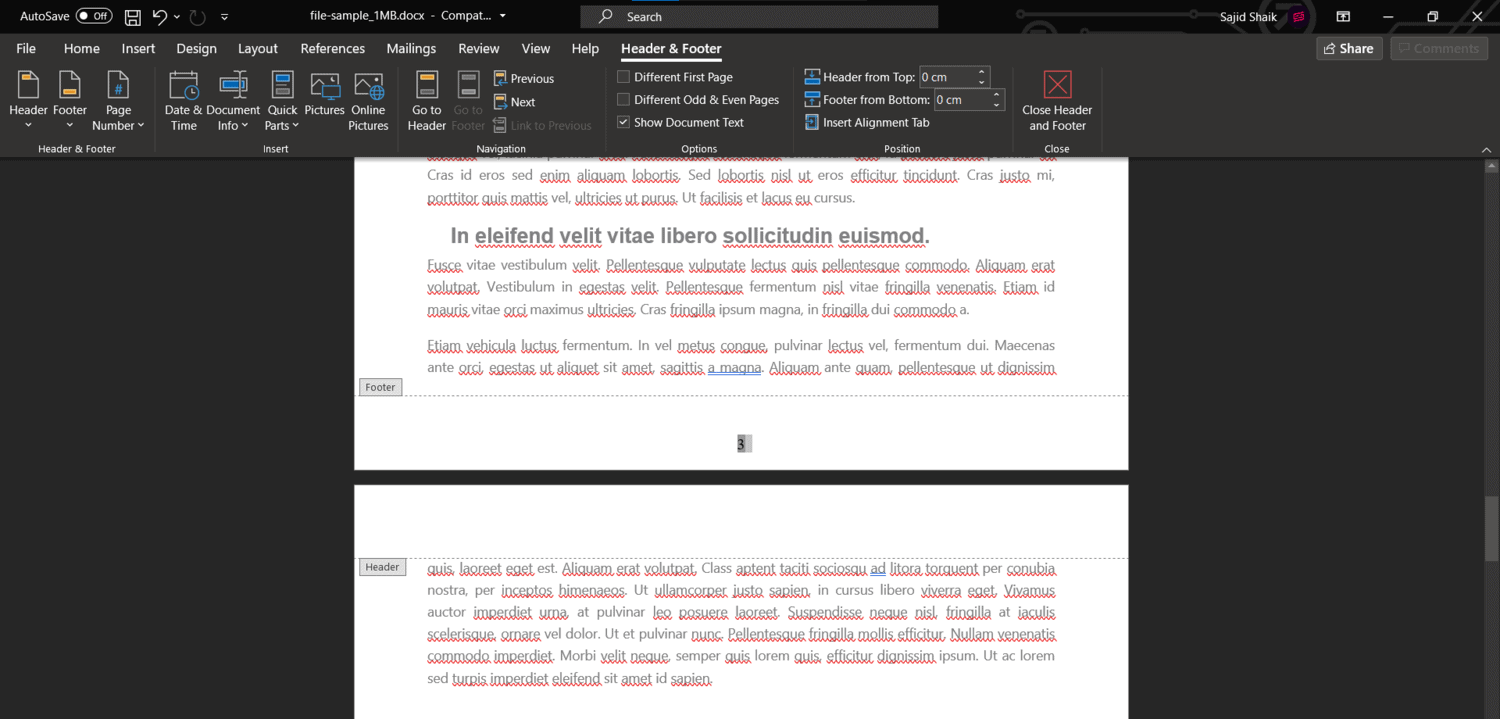
- Click on the Close Header and Footer option once done.
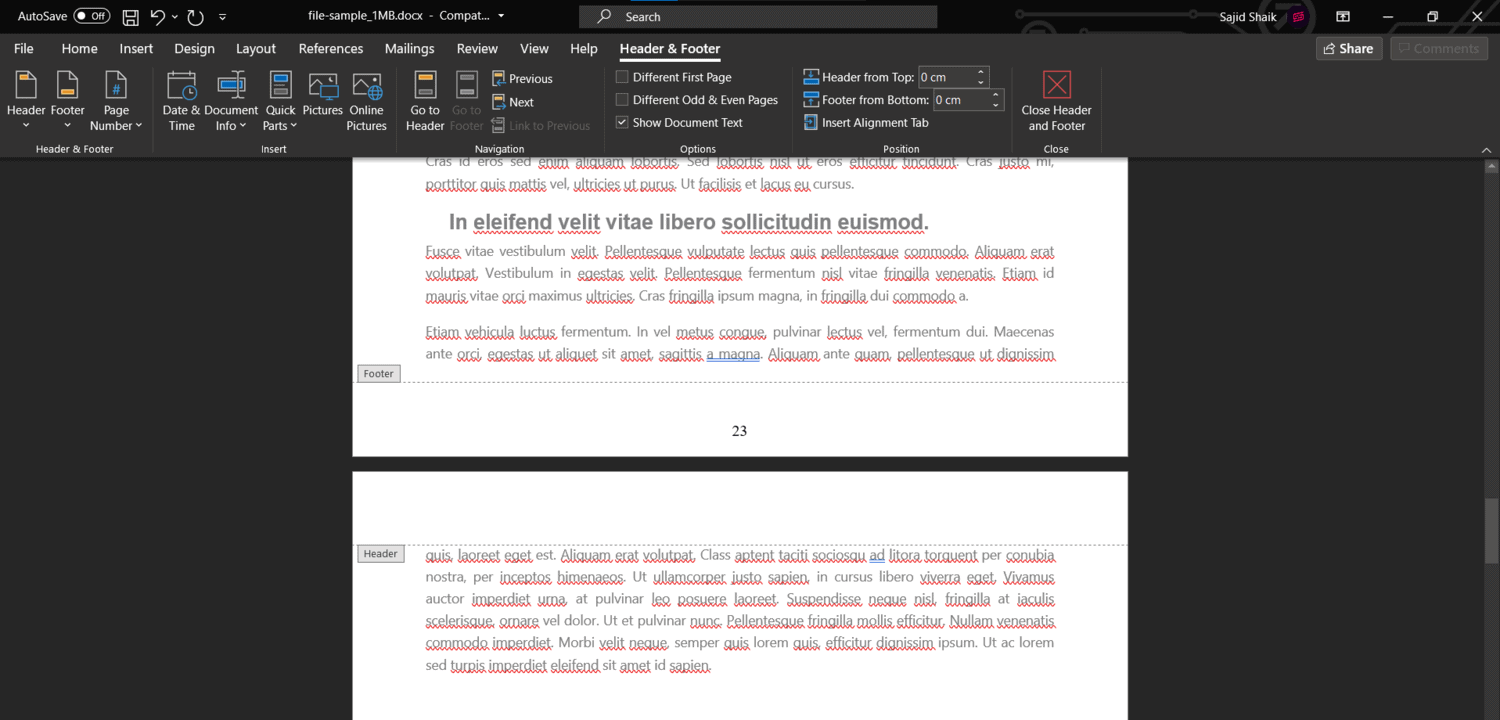
- Now change the number of the page to any number you would like to see. But, remember that the page numbering will be altered for all the pages accordingly.
As we mentioned earlier, changing the page numbering is quite easy. Although changing a specific page number isn’t easy, but also not required in any case. You can always use the Different Page Number option to do that if necessary.
Also Read: 3 Ways to View WiFi Passwords on Windows 10 PC or Laptop
Manage Page Numbers in Microsoft Word Easily
Whether it be a formal interview or a school/college project, you might have to go with page numbers at any point in time. Page numbers make things quite tidy and neat. Word doesn’t make it easy to alter the page numbers while inserting and removing them is quite easy.
The above-mentioned processes are easy to perform while deleting a specific page number is a little more complex than the other processes. Anyways, we hope you learned how to insert, delete, and change the page numbers in Word. If you still got any suggestions or queries regarding this article, you can mention them in the comments below.
