All iPhones from 3GS has inbuilt magnetometer sensor, quite a fancy name for the digital compass. It can tell you the direction at which the phone is pointing to. It offers better orientation and consistency while you are navigating. The combination of GPS, location service of iOS and this makes the iPhone a cool navigation gadget.
We are not sure whether you know it or not that your iPhone by default disable the compass function while the navigation mode is on. If you want to know the procedure that will help you to enable the compass in Apple Maps on your iPhone, then follow the steps. These steps will ensure that the compass will enable in Apple apps while using.
3 steps to enable compass in Apple Maps
1. Open Settings on your iPhone. Scroll down and click on Maps or find Maps from the Search bar at the top.
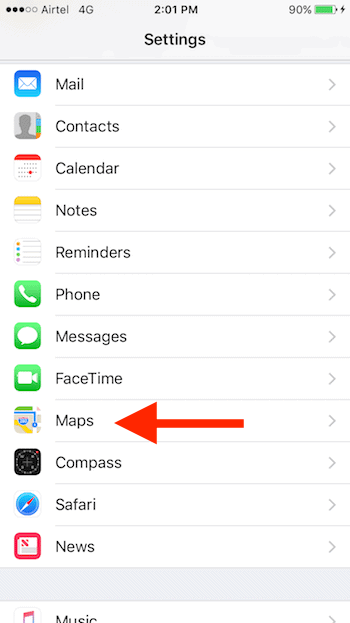
2. In the screen, click on Driving & Navigation.
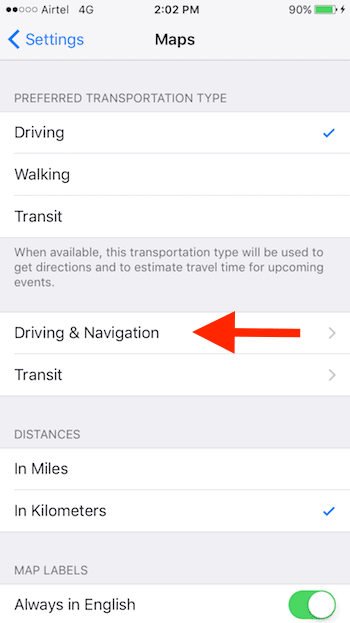
3. Turn on the Compass below the heading Show in Navigation, by sliding the toggle beside it.
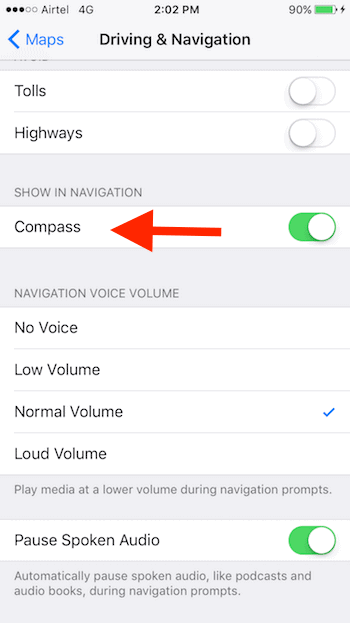
The compass icon will be displayed next time you want to navigate in maps. Now let me tell you the various uses of the compass in your Apple maps to enhance your experience:
1. You can Reorient your View Towards the North Direction
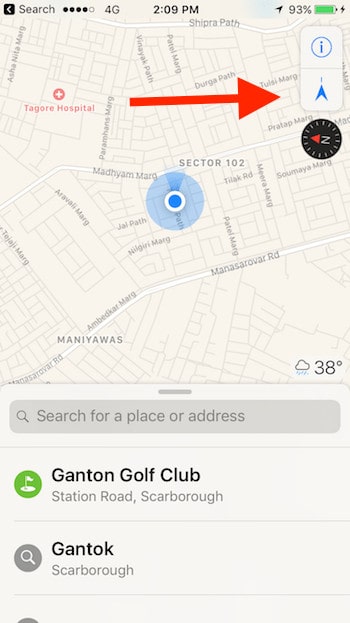
Sometimes while using the maps, you tend to rotate it to understand the navigation better. But then, you lose your direction whether you are facing north or south. You can definitely return to North by just tapping on the Compass icon. You can find this icon in the upper right corner of your iPhone’s Apple Maps.
2. You can Lock your Navigation in Compass Mode
Do you get confused with the directions in the navigation while driving? Do you change the orientation after every turn? You can solve this problem by just switching from maps to Compass lock mode. In this, the navigation app automatically changes the view according to your direction.
You just have to tap on the Arrow icon twice. This icon is in the upper right corner of Apple Maps. You can notice a change in your graphics to a very solid arrow which is forward facing. To get back to traditional mode, tap the compass icon or hit the arrow icon again.
Now, your iPhone has two configurations for compass: True North and Magnetic North.
True North shows you the directions in line with the Earth’s geographical North Pole. Whereas Magnetic North mode refers to the direction of the magnetic field of the earth. It is recommended to keep your iPhone on true North mode for better accuracy. Following are the steps to check whether your iPhone is in the True North mode or not:
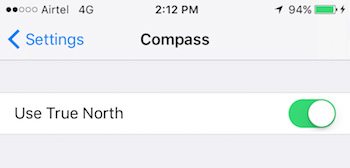
1. Go to Settings and open Compass.
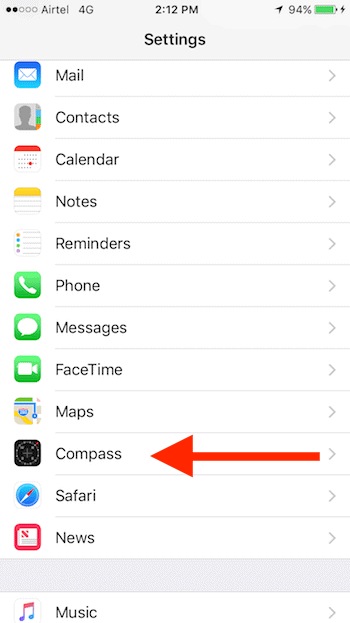
2. Slide the toggle to right beside the Use True North to turn it on.
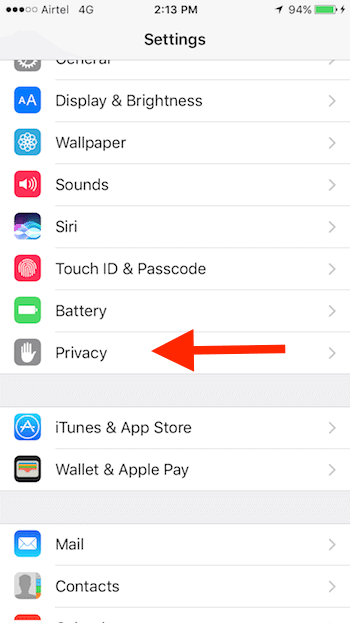
When you are using Apple maps or even the third party app, at times, you need to refresh the compass constantly. To avoid this, always allow your iPhone to use iOS location services for calibration.
1. Go to Settings and click on Privacy.
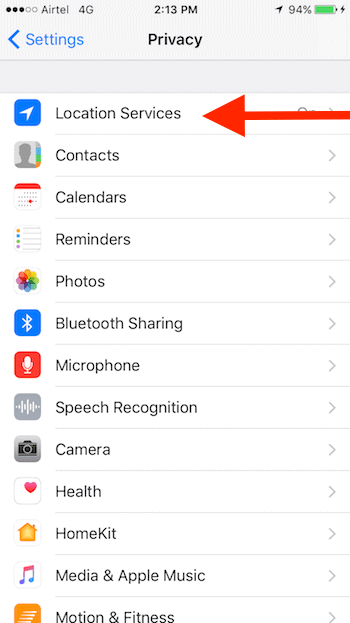
2. In the Privacy screen, tap on Location services.
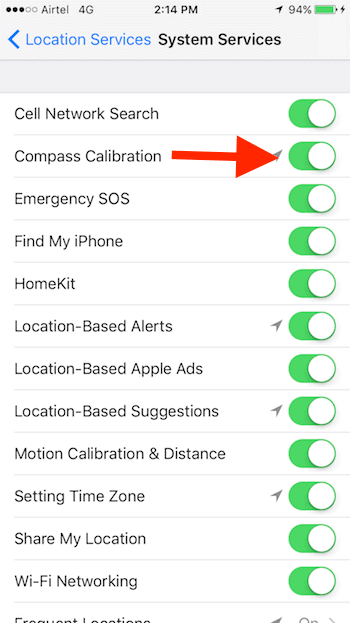
3. Click on the System Services.
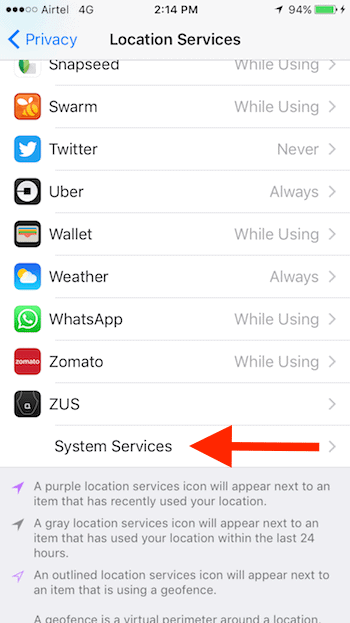
4. Make sure that the Compass Calibration is switched ON.
These are the ways you can enable compass in Apple Maps apps and the way you can use Compass in Apple Maps or any other navigational apps.
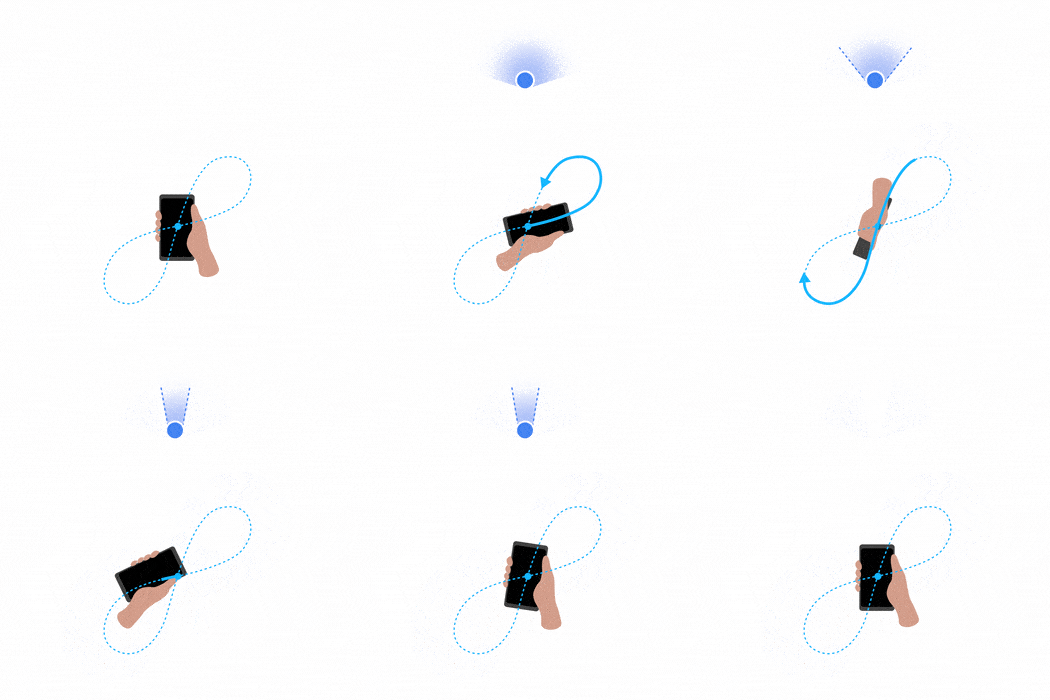
The accuracy of the compass can be affected due to interference in the environment. Even small things like your AirPods can cause a problem. If such situation occurs, just re-calibrate your compass by rotating your phone in a figure of 8.
Apple suggests you limit the use of a compass as it can cause a distraction while driving. But if you like to use the compass in Apple Maps, then you just have to follow the above-mentioned procedures.
