Are you facing issues like Windows 11 slowing down or lagging after updating from the previous Windows version? Windows 11, with its new redesigned interface, features a new-age start menu, taskbar, and many more. However, some users didn’t receive the latest upgrade of the operating system on good terms due to speed issues. Mainly, the users faced problems like slowing down in daily usage, lags, Bluetooth, and Wi-Fi problems. All these issues and bugs on the Windows 11 OS gave a mediocre experience for users worldwide.
If you are one of the Windows 11 users and facing similar issues, that may constantly interrupt your workflow. Worry not; as we bring 7 different solutions for fixing the Windows 11 speed problems. We’ll be also using a third-party tool called Advanced SystemCare from IOBit that offers a one-stop solution to speed up your Windows 11 PC and protect it from malware.
7 Ways to Fix Windows 11 Slow and Lag Issues to Improve Performance
Try tweaking and fine-tuning your operating system using the below methods and improve the overall performance of your Windows 11 PC. Without further delay, let’s jump on to the solutions for resolving Windows 11 slow issues for a much better experience in daily usage.
1. Disable Start Up Apps
Slow boot-up is a common issue on many Microsoft Windows operating system computers. Furthermore, the third-party applications or system apps that open up right after the boot-up will make the PC sluggish and takes up more resources. You can overcome this issue by disabling unwanted start-up applications in Settings for faster boot-up and enhanced performance.
- Open the Windows 11 Settings menu.
- Go to Apps.
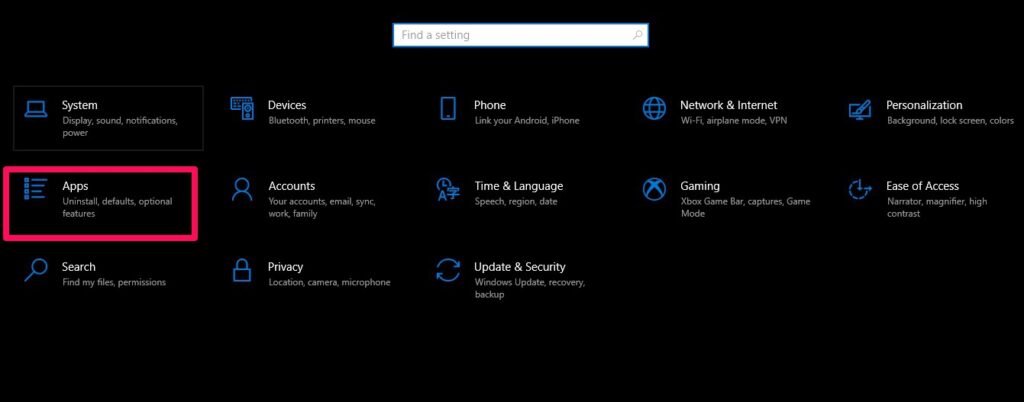
- Select the Startup option from the left side menu.
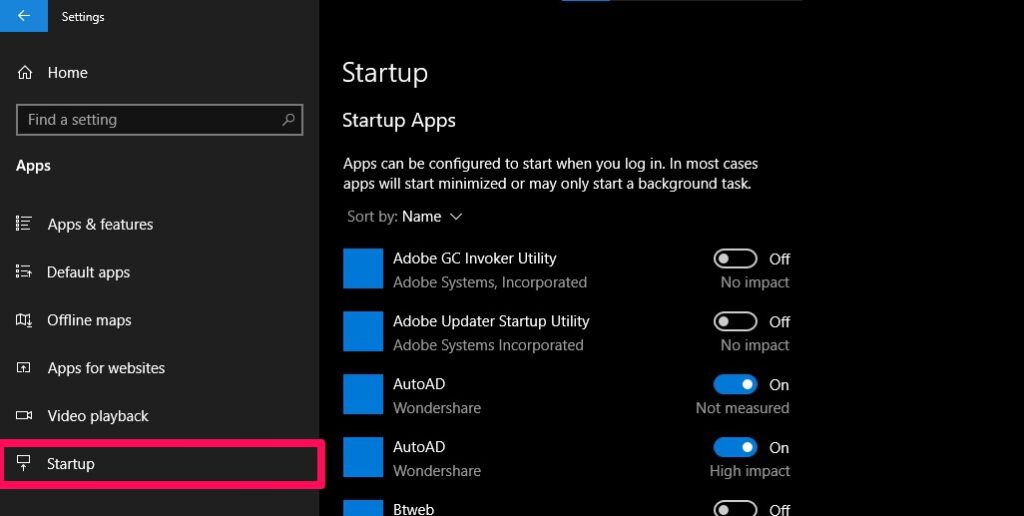
- Now, you will find the list of Startup apps and their impact while booting up.
- Toggle Off unnecessary and High Impact apps to improve the booting time.
This way, the unnecessary applications won’t load up when you turn on your Windows 11 system.
2. Disable Unnecessary Privacy Permissions
Windows 11, with its latest upgrades, has even brought many improvements to its personalized ads and widgets. These widgets showcase locally relevant content and ads according to users’ interests. These extra permissions may end up using more resources for personalized ad services, giving a sluggish experience on your Windows PC. Let’s disable these privacy permissions to take the load off your system and give you a better experience.
- Press Windows + I to open the Settings menu on Windows 11.
- Select Privacy & Security from the menu.
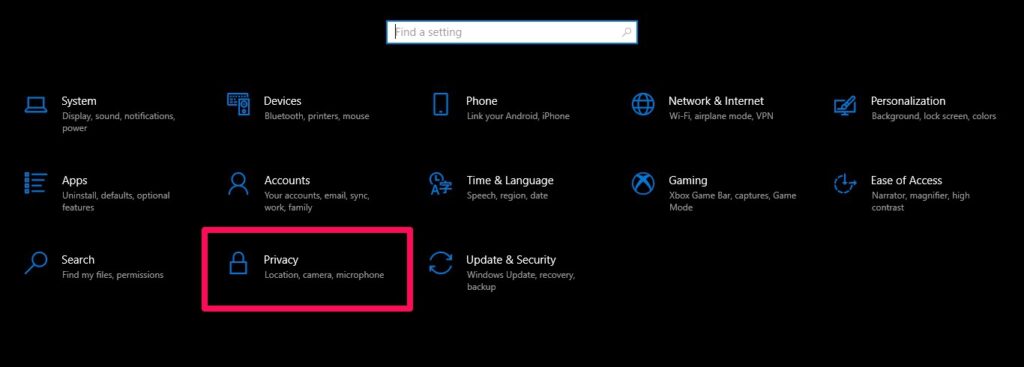
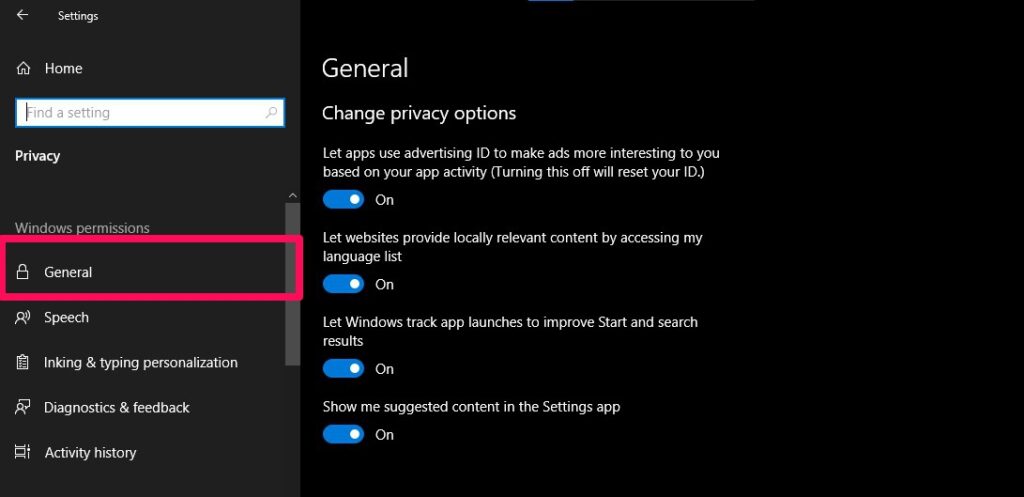
- Click on General.
- Turn off all the Personalized ads and local content on Windows 11.
- Select the Speech option in the main menu and turn off Online speech recognition.
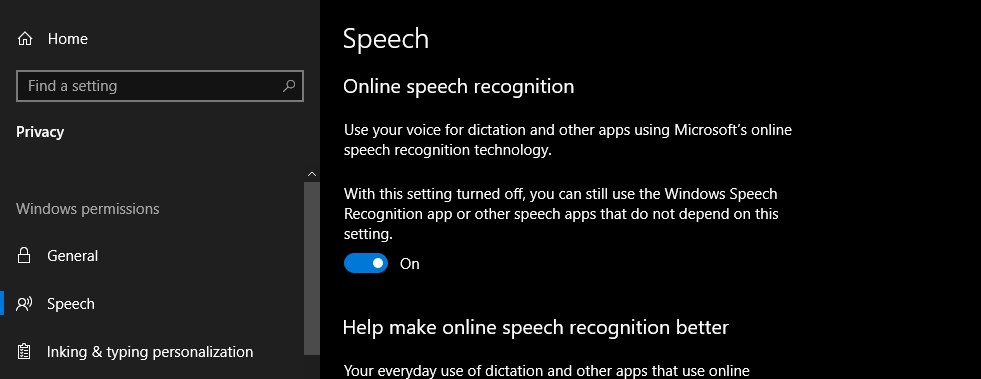
- You can also turn off the basic permissions such as Location, Camera, Voice Activation, Contacts, and Phone if you are not using them.
3. Speed up your Windows 11 PC with Advanced SystemCare 15
The Advanced SystemCare 15 arrives as a savior for Windows users that don’t want to indulge in manual ways of speeding up their PC. You can download the Advanced SystemCare 15 tool from IOBit’s official website and install it directly. Moreover, the Pro features of the software help you protect and improve Windows 11 performance in a much better way.
- Download and install the Advanced SystemCare 15 tool on your Windows 11 PC.
- Open Advanced SystemCare 15 and you will find two options – AI Mode and Manual Mode.
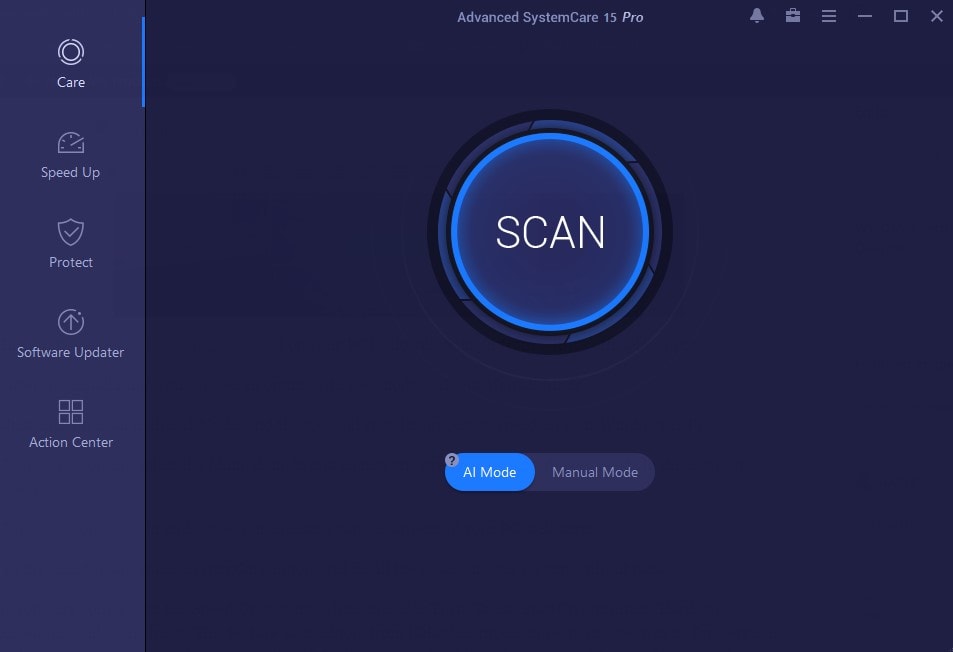
- Select AI Mode if you want the tool to speed up your Windows 11 PC automatically.
- If you need to have more control, select the Manual Mode and choose the preferences according to your needs.
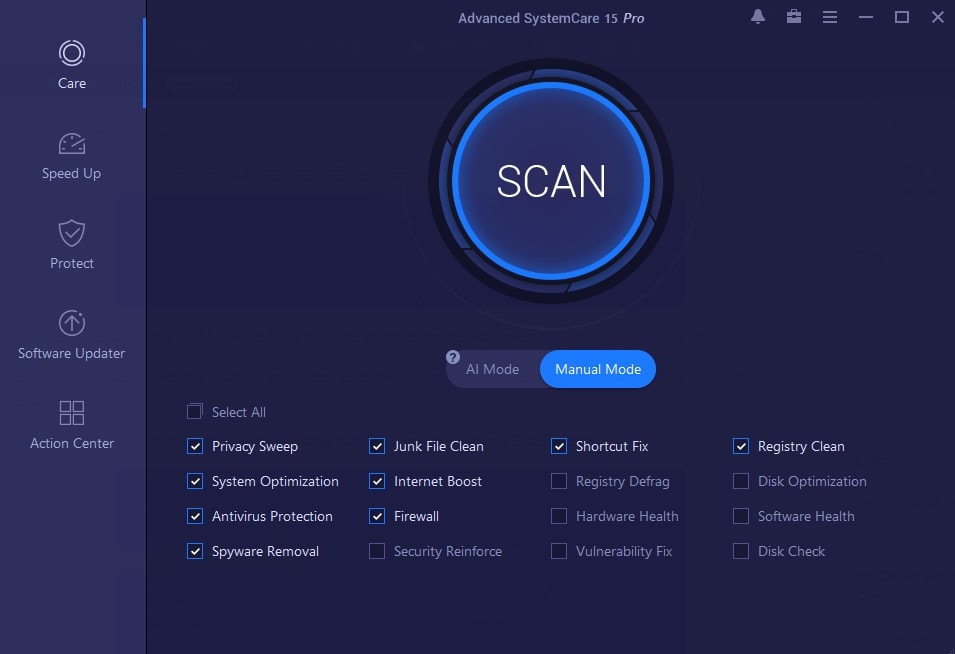
- Finally, click on the big round Scan button and the Advanced SystemCare 15 will start optimizing your PC immediately.
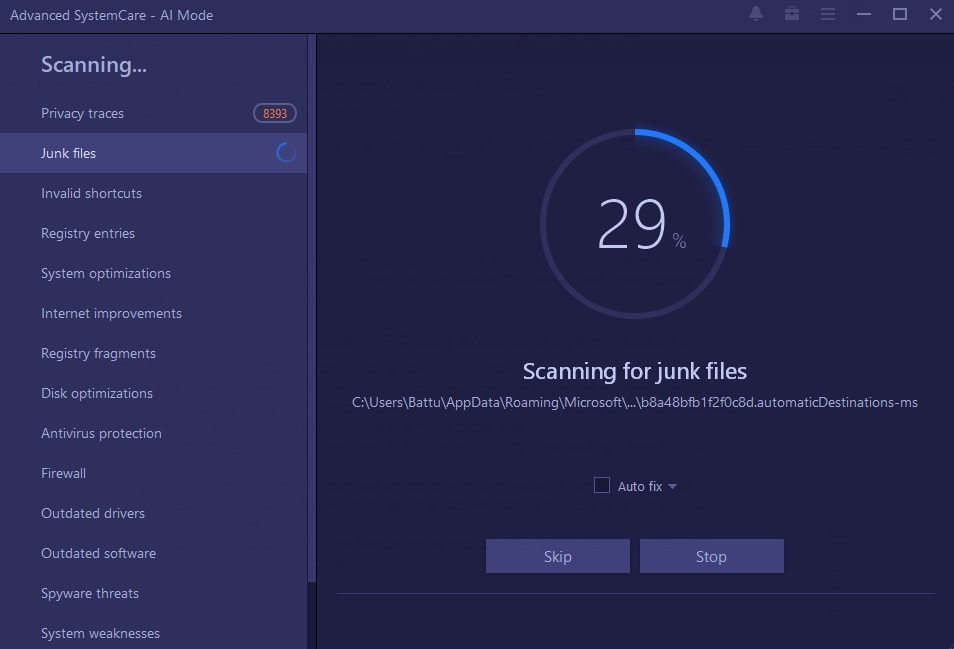
- Wait for a few minutes and in the end, the Advanced SystemCare 15 tool will fix all the issues in your system without fuss.
The software comes with the Speed Up feature, which includes TurboBoost, StartUp optimizer, Hardware Accelerator, and many more. This feature-packed tool from IOBit has much more up its sleeve in its Pro version, which has many security and privacy options. Windows users should try the Advanced SystemCare 15 tool for enhanced performance and experience a secure way of using the PC.
4. Remove Unused Apps and Software on your PC
How much ever we clean up our system’s temporary files, some applications just lie in the corner. This unused software and applications on your Windows PC will use your resources running in the background.
These third-party apps might become incompatible with your computer’s polished new OS. These apps might stop responding or may even crash your PC. You need to update these apps or uninstall them to improve your Windows 11 performance.
- Launch the Windows Settings.
- Select Apps from the left side menu.
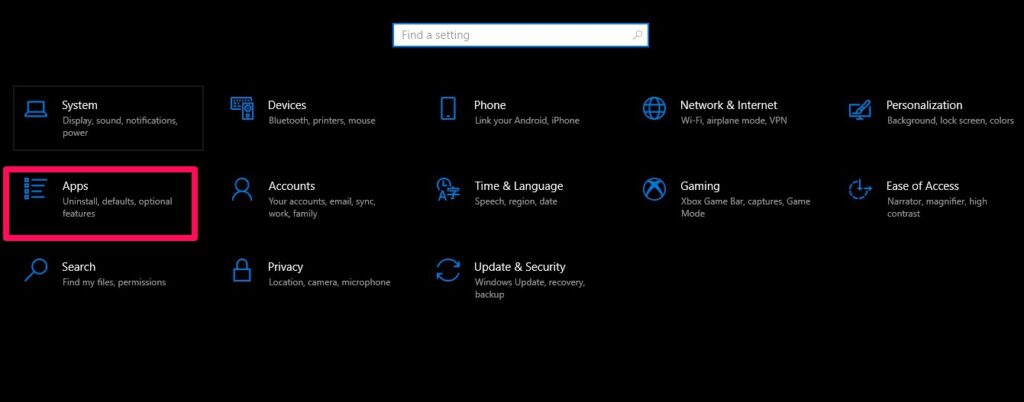
- From the Apps section, click the application you are no longer using.
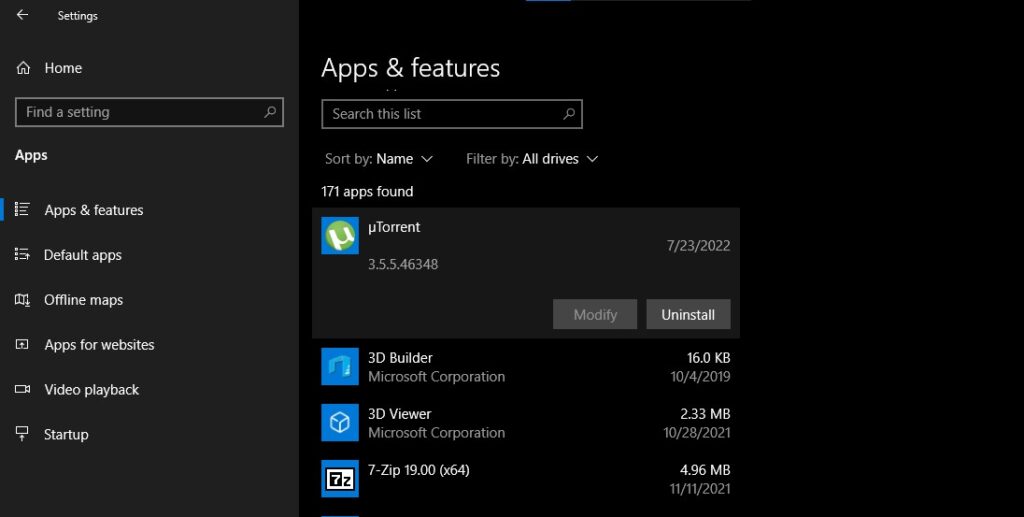
- Click on the Uninstall button from the drop-down list, and the app will be deleted from the system.
This way, you can easily remove the unnecessary applications sitting around on your Windows PC for a longer time.
5. Download Optional Updates
Microsoft updates its Windows operating systems at regular intervals to improve the user experience and security. After the regular updates, the system may skip a few optional updates during the installation process. Sometimes, without these optional updates, the system might have sluggish movements. Here is how you can install these optional updates easily.
- Launch the Windows Settings menu on your PC.
- Select the Update & Security option from the list.
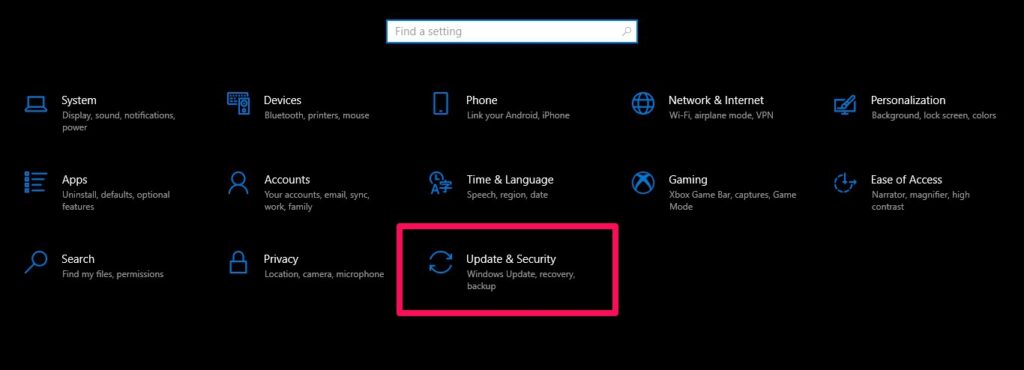
- Go to Advanced options in the Windows update menu.
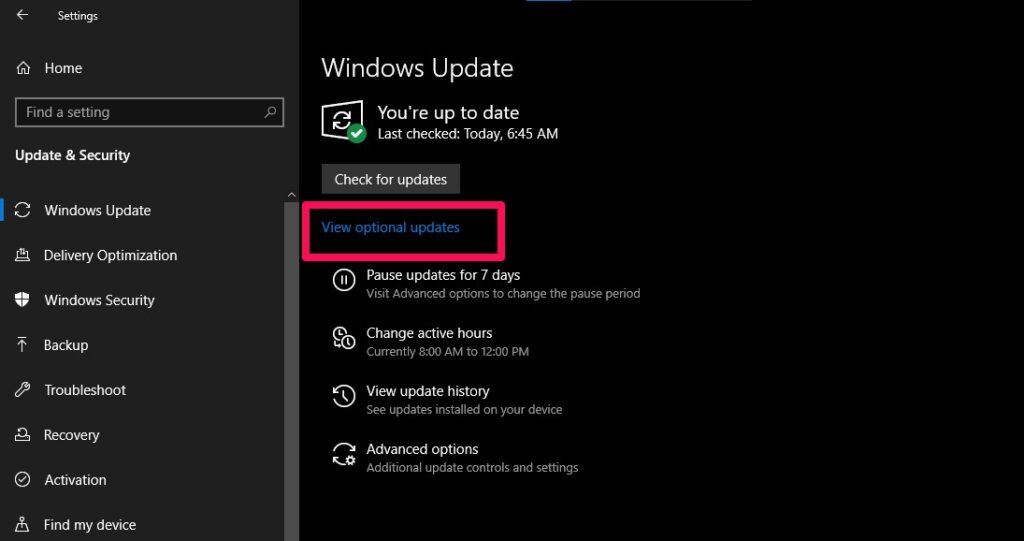
- Check for the Optional updates and select all pending driver updates.
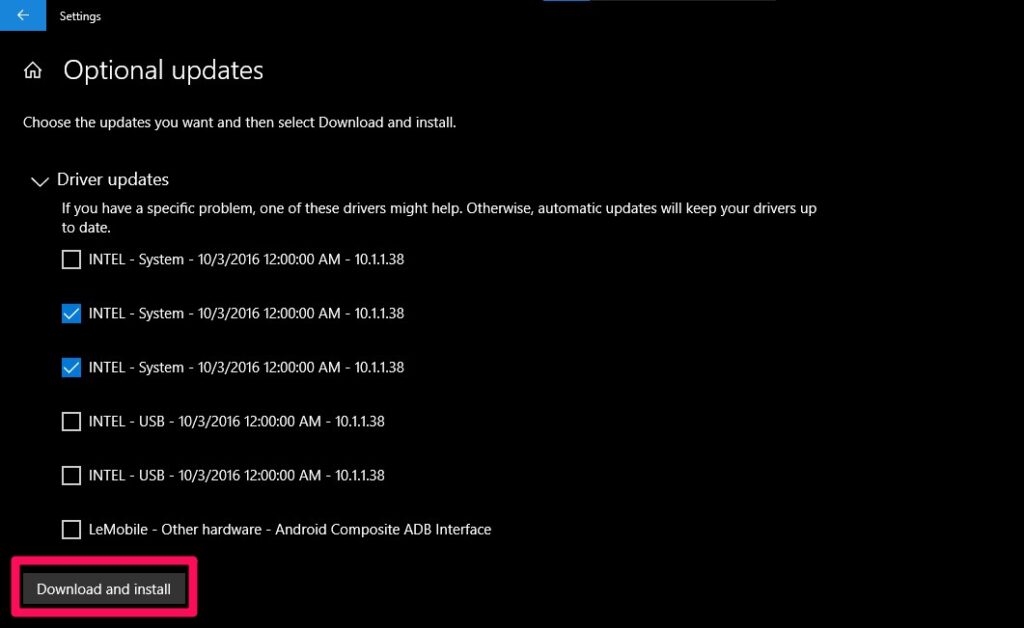
- Finally, click the Download and install button to download the optional updates.
Downloading and installing the optional updates has its own benefits as it will check for needed upgrades for the hardware on your system. Besides, these updates can boost Windows 11 performance as these will include fixes for bugs and redundancies.
6. Change Performance Options to the Maximum
Although, after trying all the above-shown methods, there’s one more thing you can try that can drastically improve Windows 11 performance. Windows operating system provides a wide range of animations and customizability options for more efficiency in workflow. You can make your PC more snappy by changing the Performance options and lowering the intensity of these animations.
Here is how you can set Windows 11 visual effects for best performance:
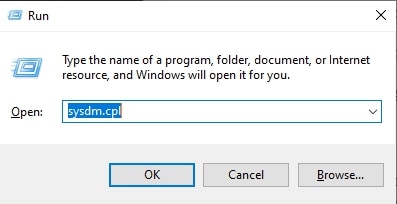
- Open Run by pressing Windows + R keys on your PC.
- Type
sysdm.cplin the Run dialog and click OK.
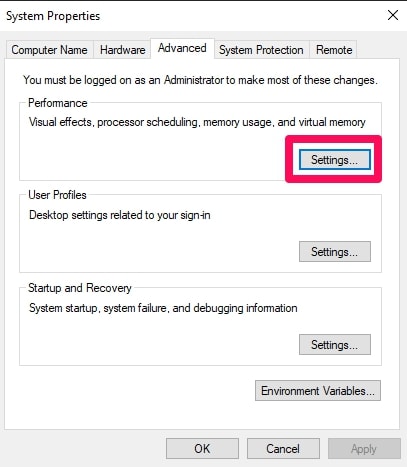
- Go to the Advanced tab in the System Properties window.
- Under Performance, click on the Settings… button.
- Now go to the Visual Effects tab and select Adjust for best performance radio button.
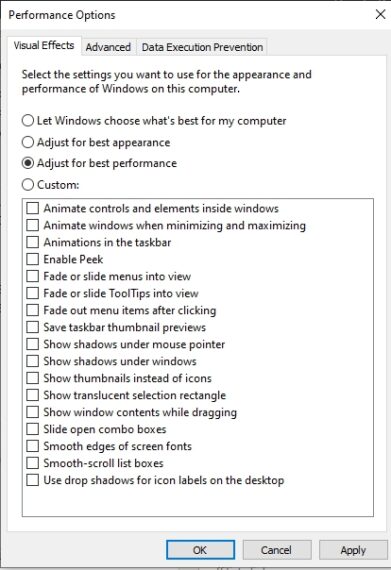
- Click Apply and then OK to save the changes.
- Restart your PC for the changes to take effect.
The new Windows 11 operating system brings many fluid animations and graphic-intensive interfaces under its hood. In a few circumstances, these animations slow down the PC, which can be frustrating. By following the above steps, you can change the performance options easily and enjoy the peak performance of your system with fewer to no animations. This solution is one of the most straightforward ways to fix the Windows 11 slow issue.
7. Cleanup System Files
You can take full advantage of the built-in Disk Cleanup tool that scans files that aren’t necessary. These files include temporary files, downloaded programs, DirectX Shader Cache, Delivery Optimization Files, and much more. All these files sum up into a pile and become one of the reasons for a laggy experience.
- Open Run or press the Windows + R keys on your PC.
- Type
cleanmgr.exein the Run dialog.
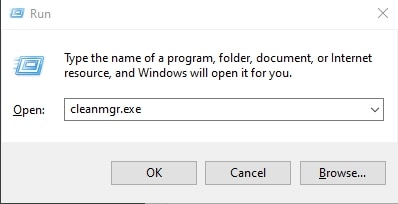
- The Disk Cleanup utility window opens on the screen with the User Account Control prompt. Click Yes to grant Administrative access.
- Select the drive where the Windows OS is installed.
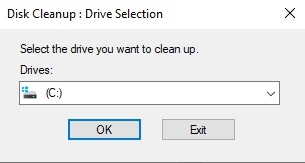
- Select the files to delete in the Disk Cleanup utility dialog.
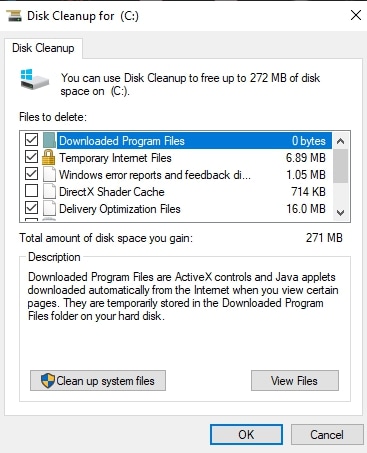
- After selecting files for cleanup, click on the Cleanup system files button to start the process.
Switch back to Windows 10 If nothing works!
You can directly roll back to the previous operating system version, i.e., from the latest Windows 11 to Windows 10. We recommend this as Windows 11 as an operating system is still new, and many systems might not be compatible with the update.
However, if you still want to stay on the latest OS, use the Advanced SystemCare 15 tool that improves the performance, and keeps your privacy intact with advanced security checks.
