Google Chrome currently holds the major share as the most widely used web browsers across all platforms. With over 60% usage share across all platforms, Google Chrome is undoubtedly the most preferred web browser globally. However, it always frustrates when you get DNS_PROBE_FINISHED_NXDOMAIN Google Chrome error every now and then. Well, that’s the case as many users have complained about DNS_PROBE_FINISHED_NXDOMAIN error on their Google Chrome browser.
But, nothing to worry about. We have found a few ways to solve DNS_PROBE_FINISHED_NXDOMAIN issue in Chrome. Before we get to the solution, let’s understand the problem first.
What is DNS_PROBE_FINISHED_NXDOMAIN Error on Google Chrome?
Internet connections are managed through various DNS servers linked with your ISP (internet service provider). Every time you try to open a web page, your ISP automatically runs through the DNS server to locate the IP address associated with the domain name of the web page.
However, sometimes the DNS fails to retrieve the IP address of the domain name due to unavailability or misconfiguration. There are numerous errors where Google Chrome doesn’t open a web page such as DNS Probe Finished No Internet or DNS_PROBE_FINISHED_NXDOMAIN.
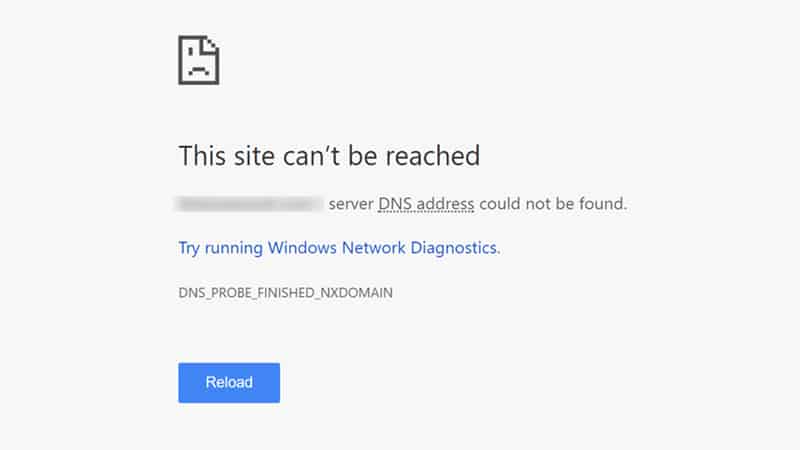
Google Chrome opens a problem page with the error message and error code. The error code is DNS_PROBE_FINISHED_NXDOMAIN in this case. NXDOMAIN in the error code indicates a non-existent domain.
How to fix DNS_PROBE_FINISHED_NXDOMAIN issue in Google Chrome?
There are many different ways to fix DNS_PROBE_FINISHED_NXDOMAIN in Mac, Windows, or Android. You just need to try the best of the lot to check if any of these methods can fix DNS_PROBE_FINISHED_NXDOMAIN in Windows, Mac, or Android devices.
The error code basically means that server DNS could not be found or the server IP could not be found by the Chrome browser while trying to access a web page. Well, you can fix this error easily by following the tutorial mentioned below.
8 Methods to Fix DNS_PROBE_FINISHED_NXDOMAIN Chrome Error on Windows and Mac
Server DNS could not be found is a common error associated with Google Chrome. If it displays the error code DNS_PROBE_FINISHED_NXDOMAIN, then you can try the following methods to fix DNS_PROBE_FINISHED_NXDOMAIN in Windows and Mac simultaneously.
1. Restart Your Computer
Well, the solution isn’t as simple as restarting the computer. Yet, you can always give it a shot as 9 out of 10 times, it’s the temporary configuration error which is resolved once the system reboots. If the problem continues even after restarting the PC, you can go through the next recommended solution.
2. Check DNS of Your Domain
Sometimes we look in the wrong direction for the solution. The problem may not always be at the client end but at the domain end. If you are facing trouble with a specific domain like Facebook, YouTube, Quora etc, then it is a possibility that the problem is with this domain and not the browser.
You can check the DNS settings on the domain name to verify the same if you own the domain yourself or ask your friends to check if they can access the domain on their Google Chrome browser. If you have recently migrated the domain from one host to another, then there are chances that it is the DNS caching error. You can rectify that problem following the next recommended solution if you are on Windows.
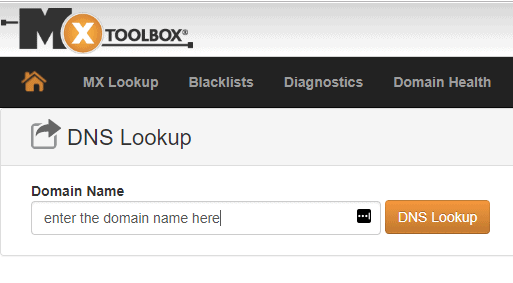
You can visit MX DNS Look Up and enter your domain name to check if the DNS values are mapped correctly to your host account.
3. Restart DNS Client Service
Windows users can always restart the DNS Client Service to get rid of Google Chrome’s DNS_PROBE_FINISHED_NXDOMAIN error. The DNS Client on Windows basically resolves and caches DNS domain names. If the domain that you are trying to access has been recently moved to a new hosting provider, there are chances that the browser will show DNS_PROBE_FINISHED_NXDOMAIN Google Chrome error due to DNS caching error.
Simply restart the DNS Client Service by the following the simple steps below to resolve the problem:
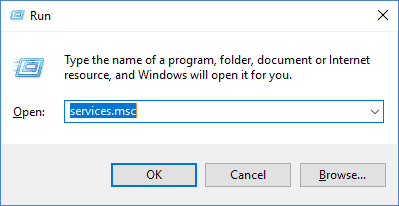
Open “Command Prompt” window using the shortcut keys “Windows” and “R”. Type services.msc in the Open field and hit Enter.
On the Local Services window, scroll down to find DNS Client. Right click on DNS Client and choose “Restart” from the options.

If the “Restart” option is greyed out same as in our case, then you need to restart the DNS Client using Command Prompt.
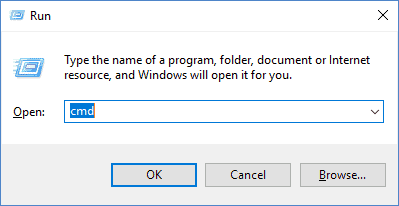
Go to the Command Prompt window and this time type cmd in the Open field and hit Enter.
Enter the commands as follow to stop and start DNS Client.
net stop dns cache
This command stops the DNS Client and disables DNS caching.
net start dns cache
This command starts the DNS Client and enables DNS caching.
If you get an error as follows while using these commands, then you need to run CMD as a network service for the commands to work.

You can also try this solution to stop and start DNS Cache on Windows 10. The solution is taken from feedback by a staff moderator at an official Microsoft forum.
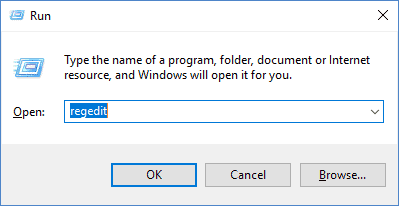
Go to command prompt window and enter regedit to open the Registry Editor on Windows.
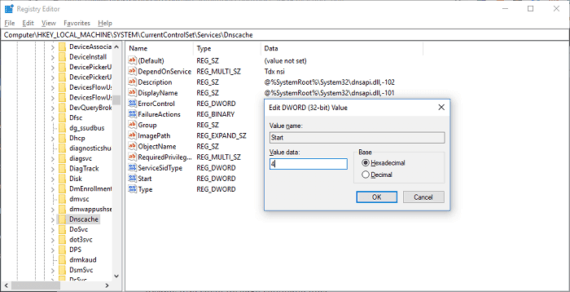
Navigate through the registry and go to HKEY_LOCAL_MACHINESYSTEM > Current > Control > Set > Services > Dnscache. Locate the Start registry key and change its value from 2 (Automatic) to 4 (Disabled)
4. Change DNS Servers
Your ISP sets default DNS servers for your internet connection. However, there’s no mandate that you can change or use other free and fast Public DNS servers available out there. You can always try updating or changing the DNS servers of your internet connection.
Simply pick any of the top free public DNS servers and replace them with your network’s default DNS servers. There’s nothing to worry as changing DNS servers won’t affect or disable your internet connectivity. You can follow a few simple steps to change the DNS servers on both Windows and Mac.
For Windows Users:
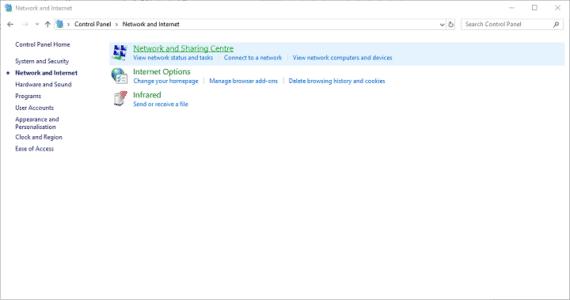
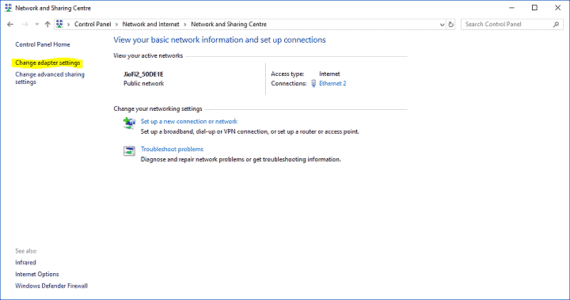
Open Control Panel and go to Network and Internet.

Next, on the Network and Internet section, click Network and Sharing Center.
In the Network and Sharing Center, you need to choose “Change Adapter Settings“.
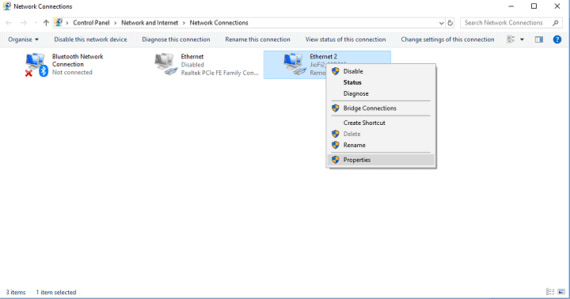
It will open a window displaying different connectivity options. Right-click on the current active connection from the lot and go to Properties.
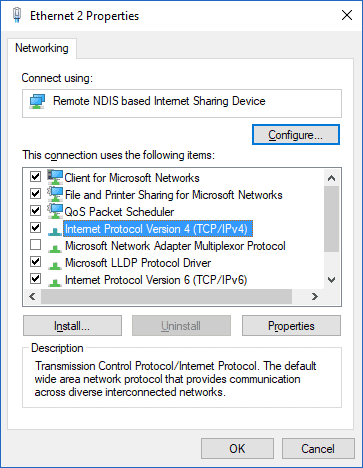
In the Properties area, click Internet Protocol Version 4 (TCP/IPv4) or Internet Protocol Version 6 (TCP/IPv6) based on the DNS values you got.
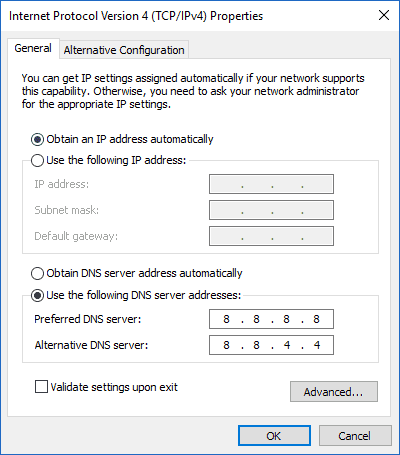
In this case, we are using IPv4 DNS of Google. Based on your ISP configuration, the DNS will be either set to detect automatically or the ISP must have added DNS values of their own. In either case, you need to Enter the new DNS values and hit OK to confirm the changes. Make sure to the option “Use the following DNS server addresses” is already active.
For Mac Users:
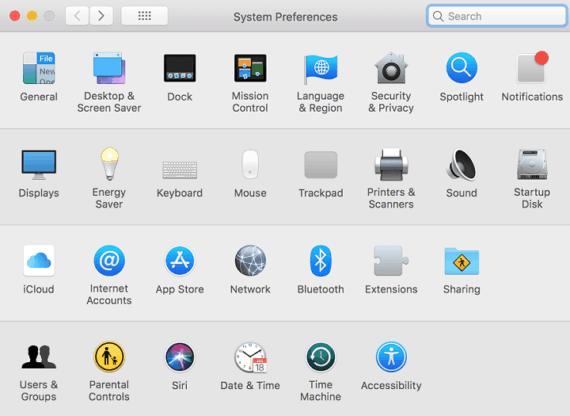
If you are a Mac user, then you need to go to System Preferences by clicking the Apple icon on the top-left corner of Macbook or iMac and click on Network.
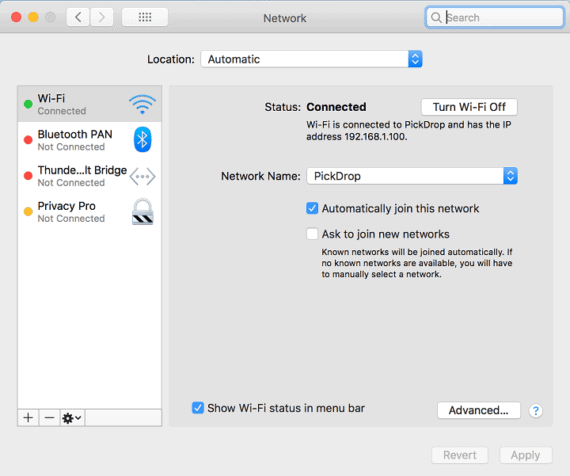
Choose the active connection from the list of connections in the Network section and click “Advanced” at the bottom.
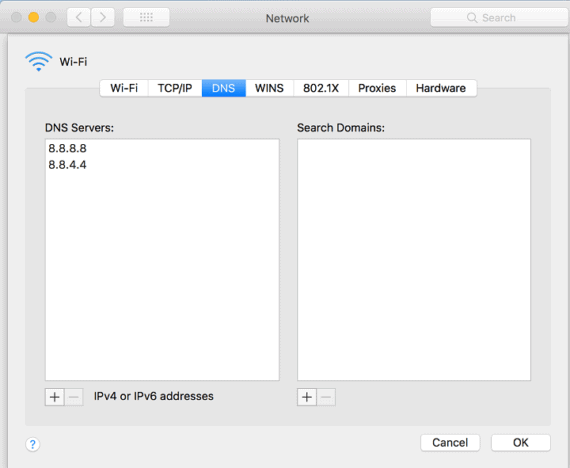
In the Advanced section, go to the DNS tab. Click the (+) button to add or update new DNS servers. Remove the old ones if there are any using (-) button. Click OK to confirm the changes.
5. Release and Renew IP Address
If the web page opens everywhere but not on your PC, then it has to be a client-side DNS error. If none of the above solutions work, then it is wise to try releasing and renewing the IP Address. This step will also include flushing the local DNS cache which works on the same principle as browser cache.
To release and renew the IP address, follow the steps below.
For Windows Users
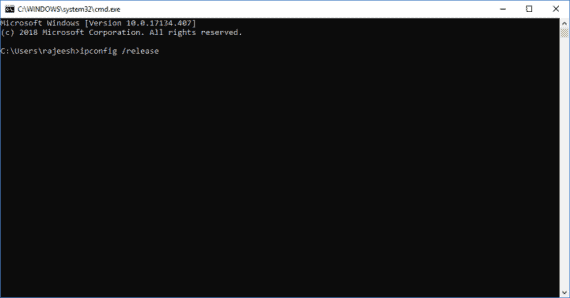
Open Command Prompt and type cmd and hit Enter.
Enter the command below to release IP.
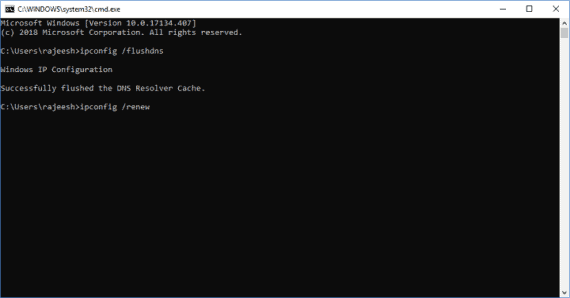
ipconfig /release (check the image below for better understanding)
Once you hit enter after typing the command, this step will release your current IP address.
Next type ipconfig /flushdns and press Enter. You should get a message, “Successfully flushed the DNS resolver cache“. If you do, then the command worked.

Now, it is time to renew the IP. Type ipconfig /renew and then hit Enter to renew the IP address.
It is also advised to reset your IP settings and Winsock catalog to complete this step. You can do it by using the following two commands one after the another.
netsh int ip set dns and netsh winsock reset.
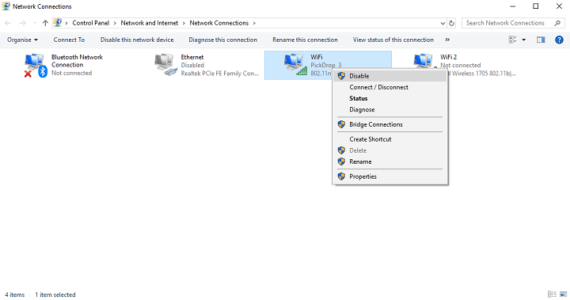
Alternatively, you can release, flush, and renew the IP address by disabling and then enabling your network adapter in Network and Sharing Center > Change adapter settings.
For Mac Users
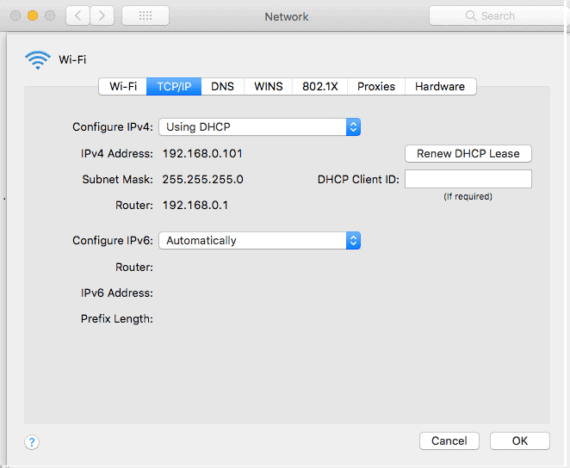
Mac users can go to System Preferences and click Network.
On the active connection, you can hit “Advanced.”
Go to the TCP/IP tab and click “Renew DHCP” button.
You can also use the Mac Terminal to clear the DNS cache just as we showed above for Windows.
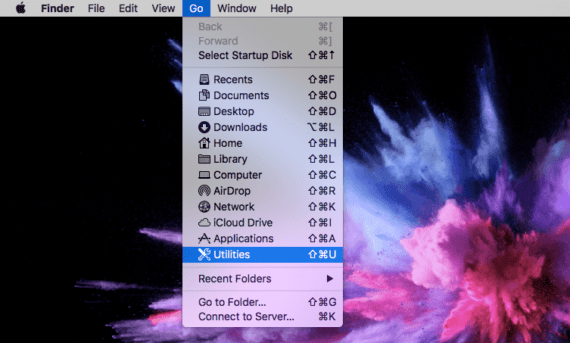
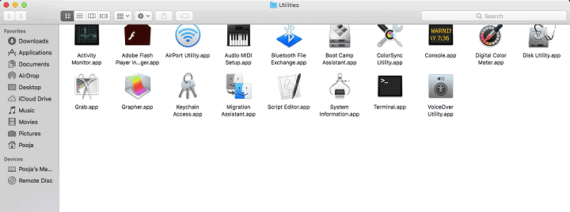
Go to Utilities on your Mac and click Terminal.
Enter the following command to flush DNS cache.
dscacheutil -flushcache
Unlike Windows, there’s no success message on Mac.
6. Update Local Hosts File
Every computer by default adds DNS entries mapped to specific IP addresses in their local hosts file. If the domain you are trying to access on Google Chrome has been recently moved to a new web host, then there are chances that your network is unable to access the domain due to the conflicting Local Hosts file where the domain is mapped to the previous IP address. Hence, it is advised to update the Local Hosts file on your computer to access the domain on your Chrome browser.
To update the local hosts file, you can follow the steps below.
For Windows Users
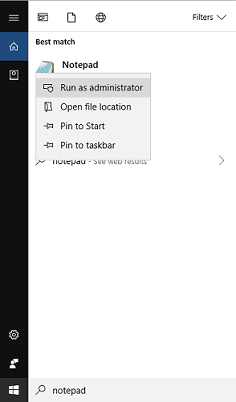
Remember that you will require administrative rights to edit or access the Local Hosts file on Windows. Open Start Menu and search for Notepad or Notepad++ or any other Text Editor you prefer. Right click on the text editor app and choose Run as Administrator.
Once the text editor loads, open the hosts file located at C > Windows > System32 > drivers > etc
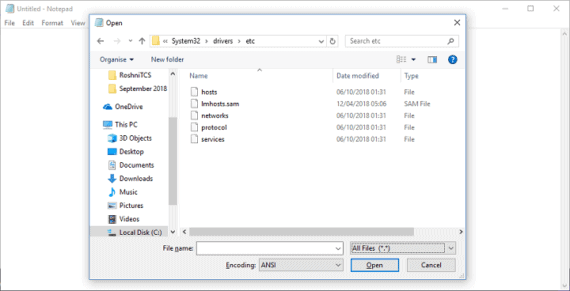
Now, look into the file for the website or domain you are trying to access. Remove the domain if it is already there.
For Mac Users
Mac users can use the Terminal program to access the Local Hosts file on Mac machine. Go to Utilities and open Terminal.
Enter the following command to access the local hosts file.
sudo nano /private/etc/hosts

7. Reset Chrome Flags
At times, new Chrome settings or experimental features are the real cause of the problem. You can always go back to the default settings and reset the Chrome browser by simply browsing chrome://flags in the address bar. On this page, you will find “Reset all to default” button. This solution is common for both Windows and Mac devices.
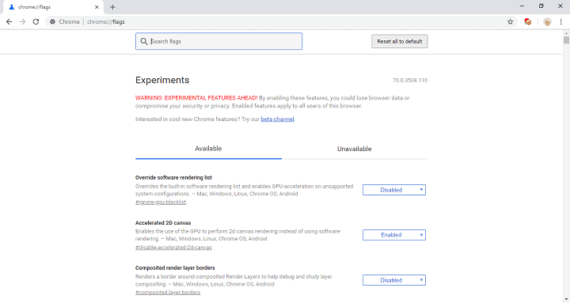
Click the button to Reset Chrome Flags and restart the browser. Check if the DNS_PROBE_FINISHED_NXDOMAIN problem on Google Chrome still persists.
8. Disable VPN and Antivirus Temporarily
Even after trying every viable method listed above, you’re not able to solve DNS_PROBE_FINISHED_NXDOMAIN error on Google Chrome browser, then the error is most likely because of the VPN service or the Antivirus you use on your PC or Mac. Try disabling both these services once on a temporary basis for a while and try accessing the website. If it works, then it is surely either the VPN service or the Antivirus program which is causing the problem.
How to Fix DNS_PROBE_FINISHED_NXDOMAIN Chrome Error in Android
Android is the most widely used mobile OS globally and being a Google product, most Android phones feature Google Chrome as its default browser. If you are facing the ‘server DNS could not be found’ or ‘server IP could not be found’ issue on the Google Chrome browser on your phone, then here is a trick to fix DNS_PROBE_FINISHED_NXDOMAIN in Android.
Step 1: Clear browser history and cache on Google Chrome
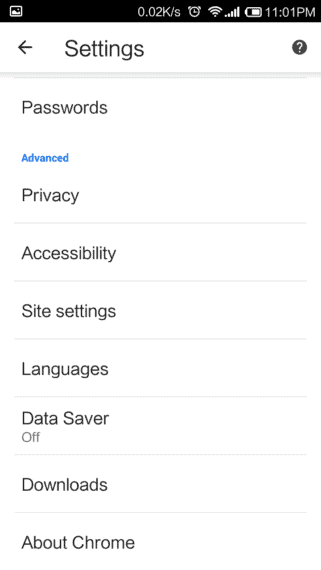
Open Google Chrome on your Android device and tap the three dots or parallel lines on the top right corner.

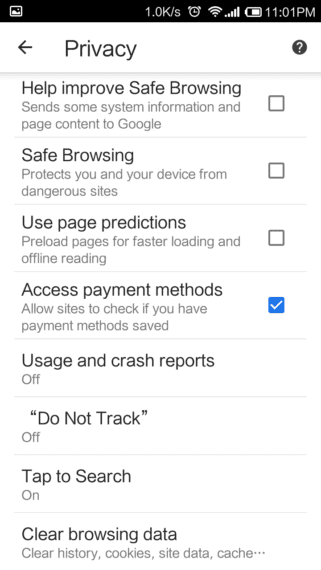
Tap on Settings and Go to Privacy section.

Select “Clear browsing data” in Privacy section.
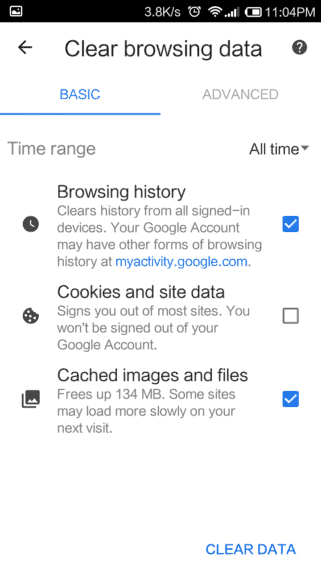
You can choose the time intervals or remove history and cache of all time as per your preference. All of the clearing browser cache and history is recommended for this fix unless you know the exact time when the error started to show.
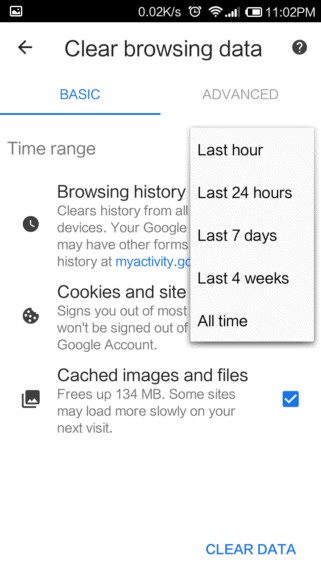
Tick the Browsing history and Cached images and files in the “Clear browsing data” section and tap Clear Data button at the bottom.
Step 2: Uninstall Google Chrome
Next, close the Chrome browser and go to Settings > Manage Apps on your Android Phone.
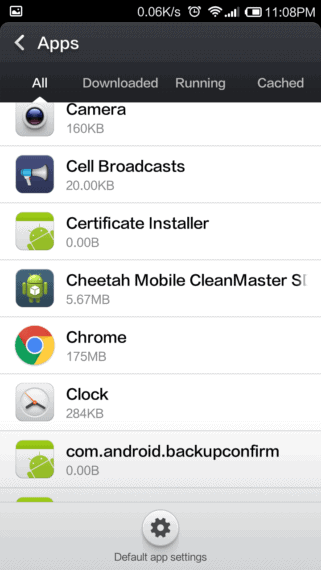
Find Google Chrome and open it. On the App info page, select ‘Clear Data‘ and ‘Clear Cache‘.
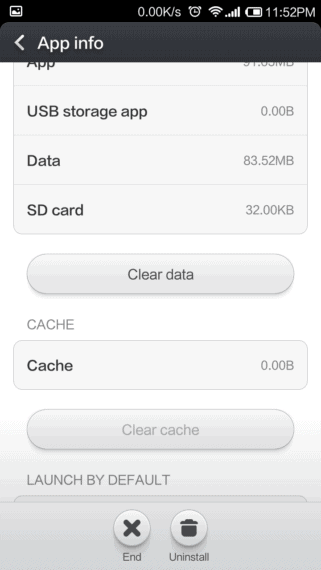
Now, uninstall the Chrome app by pressing the Uninstall or Trash bin icon at the bottom.
Step 3: Reinstall Google Chrome
Open Google Play Store and search for Google Chrome or open this link.
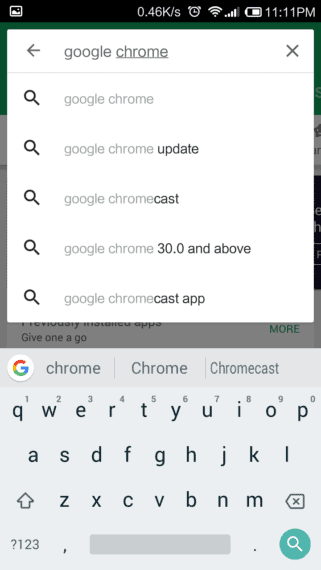
Click on “Install” button and set up the Google Chrome browser again. That’s it. These simple steps can fix DNS_PROBE_FINISHED_NXDOMAIN in Android easily.
You should always confirm if the error is across all other browsers on the PC or Mac as well. If it is just with Chrome, then it must be a Chrome-specific error and the best option is either check for updates or entirely remove Google Chrome from your PC or Mac and reinstall the latest Google Chrome version and try again.
Hi There, I was searching for a solution for this same issue. Thank you very much for your suggestions. I found that resetting Winsock resolved the issue for me. Makes sense. Winsock manages input and output requests for Internet applications on Windows. Therefore, resetting it helped me to get rid of DNS_PROBE_FINISHED_NXDOMAIN