Are you experiencing thin or blurry text or font issues in macOS Mojave? If you do, then it is basically because of the effected changes in anti-aliasing in Mojave to aid the users with non-retina displays. Many Mac users with a non-retina display or an external monitor have reported fuzzy, blurry, or difficult to read fonts after they upgraded to macOS Mojave. Well, with some adjustments in font smoothening settings in Mojave, you can easily solve blurry font in macOS Mojave.
After updating to Mojave, we immediately noticed this issue on our external monitor while using Google Chrome. Without making any delay, we reported the problem on Google Chrome Help Forum, and interestingly we are not alone. Many users reported the same issue but it is not limited to Chrome but for the entire OS. We dig deeper and found easy solutions to fix blurry text in the Mojave update.
Simply follow the methods below to adjust font smoothening settings in macOS in order to sharpen the fonts and get rid of the thin text in Mojave. The tutorial may also work for users running macOS Mojave via Virtual Box on Windows.
macOS allows different methods to make changes or customize elements such as font smoothening to sharpen or solve blurry font in macOS Mojave. You can also try different methods to boost the performance of your Mac by trying out a few tricks as well. However, in this article, we will discuss how to remove fuzzy text in macOS Mojave.
Try out the following methods on your non-retina display and let us know in the comments which of these font smoothening methods worked for you in fixing fuzzy text in macOS Mojave.
3 Methods to Solve Blurry Font in macOS Mojave
There are three ways to solve blurry font in macOS Mojave. Using these methods, you can easily adjust font smoothening and anti-aliasing settings in macOS Mojave to fix thin and fuzzy text of your MacBook Pro or MacBook Air.
While the first method is a simple setting change using the preference panel, the other two methods are a bit more advanced and require you to use the Mac terminal.
You can either use all these methods or execute each individually to witness the change differently. Remember, the effected changes will differ from display to display as well as your individual preference and eyesight.
Method 1: Enabling Font Smoothing in MacOS Mojave
In this method, we will directly tune into the settings panel to smoothen fuzzy text in macOS Mojave by enabling font smoothening in macOS Mojave.
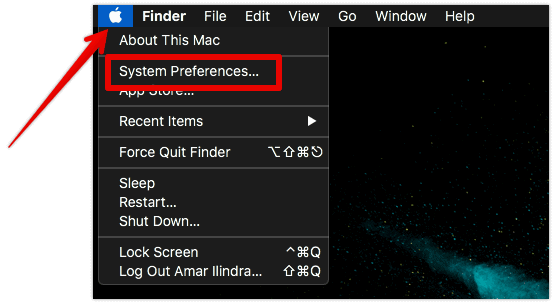
To do this, click the Apple icon on the top left corner and select System Preferences.
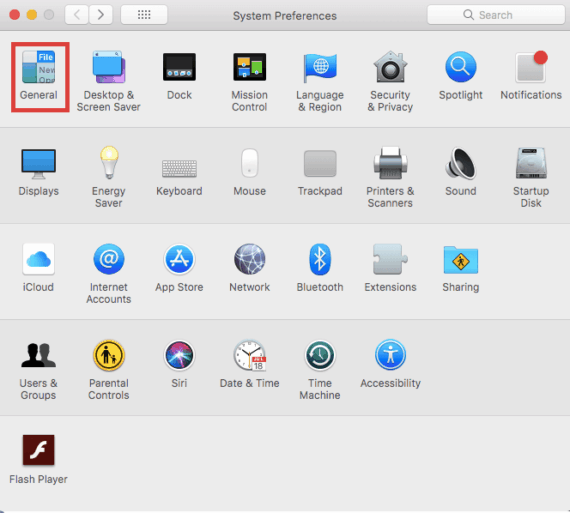
Go to General settings by clicking the General icon on System Preferences window.
At the bottom of the General settings page, you will find the option for “Use font smoothening when available”. Enable the option if it is disabled. You can do that by clicking once on the checkbox on the left side of the option.
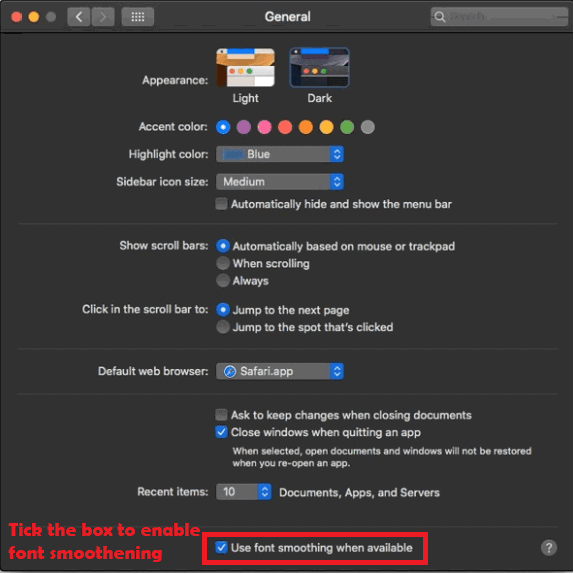
Switch to the second method, if the font smoothening option is already enabled. You can test the font smoothening settings by simply toggling on and off. If you can see the difference, then this simple method is enough to solve the thin text in Mojave.
There’s no need to dig further deep into this tutorial if this method does the trick for you. However, you can try some more tweaks to further adjust fuzzy text in macOS Mojave.
Method 2: Enable Font Smoothing in macOS Mojave by Terminal
If the above method doesn’t work as expected, then you can try enabling font smoothening and solve blurry font in macOS Mojave using the Mac Terminal.
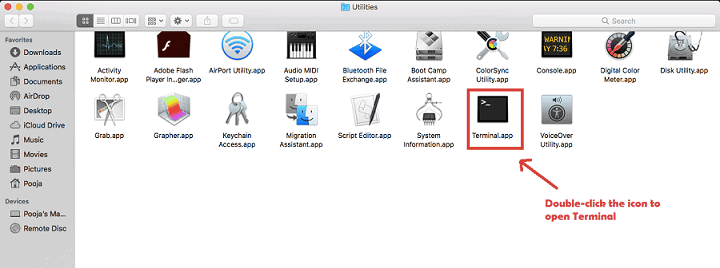
You can open the Mac Terminal by navigating to Go > Utilities.
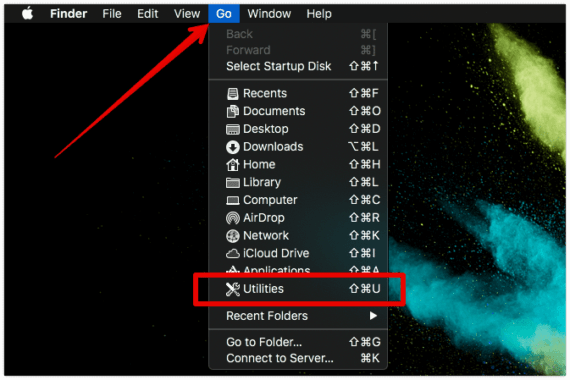
Find the “Terminal” application in the “Utilities” section and click it to open the terminal.
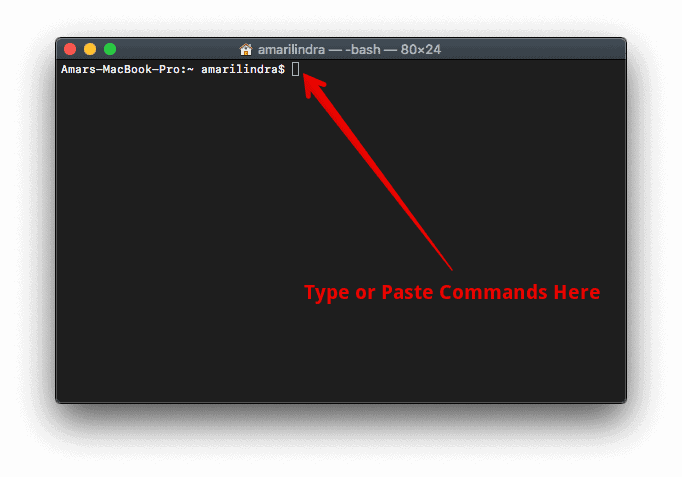
Type the below command exactly and hit return to adjust fuzzy text in macOS Mojave.
defaults write -g CGFontRenderingFontSmoothingDisabled -bool NO
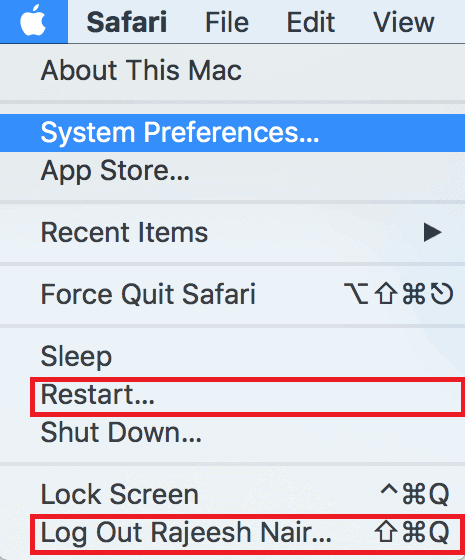
Now, reboot your MacBook to apply the smoothening settings.
You can find subtle changes on your Mac as the fonts now seem thicker and bolder after the changes.
For many Mac users, this method will be enough to enable font smoothening and getting rid of the blurry text in Mojave. However, many others aren’t completely satisfied. They can go one step further to manually adjust anti-aliasing settings in MacOS.
Method 3: Adjust Mac Font Smoothing Settings via Defaults
In this method, we dig a bit deeper to change the default strength of font smoothening settings (anti-aliasing) in MacOS by changing default settings.
Open the Mac Terminal by navigating to Go > Utilities.
Click the Terminal icon to activate the Terminal application.
Enter the following commands based on your preferences.
Strong font smoothing defaults command:
defaults -currentHost write -globalDomain AppleFontSmoothing -int 3
Medium font smoothing defaults command:
defaults -currentHost write -globalDomain AppleFontSmoothing -int 2
Light font smoothing defaults command:
defaults -currentHost write -globalDomain AppleFontSmoothing -int 1
You can try executing all three commands to notice the difference. However, only the last executed command will be applied to System settings.
Once you run the command, make sure to log out and log in or reboot the Mac to see the applied changes.
The changes in font smoothening heavily depend on the display you’re using. Individual preference and eyesight also come to play while assessing the quality of results after adjusting font smoothening settings in macOS Mojave. If you’re not using a Retina display, the quality will not be the same even after changing the font smoothening settings in Mojave
Simply follow each of the above methods individually and identify the method that works best for you.
Remove all adjustments to font smoothing in Mac OS and return to default settings
If you messed with the font settings, you can anytime revert the changes and switch to default settings. Use these commands to reset font settings to default in macOS Mojave.
To remove any custom font smoothening settings, run the following command syntax:
defaults -currentHost delete -globalDomain AppleFontSmoothing
To revert the changes and switch to defaults for font smoothening in macOS Mojave, run the following command syntax:
defaults write -g CGFontRenderingFontSmoothingDisabled -bool YES
Don’t forget to Reboot your Mac to apply the changes.
Conclusion for macOS Mojave Blurry Text Problem
Thin, blurry, and fuzzy text in Mojave is common only on non-retina displays and external monitors. Altering the font smoothening settings using the above methods may work on your Mac but it solely depends on the MacBook display or external monitor, your individual preference, and eyesight to witness the changes. The apparent change in how macOS Mojave executes font rendering and anti-aliasing justifies the need for font smoothening settings to solve blurry font in macOS Mojave on certain displays.
Since this tweak involves personal taste and other factors, you need to try all three solutions. Choose the best font settings for your MacBook running on Mojave after trying them. In case if you feel default fonts look better, you can choose to revert changes and reset to defaults anytime.


Thank you so much for this article!!! Beyond helpful!
This was the bane of my existence, had eventually figured it out from a bunch of forums, but this is the clearest and most accessible explanation I’ve seen yet. Thank you! Thank you! Thank you!
One thing I’d add: on my Dell monitor SE2719HR, the main problem was that the sharpness in the default settings was 50. When I turned it down to zero, fonts look wayyyyyy better!